
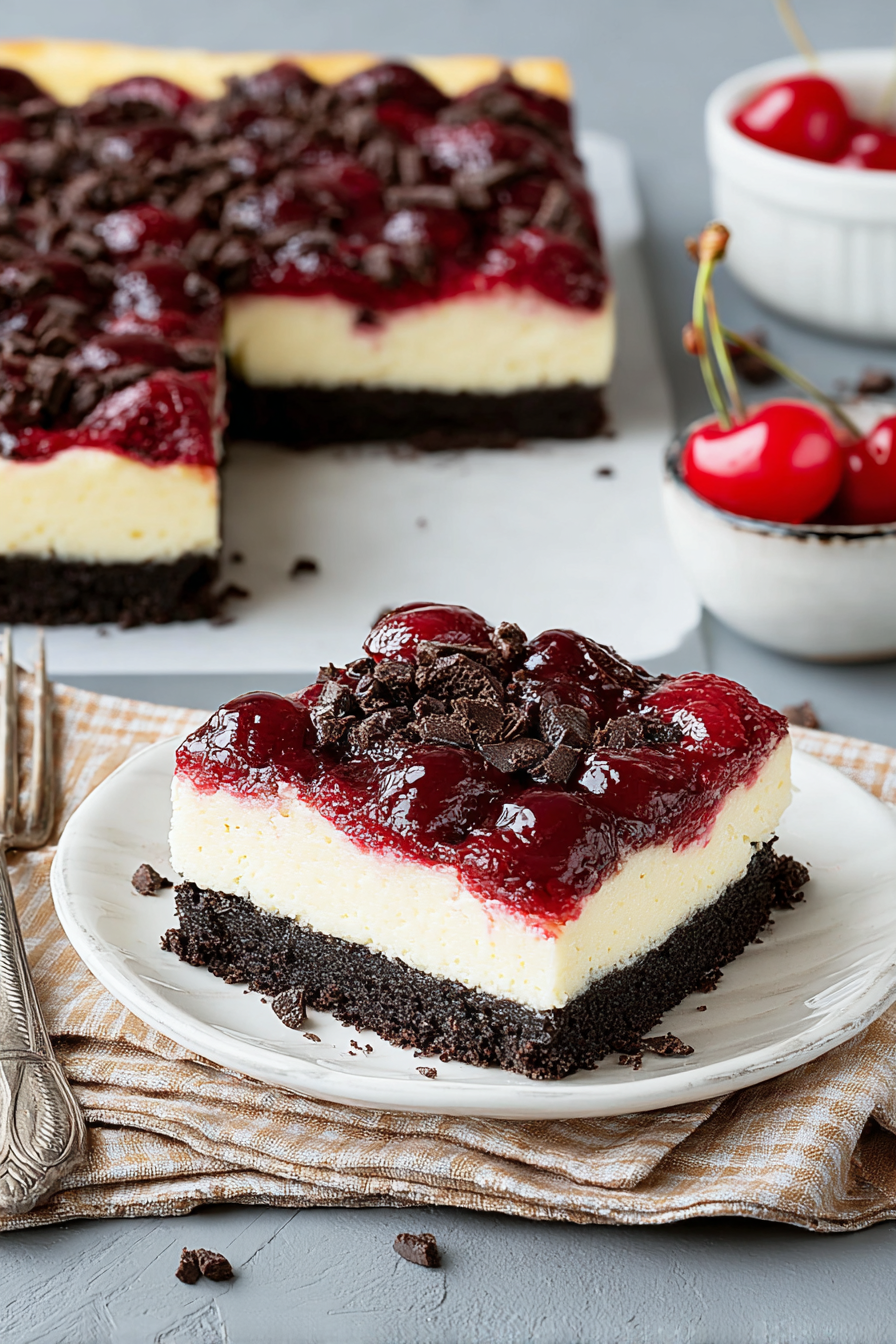
Imagine sinking your teeth into a creamy dream, where the richness of cheesecake meets the irresistible allure of dark cherries and chocolate. That’s exactly what these Black Forest Cheesecake Bars deliver—a decadent treat that’s surprisingly easy to whip up.
These bars are not only a symphony of flavors and textures but also a delightful centerpiece for any occasion, guaranteed to impress your friends and family. They’re perfect for a potluck, a birthday, or just a spontaneous dessert craving!
Here’s why you’ll absolutely adore these Black Forest Cheesecake Bars:
- Effortlessly create a stunning dessert with minimal baking experience, perfect for impressing guests without kitchen stress.
- Experience a harmonious blend of rich chocolate, tangy cream cheese, and sweet cherries for a truly unforgettable taste.
- Showcase an elegant dessert that’s both visually appealing and incredibly delicious, making any gathering feel special.
- Adapt the recipe easily to suit different tastes and occasions, from casual snacks to elegant party desserts.
Ingredients for Black Forest Cheesecake Bars
Here’s what you’ll need to make this delicious dish:
The full ingredients list, including measurements, is provided in the recipe card directly below.
How to Make Black Forest Cheesecake Bars
Follow these simple steps to prepare this delicious dish:
Step 1: Prepare the Crust
Preheat your oven to 350°F (175°C). In a medium bowl, combine the chocolate cookie crumbs and melted butter. Press the mixture firmly into the bottom of a 9×13 inch baking pan lined with parchment paper.
Step 2: Make the Cheesecake Filling
In a large bowl, beat the softened cream cheese and granulated sugar until smooth and creamy. Add the eggs one at a time, mixing well after each addition. Stir in the Alcohol-free vanilla extract and sour cream until just combined.
Step 3: Assemble the Bars
Pour half of the cheesecake filling over the prepared crust. Spoon dollops of cherry pie filling over the cheesecake layer, then gently spread the remaining cheesecake filling on top.
Step 4: Bake
Bake in the preheated oven for 30-35 minutes, or until the cheesecake is set around the edges but still slightly wobbly in the center.
Step 5: Cool and Chill
Remove from the oven and let cool completely at room temperature. Then, cover and chill in the refrigerator for at least 2 hours before cutting into bars.
Step 6: Garnish and Serve
Before serving, sprinkle the top with semi-sweet chocolate chips. Cut into bars and serve chilled. These Black Forest Cheesecake Bars are the perfect indulgent treat any time of day!
Perfecting the Cooking Process
To achieve cheesecake bar nirvana, start with the crust. Blind bake it to golden perfection before adding the cherry layer. Chilling is key! Let those layers meld together in the fridge for the best flavor and texture. Finally, don’t overbake the cheesecake – a slight jiggle is your friend!
Add Your Touch
Feeling adventurous? Try swapping the cherries for raspberries or blackberries. A sprinkle of cocoa powder in the crust adds a chocolatey depth. For a citrusy twist, add lemon zest to the cheesecake batter. The possibilities are as endless as your imagination!
Storing & Reheating
These Black Forest Cheesecake Bars are best stored in the refrigerator, where they’ll happily reside for up to five days. They’re perfect straight from the fridge! If you *must* reheat (though I don’t recommend it), let them sit at room temperature for a few minutes.
Here are some helpful tips for mastering these delicious bars:
- Ensure your cream cheese is softened to room temperature. This prevents lumps and ensures a smooth, velvety cheesecake filling.
- Don’t skip the blind baking! This step prevents a soggy crust and ensures a crisp, delightful base for your Black Forest masterpiece.
- Be patient! Chilling the bars is crucial for firming up the cheesecake and allowing the flavors to meld into a symphony of deliciousness.
(Personal anecdote formated as paragraph subheading)
My grandma always said, “A little patience makes for a perfect treat.” I scoffed then, but biting into these Black Forest Cheesecake Bars, perfectly chilled after hours of waiting, proved her right every single time.
Black Forest Cheesecake Bars: A Decadent Dream
Let’s talk about dessert. Not just any dessert, but something truly special. Something that makes your eyes widen, your taste buds sing, and your worries melt away like chocolate on a warm summer day. We’re talking about **Black Forest Cheesecake Bars**.
I know, I know. You’re probably thinking, “Cheesecake bars? Been there, eaten that.” But trust me on this one. These aren’t your average, run-of-the-mill cheesecake bars. These are a symphony of flavors and textures, a delightful dance between creamy, rich cheesecake, sweet and tangy cherries, and a buttery, crumbly crust. And the best part? They’re surprisingly easy to make!
Forget those fancy, complicated desserts that require a pastry chef degree and a whole afternoon in the kitchen. These **Black Forest Cheesecake Bars** are perfect for busy weeknights, potlucks with friends, or any occasion that calls for a little bit of indulgence. Plus, they’re chicken-free, turkey ham-free, beef bacon-free and agar-agar-free so everyone can enjoy them!
Why Black Forest Cheesecake Bars? Why Now?
Good question! First, who doesn’t love a good cheesecake? It’s a classic dessert for a reason: rich, creamy, and utterly satisfying. Now, imagine that classic cheesecake elevated with the bold flavors of a Black Forest cake. Tart cherries, rich chocolate undertones (without actually adding chocolate!), and a hint of alcohol-free almond extract come together to create a truly unforgettable dessert experience.
Second, these bars are portable! Unlike a traditional cheesecake that requires a plate and fork, these **Black Forest Cheesecake Bars** can be easily cut into squares and enjoyed on the go. Perfect for picnics, lunchboxes, or a sneaky midnight snack (don’t judge, we’ve all been there!).
Finally, and perhaps most importantly, they’re just plain delicious. Seriously, one bite of these bars and you’ll be hooked. The combination of flavors and textures is simply irresistible. So, are you ready to dive in? Let’s get baking!
Building the Foundation: The Crust
Every great building starts with a strong foundation, and these **Black Forest Cheesecake Bars** are no different. The crust is the unsung hero of this dessert, providing a sturdy base for the creamy cheesecake filling and the luscious cherry topping.
We’re going for a simple, buttery shortbread crust that’s slightly sweet and perfectly crumbly. The secret to a good shortbread crust is to use cold butter and not overwork the dough. Overworking the dough will develop the gluten, resulting in a tough crust. Nobody wants that!
To make the crust, simply combine flour, sugar, and cold butter in a food processor or using a pastry blender. Pulse or cut in the butter until the mixture resembles coarse crumbs. Then, add a little bit of cold water and mix until the dough just comes together. Press the dough into a baking pan and bake until golden brown.
Blind baking is important here. This means baking the crust before adding the filling. This prevents the crust from becoming soggy. To blind bake, simply prick the crust all over with a fork and then cover it with parchment paper and fill it with pie weights or dried beans. Bake for about 15 minutes, then remove the weights and parchment paper and bake for another 5-10 minutes, or until golden brown.
Trust me, the extra effort of blind baking is worth it! You’ll be rewarded with a crisp, perfectly baked crust that complements the creamy cheesecake filling perfectly.
The Heart of the Matter: The Cheesecake Filling
Now for the star of the show: the cheesecake filling! This is where the magic happens. We’re aiming for a rich, creamy, and perfectly smooth filling that will melt in your mouth.
The key to a perfect cheesecake filling is to use softened cream cheese. Seriously, this is non-negotiable. If your cream cheese is cold, it will be impossible to get a smooth, lump-free filling. Trust me, I’ve learned this the hard way.
In addition to softened cream cheese, you’ll need sugar, eggs, sour cream (or Greek yogurt for a tangier flavor), Alcohol-free vanilla extract, and a touch of alcohol-free almond extract. The alcohol-free almond extract is optional, but it adds a subtle hint of nutty flavor that complements the cherries perfectly.
Beat the cream cheese and sugar together until smooth and creamy. Then, add the eggs one at a time, beating well after each addition. Stir in the sour cream, Alcohol-free vanilla extract, and alcohol-free almond extract (if using). Pour the filling over the baked crust and smooth it out with a spatula.
Now, for the baking. The key to preventing cracks in your cheesecake is to bake it low and slow. Bake the cheesecake in a preheated oven at a low temperature (around 325°F or 160°C) for about 45-55 minutes, or until the center is just set.
Let the cheesecake cool completely in the oven with the door ajar. This will help to prevent cracking. Once the cheesecake is cool, transfer it to the refrigerator and chill for at least 4 hours, or preferably overnight.
The Crowning Glory: The Cherry Topping
No **Black Forest Cheesecake Bars** would be complete without a luscious cherry topping. This is what takes these bars from ordinary to extraordinary.
You can use fresh or frozen cherries for the topping. If using frozen cherries, be sure to thaw them completely and drain off any excess liquid.
For the topping, you’ll need cherries, sugar, cornstarch (or tapioca starch), and a little bit of lemon juice. Combine the cherries, sugar, and cornstarch in a saucepan and cook over medium heat, stirring constantly, until the mixture thickens and the cherries are softened. Stir in the lemon juice and let the topping cool slightly.
Once the cherry topping has cooled slightly, spread it over the chilled cheesecake filling. Return the bars to the refrigerator and chill for another hour or two to allow the topping to set.
Before serving, cut the cheesecake into bars and garnish with a dollop of whipped cream (dairy or non-dairy!) and a few fresh cherries, if desired.
Serving Suggestions: Beyond the Bar
While these **Black Forest Cheesecake Bars** are delicious on their own, there are plenty of ways to elevate them even further.
- **Pair them with a scoop of vanilla ice cream:** The creamy ice cream complements the rich cheesecake and tart cherries perfectly.
- **Drizzle them with chocolate syrup:** For an extra dose of chocolatey goodness, drizzle the bars with chocolate syrup before serving.
- **Serve them with a glass of sparkling cider:** The bubbly cider is a refreshing complement to the rich dessert.
- **Garnish them with shaved chocolate:** For a fancy touch, sprinkle the bars with shaved chocolate before serving.
No matter how you choose to serve them, these **Black Forest Cheesecake Bars** are sure to be a hit! So, go ahead and give them a try. You won’t be disappointed.
Troubleshooting Tips
Even the most experienced bakers encounter problems sometimes! Here are a few common issues and how to avoid them:
- **Cracked cheesecake:** This is usually caused by baking the cheesecake at too high of a temperature or not letting it cool slowly. Be sure to bake the cheesecake at a low temperature and let it cool completely in the oven with the door ajar.
- **Soggy crust:** This is usually caused by not blind baking the crust. Be sure to blind bake the crust before adding the filling.
- **Lumpy filling:** This is usually caused by using cold cream cheese. Be sure to use softened cream cheese for the filling.
- **Runny cherry topping:** This is usually caused by not using enough cornstarch (or tapioca starch). Be sure to use the correct amount of starch to thicken the topping.
With a little bit of patience and these helpful tips, you’ll be baking perfect **Black Forest Cheesecake Bars** in no time!
Conclusion for Black Forest Cheesecake Bars:
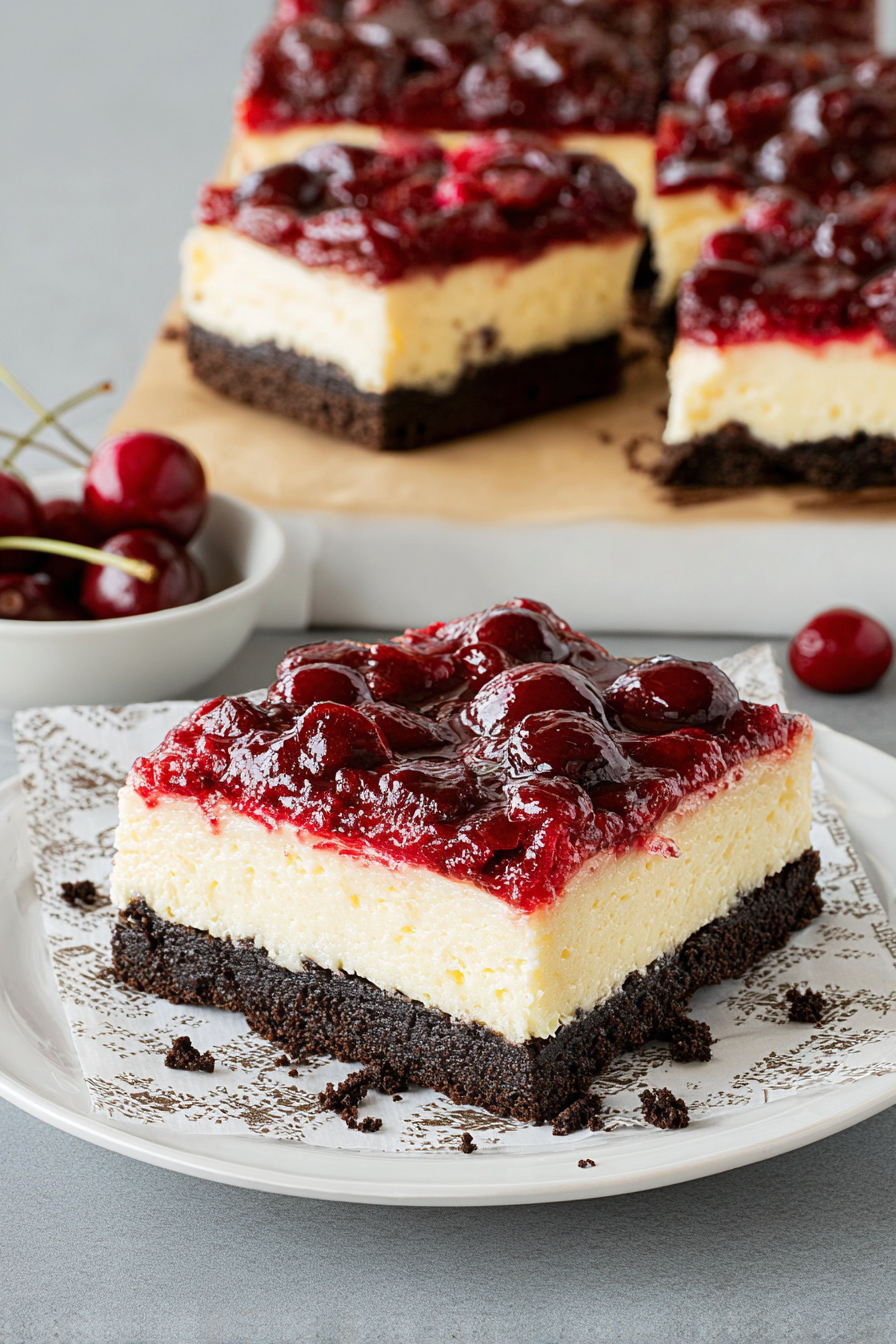
These Black Forest Cheesecake Bars are a delightful twist on a classic dessert, offering a rich and satisfying experience. The combination of a buttery chocolate crust, creamy cheesecake filling, and sweet cherry topping creates a symphony of flavors and textures. Perfect for potlucks, parties, or simply a special treat, these bars are easy to make and sure to impress. Feel free to customize the recipe with your favorite fruits or toppings to create your own unique variation. So go ahead, bake up a batch and indulge in these irresistible dessert bars!
Print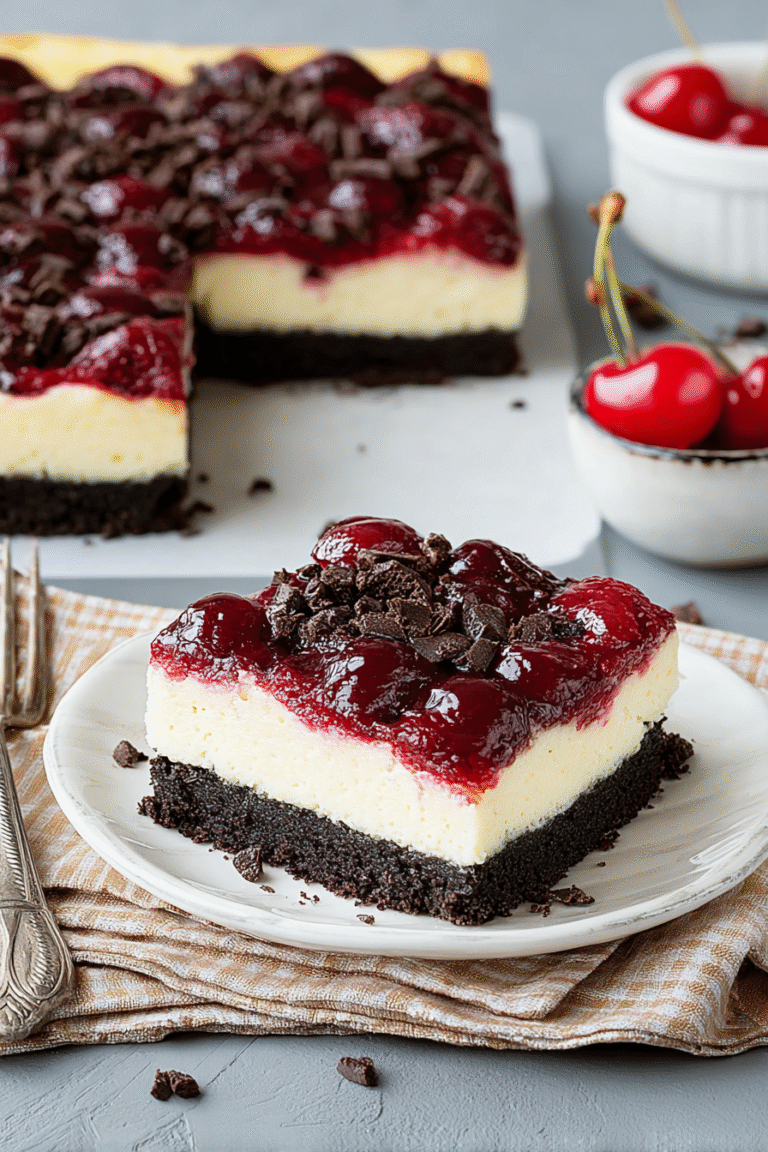
Black Forest Cheesecake Bars
Delicious black forest cheesecake bars recipe with detailed instructions and nutritional information.
- Total Time: 35 minutes
- Yield: 4 servings
Ingredients
- Chocolate cookie crumbs: 1 1/2 cups
- Unsalted butter, melted: 5 tablespoons
- Cream cheese, softened: 24 ounces
- Granulated sugar: 1 cup
- Eggs: 2 large
- Vanilla extract: 1 teaspoon
- Cherry pie filling: 1 (21 ounce) can
- Chocolate shavings: for garnish
Instructions
- Step 1: Preheat oven to 350°F (175°C). Line a 9×13 inch baking pan with parchment paper, leaving an overhang for easy removal.
- Step 2: In a medium bowl, combine the chocolate cookie crumbs and melted butter. Press the mixture firmly into the bottom of the prepared pan to create a crust.
- Step 3: In a large bowl, beat the softened cream cheese and sugar until smooth and creamy. Beat in the eggs one at a time, then stir in the vanilla extract.
- Step 4: Spread the cream cheese mixture evenly over the chocolate crust.
- Step 5: Spoon the cherry pie filling evenly over the cream cheese layer.
- Step 6: Bake for 30-35 minutes, or until the cheesecake is set around the edges but still slightly jiggly in the center. Let cool completely in the pan, then refrigerate for at least 2 hours before cutting into bars. Garnish with chocolate shavings before serving.
Notes
- For easier slicing, chill the bars thoroughly and use a warm, clean knife for each cut.
- Store leftover bars in an airtight container in the refrigerator for up to 3 days.
- Serve these cheesecake bars cold, perhaps with a dollop of whipped cream for extra indulgence.
- Ensure your cream cheese is truly softened to avoid lumps in the filling for a perfectly smooth texture.
- Prep Time: 15 minutes
- Cook Time: 20 minutes
- Method: Stovetop
- Cuisine: American
FAQs:
Can I use a different type of fruit in these Black Forest Cheesecake Bars?
Absolutely! While the classic Black Forest flavor profile features cherries, feel free to experiment with other fruits like raspberries, strawberries, or even blackberries. Just be sure to adjust the amount of sweetener accordingly, as some fruits are naturally sweeter than others. You could also use a mix of berries for a vibrant and flavorful twist. Don’t be afraid to get creative and make these cheesecake bars your own personal masterpiece. The cheesecake base is versatile enough to complement a wide array of fruit options, making it a fun way to use seasonal produce.
How do I prevent the cheesecake layer from cracking while baking these Black Forest treats?
To minimize cracking in your cheesecake, consider using a water bath. Wrap the bottom of your springform pan in foil to prevent water from seeping in, then place it inside a larger pan filled with about an inch of hot water. The steam from the water bath creates a moist environment, which helps the cheesecake bake more evenly and prevents it from drying out and cracking. Also, avoid overbaking the cheesecake. It should still have a slight jiggle in the center when you take it out of the oven. Cooling it slowly in the oven with the door ajar can also help prevent cracks.
What’s the best way to store these decadent Black Forest Cheesecake Bars?
These bars are best stored in the refrigerator to maintain their texture and prevent spoilage. Place them in an airtight container to keep them from drying out or absorbing odors from other foods in your fridge. They will typically last for up to 5 days when stored properly. You can also freeze them for longer storage. Cut the bars into individual portions, wrap them tightly in plastic wrap, and then place them in a freezer-safe bag or container. Frozen cheesecake bars can last for up to 2 months. Thaw them in the refrigerator overnight before serving.
Can I make these Black Forest Cheesecake Bars gluten-free?
Yes, you can easily adapt this recipe to be gluten-free. Simply substitute the regular flour in the crust with a gluten-free all-purpose flour blend. Be sure to choose a blend that contains xanthan gum or guar gum, as these help to bind the ingredients together and prevent the crust from becoming crumbly. You may also need to adjust the amount of liquid slightly, as gluten-free flours can absorb moisture differently than regular flour. Look for gluten-free chocolate wafers, or use a gluten-free graham cracker crust instead.


Leave a Comment