
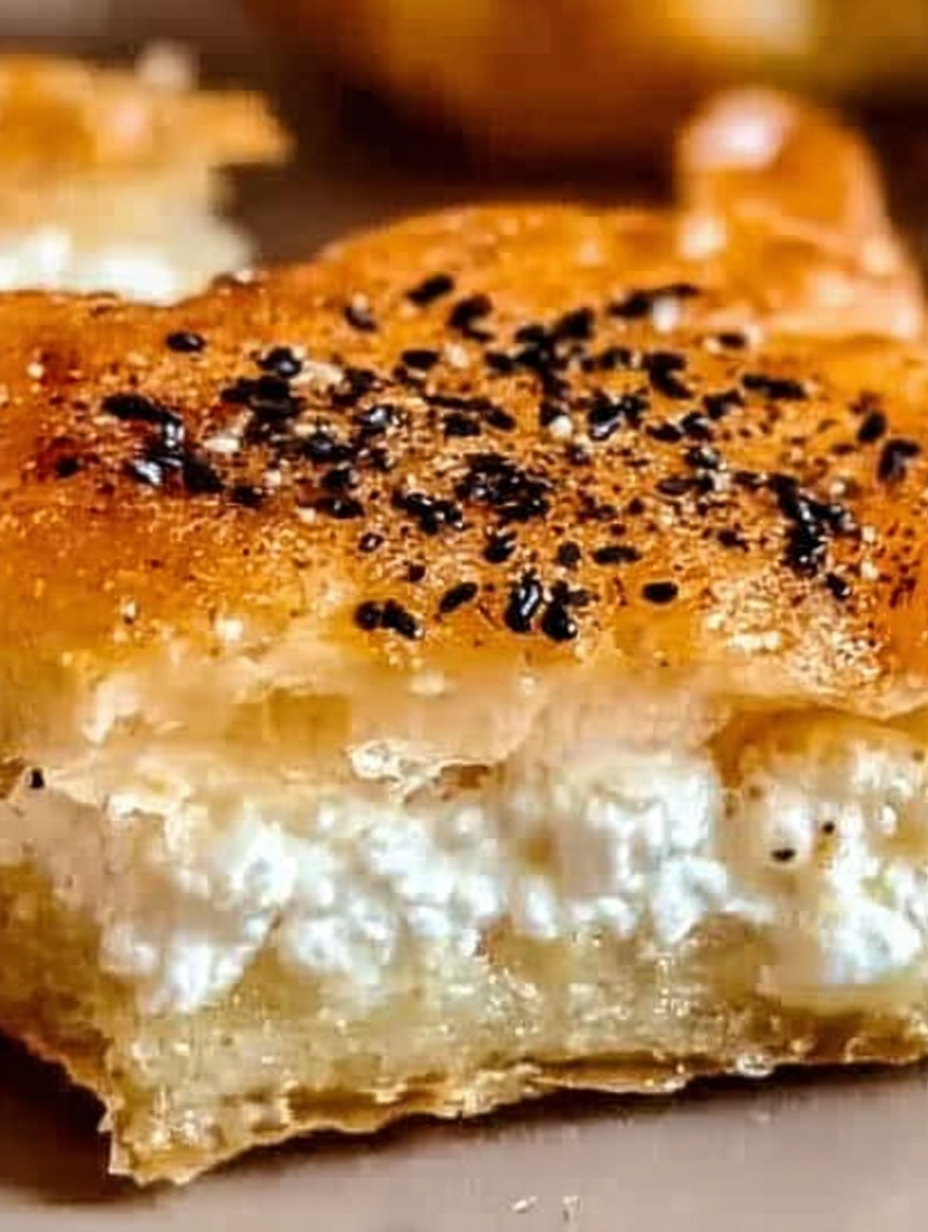
Imagine sinking your teeth into layers of crispy, golden-brown phyllo pastry, giving way to a warm, creamy, and oh-so-satisfying cheese filling. That’s Tiropita – Greek Cheese Pie, a culinary hug in a flaky, cheesy package, ready to transport you straight to a sun-drenched taverna.
This isn’t just a recipe; it’s a delicious adventure, a testament to simple ingredients transformed into something extraordinary. Picture yourself creating a masterpiece that’s perfect for brunch, a delightful snack, or even a show-stopping centerpiece at your next gathering. Get ready to unlock the secrets to the ultimate **Tiropita – Greek Cheese Pie: An Incredible Ultimate Recipe** that will have everyone begging for more!
Ready to make some magic? Here’s why this **Tiropita – Greek Cheese Pie: An Incredible Ultimate Recipe** is about to become your new obsession:
- Effortless Elegance: It’s surprisingly easy to make, transforming simple ingredients into a show-stopping culinary masterpiece.
- Flavor Fiesta: The creamy, tangy cheese filling perfectly complements the delicate, crispy layers of golden phyllo pastry.
- Visually Stunning: The beautiful golden-brown color and flaky texture make it a feast for the eyes as well as the taste buds.
- Ultimate Versatility: Perfect for breakfast, brunch, lunch, dinner, or as an irresistible appetizer at any gathering.
Ingredients for Tiropita – Greek Cheese Pie: An Incredible Ultimate Recipe
Here’s what you’ll need to make this delicious dish:
The full ingredients list, including measurements, is provided in the recipe card directly below.
How to Make Tiropita – Greek Cheese Pie: An Incredible Ultimate Recipe
Follow these simple steps to prepare this delicious dish:
Step 1: Prepare the Cheese Filling
In a large bowl, combine the crumbled feta cheese, ricotta cheese, eggs, olive oil, chopped fresh mint, salt, and pepper. Mix well until all ingredients are evenly incorporated. This creamy mixture is the heart of your tiropita.
Step 2: Prepare the Phyllo Pastry
Melt the butter in a small saucepan or in the microwave. On a clean, flat surface, lay out one sheet of phyllo pastry. Brush it lightly with melted butter. Repeat this process with 5-6 sheets of phyllo, layering them on top of each other. This creates a solid, buttery base.
Step 3: Assemble the Tiropita
Place the layered phyllo pastry into a greased baking dish, allowing the edges to overhang. Pour the cheese filling evenly over the phyllo base. Fold the overhanging edges of the phyllo pastry over the filling, creating a sealed package.
Step 4: Top with Phyllo and Bake
Brush another sheet of phyllo pastry with melted butter and place it on top of the filled pie. Repeat with 2-3 more sheets, brushing each with butter. This creates the flaky, golden crust. With a sharp knife, gently score the top layers of phyllo in a diamond or square pattern. This helps to prevent the pastry from puffing up too much.
Step 5: Bake to Golden Perfection
Preheat your oven to 350°F (175°C). Bake the tiropita for 45-55 minutes, or until the phyllo pastry is golden brown and crispy. Keep an eye on it to prevent burning. If the top starts to brown too quickly, you can loosely cover it with foil.
Step 6: Cool and Serve
Remove the tiropita from the oven and let it cool slightly before slicing and serving. This allows the filling to set and the flavors to meld.
Serve warm, garnished with a sprig of fresh mint, for the perfect delightful treat. It’s fantastic on its own or as part of a larger brunch spread. Enjoy!
Tips and Tricks for the Perfect Tiropita – Greek Cheese Pie: An Incredible Ultimate Recipe
Want to take your **Tiropita – Greek Cheese Pie: An Incredible Ultimate Recipe** to the next level? Here are some insider tips and tricks to ensure your culinary creation is a smashing success:
- Don’t Be Afraid of Butter: The butter is what makes the phyllo pastry flaky and golden brown. Don’t skimp!
- Handle Phyllo with Care: Phyllo pastry dries out quickly, so keep it covered with a damp towel while you’re working with it.
- Evenly Distribute the Filling: Ensure the cheese filling is spread evenly over the phyllo base for a balanced bite every time.
- Score the Top: Scoring the top layers of phyllo prevents the pastry from puffing up unevenly and helps to create a visually appealing finish.
- Adjust Baking Time as Needed: Ovens vary, so keep an eye on your tiropita while it’s baking and adjust the time as needed to achieve that perfect golden-brown color.
- Let it Rest: Allowing the tiropita to cool slightly before slicing helps the filling to set and makes it easier to serve.
Variations on the Classic Tiropita – Greek Cheese Pie: An Incredible Ultimate Recipe
While the classic **Tiropita – Greek Cheese Pie: An Incredible Ultimate Recipe** is a masterpiece in itself, there’s always room to get creative in the kitchen! Here are some delicious variations to try:
- Spinach and Cheese: Add sautéed spinach to the cheese filling for a flavorful twist. This is a classic combination that’s both nutritious and delicious.
- Herb Infusion: Experiment with different herbs such as dill, parsley, or oregano to customize the flavor profile of your tiropita.
- Spicy Kick: Add a pinch of red pepper flakes or a dash of hot sauce to the cheese filling for a little heat.
- Sweet Tiropita: For a dessert version, use a sweeter cheese like mascarpone or cream cheese, and add a touch of honey or sugar to the filling.
- Vegetable Medley: Incorporate finely chopped vegetables like zucchini, bell peppers, or onions for added texture and flavor.
Serving Suggestions for Tiropita – Greek Cheese Pie: An Incredible Ultimate Recipe
The versatility of **Tiropita – Greek Cheese Pie: An Incredible Ultimate Recipe** makes it perfect for any occasion. Here are some serving suggestions to inspire you:
- Brunch Superstar: Serve warm with a side of fresh fruit and a dollop of Greek yogurt for a delightful brunch spread.
- Appetizer Sensation: Cut into small squares and serve as an appetizer at your next party or gathering.
- Lunchbox Treat: Pack a slice of tiropita in your lunchbox for a satisfying and flavorful midday meal.
- Dinner Delight: Serve alongside a Greek salad and grilled chicken or lamb for a complete and satisfying dinner.
- Snack Attack: Enjoy a slice of tiropita as a delicious and comforting snack any time of day.
Making Tiropita – Greek Cheese Pie: An Incredible Ultimate Recipe Ahead of Time
Want to get ahead of the game? You can easily prepare your **Tiropita – Greek Cheese Pie: An Incredible Ultimate Recipe** in advance. Here’s how:
- Assemble Ahead: Prepare the tiropita up to the point of baking and store it in the refrigerator for up to 24 hours.
- Baking Time: When ready to bake, simply remove it from the refrigerator and bake as directed. You may need to add a few extra minutes to the baking time if it’s cold.
- Freezing Option: For longer storage, you can freeze the unbaked tiropita. Wrap it tightly in plastic wrap and then in aluminum foil. It can be stored in the freezer for up to 2 months. Thaw it overnight in the refrigerator before baking.
Why This Tiropita – Greek Cheese Pie: An Incredible Ultimate Recipe is a Must-Try
In conclusion, this **Tiropita – Greek Cheese Pie: An Incredible Ultimate Recipe** is more than just a recipe; it’s an experience. It’s about bringing people together, creating memories, and savoring the simple joys of life through delicious food. With its flaky pastry, creamy filling, and endless versatility, this tiropita is sure to become a staple in your kitchen. So go ahead, give it a try, and prepare to be amazed by the incredible flavors and textures of this classic Greek dish. Opa!
Perfecting the Cooking Process

To achieve golden, flaky perfection, preheat your oven thoroughly. Next, assemble the layers with precision, ensuring even distribution of the cheesy filling. Lastly, monitor the baking time closely to prevent burning. This ensures a uniformly cooked and delicious dish.
Add Your Touch
Don’t be afraid to experiment! Add a sprinkle of dried oregano for a more authentic Greek flavor. Or, for a richer flavor, try using a blend of different cheeses like feta and ricotta. A touch of nutmeg can also add warmth.
Storing & Reheating
Store your leftover cheese pie in an airtight container in the refrigerator for up to three days. To reheat, bake in a preheated oven at 350°F (175°C) until warmed through, or microwave in short bursts to avoid a soggy crust.
Chef’s Tips for Tiropita Triumph!
- For extra flaky layers, keep your phyllo dough cool while working with it and brush each sheet lightly with melted butter or olive oil.
- Avoid a soggy bottom by baking the cheese pie on the lower rack of your oven and ensuring the filling isn’t too wet.
- Let the tiropita cool slightly before slicing and serving; this allows the filling to set and prevents it from oozing out.
(Personal anecdote formated as paragraph subheading)
I remember the first time I made this for my family. My picky eater cousin devoured three slices and then asked for the recipe! That’s when I knew I had a winner.
Embarking on a Greek Culinary Adventure
: The Tiropita Saga
Ah, tiropita! Just the word itself conjures images of sun-drenched tavernas, the salty tang of the Aegean breeze, and the satisfying crunch of perfectly golden phyllo. But let’s be honest, attempting to recreate that magic in your own kitchen can feel more like navigating a labyrinth guarded by a particularly grumpy Minotaur. Fear not, fellow food adventurers! This isn’t just a recipe; it’s a quest – a delicious quest for the ultimate Tiropita – Greek Cheese Pie: An Incredible Ultimate Recipe.
We’re not talking about some sad, pale imitation of tiropita here. We’re talking about the real deal, the kind that makes your taste buds sing and transports you straight to a bustling Greek marketplace. And yes, while it may seem intimidating at first, I promise that with a little patience, a dash of humor, and this guide, you’ll be whipping up tiropita like a seasoned yiayia in no time. Forget those frozen supermarket versions – we’re diving headfirst into homemade goodness!
A Cheesy Confession
: Why This Recipe Rocks
Let’s face it, there are approximately 7,483 tiropita recipes floating around the internet. So, what makes this one so special? Well, besides the fact that it’s written with a healthy dose of sarcasm and a genuine love for all things cheesy, this recipe focuses on simplicity without sacrificing flavor.
We’re not using any fancy, hard-to-find ingredients. We’re sticking to the basics: good quality phyllo dough, creamy feta cheese, eggs, and a few secret weapons to elevate the flavor to Olympian heights. This recipe isn’t about showing off your culinary prowess; it’s about creating a comforting, crowd-pleasing dish that everyone will love. It is a truly incredible ultimate recipe.
The Phyllo Fiasco
: Taming the Beast
Ah, phyllo dough. The bane of many a home cook’s existence. It’s delicate, it’s prone to tearing, and it seems to have a personal vendetta against anyone trying to fold it neatly. But don’t let it intimidate you! With a few simple tricks, you can conquer the phyllo beast and emerge victorious.
First things first: thaw your phyllo dough properly. Take it out of the freezer the night before and let it thaw in the refrigerator. Resist the urge to speed up the process by leaving it on the counter – that’s a recipe for sticky, unusable dough.
Next, keep the phyllo dough covered with a damp (not soaking wet!) towel while you’re working with it. This will prevent it from drying out and cracking. And finally, don’t stress if it tears a little bit. Just patch it up with another piece of phyllo – nobody will ever know the difference. Remember, tiropita is supposed to be rustic and charming, not surgically perfect!
The Cheese Filling
: A Symphony of Flavor
Now for the heart and soul of our tiropita: the cheese filling. This is where you can really let your creativity shine! While feta cheese is the star of the show, don’t be afraid to experiment with other cheeses. Ricotta cheese adds a creamy richness, while a sprinkle of Parmesan cheese provides a salty, savory note.
For this recipe, we will stick with mainly feta and ricotta to get the authentic taste.
Ingredients for the Incredible Ultimate Recipe
Here’s what you’ll need to create this cheesy masterpiece:
- 1 package (1 pound) phyllo dough, thawed
- 1 pound feta cheese, crumbled
- 1 cup ricotta cheese
- 4 large eggs, lightly beaten
- 1/2 cup olive oil, plus extra for brushing
- 1/4 cup chopped fresh dill
- Pinch of nutmeg
- Salt and pepper to taste
Step-by-Step
: Creating Tiropita Magic
Ready to get cooking? Here’s the step-by-step guide to creating the tiropita of your dreams:
1. Preheat your oven to 375°F (190°C). Grease a 9×13 inch baking dish with olive oil.
2. In a large bowl, combine the feta cheese, ricotta cheese, eggs, dill, nutmeg, salt, and pepper. Mix well until everything is evenly combined.
3. Unroll the phyllo dough and place it on a clean, dry surface. Cover it with a damp towel to prevent it from drying out.
4. Take one sheet of phyllo dough and brush it lightly with olive oil. Place it in the prepared baking dish.
5. Repeat with another sheet of phyllo dough, placing it on top of the first sheet and brushing it with olive oil.
6. Continue layering the phyllo dough, brushing each sheet with olive oil, until you have used about half of the phyllo dough.
7. Spread the cheese filling evenly over the phyllo dough in the baking dish.
8. Top with the remaining phyllo dough, layering each sheet and brushing it with olive oil, until all the phyllo dough is used.
9. Using a sharp knife, score the top layer of phyllo dough into diamond shapes or squares. This will allow the steam to escape while baking and prevent the tiropita from puffing up too much.
10. Brush the top of the tiropita with olive oil.
11. Bake for 30-40 minutes, or until the phyllo dough is golden brown and crispy and the cheese filling is set.
12. Let the tiropita cool slightly before slicing and serving.
Serving Suggestions
: From Breakfast to Dinner
Tiropita is incredibly versatile and can be enjoyed any time of day. Serve it for breakfast with a side of Greek yogurt and honey, or as a light lunch with a fresh salad. It’s also a fantastic appetizer or side dish for dinner. For a truly authentic Greek experience, pair it with a glass of chilled retsina (a Greek white wine).
Beyond the Basics
: Variations and Additions
Feeling adventurous? Here are a few ideas for taking your tiropita to the next level:
- **Spinach Tiropita:** Add a cup of cooked and squeezed spinach to the cheese filling for a healthy and delicious twist.
- **Herb Infusion:** Experiment with different herbs like mint, parsley, or oregano to add unique flavor dimensions.
- **Spicy Kick:** Add a pinch of red pepper flakes to the cheese filling for a subtle hint of spice.
- **Savory Onion Tiropita:** Add caramelized onions to the cheese filling to add sweetness.
Troubleshooting Tiropita Troubles
Even the most experienced cooks encounter hiccups from time to time. Here are a few common tiropita problems and how to fix them:
- **Soggy Bottom:** Make sure your oven is preheated properly and bake the tiropita on the lower rack of the oven. You can also try placing a baking sheet underneath the baking dish to help absorb any excess moisture.
- **Dry Phyllo Dough:** Keep the phyllo dough covered with a damp towel while you’re working with it and brush each sheet generously with olive oil.
- **Uneven Browning:** Rotate the baking dish halfway through baking to ensure even browning.
Final Thoughts
: Embrace the Imperfection
Remember, cooking is about experimentation and having fun. Don’t be afraid to make mistakes – they’re all part of the learning process. And even if your tiropita doesn’t turn out perfectly, it will still be delicious because it’s made with love. So, gather your ingredients, put on some Greek music, and get ready to embark on a cheesy adventure! Now go forth and create the incredible ultimate recipe!
Conclusion for Tiropita – Greek Cheese Pie: An Incredible Ultimate Recipe :
So there you have it – the ultimate Greek Cheese Pie recipe! It’s a journey of flaky layers, creamy cheese, and pure, unadulterated deliciousness. Remember the key: quality cheese, delicate handling of the phyllo, and a good dose of patience. Whether you’re a seasoned baker or a kitchen newbie, this recipe is guaranteed to impress. Get ready to transport yourself (and your taste buds) to Greece, one cheesy, crispy bite at a time. Kali Orexi!
Print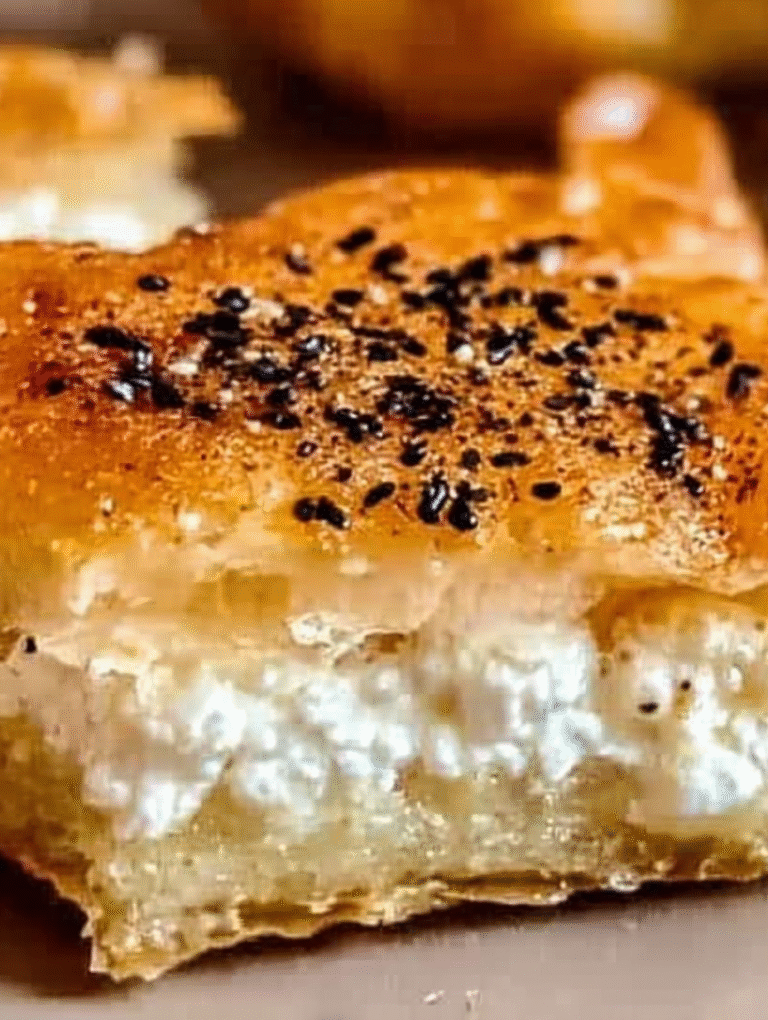
Tiropita – Greek Cheese Pie: An Incredible Ultimate Recipe
Delicious tiropita – greek cheese pie: an incredible ultimate recipe recipe with detailed instructions and nutritional information.
- Total Time: 35 minutes
- Yield: 4 servings
Ingredients
- Phyllo dough sheets: 1 pound
- Feta cheese: 1 pound
- Eggs: 4 large
- Milk: 1 cup
- Butter, melted: 1 cup
- Olive oil: 2 tablespoons
- Anthotyro cheese (or ricotta): 1/2 pound
Instructions
- Step 1: Preheat oven to 350°F (175°C). Lightly grease a 9×13 inch baking dish with olive oil.
- Step 2: In a large bowl, crumble the feta cheese and anthotyro (or ricotta) cheese. Add the eggs and milk. Mix well until combined.
- Step 3: Melt the butter. Lay one sheet of phyllo dough in the prepared baking dish, brushing it with melted butter. Repeat with half of the phyllo sheets, layering and buttering each one.
- Step 4: Pour the cheese mixture evenly over the phyllo layer.
- Step 5: Cover the cheese filling with the remaining phyllo sheets, brushing each with melted butter as you layer them.
- Step 6: With a sharp knife, score the top layers of phyllo into squares or diamonds. Bake for 40-45 minutes, or until golden brown and puffed. Let cool slightly before cutting and serving.
Notes
- Leftover tiropita can be stored in the refrigerator for up to 3 days in an airtight container.
- Reheat individual slices in a toaster oven or regular oven for the best crispy texture.
- Serve warm as a delicious appetizer, light lunch, or even a side dish to your favorite Greek salad.
- For extra flavor, sprinkle a touch of nutmeg over the cheese filling before covering with the top phyllo layers.
- Prep Time: 15 minutes
- Cook Time: 20 minutes
- Method: Stovetop
- Cuisine: American
FAQs :
What is Tiropita and what makes this recipe ultimate?
Tiropita, my friends, is a glorious Greek Cheese Pie, a savory pastry that’s basically a hug in flaky, cheesy form. This recipe stands above the rest because it strikes the perfect balance between crispy phyllo dough and a creamy, flavorful cheese filling. We’re talking layers of buttery goodness encasing a mixture so divine, it will transport you straight to a sun-drenched taverna overlooking the Aegean Sea (minus the hefty plane ticket). It’s easy enough for a weeknight bake but impressive enough to wow your dinner guests.
Can I prepare Tiropita – Greek Cheese Pie in advance?
Absolutely! You can assemble the entire pie ahead of time and keep it in the refrigerator, tightly covered, for up to 24 hours. This makes it a lifesaver for those busy weeknights or when you are expecting company. Just remember to add a few extra minutes to the baking time since it will be starting cold. Alternatively, you can bake it completely and then reheat individual slices in the oven or microwave. The phyllo might lose a little crispness upon reheating, but the flavor remains fantastic.
What kind of cheese should I use for the best Tiropita experience?
For the ultimate Greek Cheese Pie experience, a blend of cheeses is key. Feta cheese, with its salty tang, is an absolute must. I recommend combining it with ricotta cheese for a creamy, smooth texture and a milder flavor. If you want to get fancy, a little bit of Kasseri or Kefalotyri can add a delightful nutty complexity. Just make sure to crumble the feta well and drain any excess liquid from the ricotta before mixing everything together.
How do I keep my Tiropita – Greek Cheese Pie from getting soggy?
Ah, the dreaded soggy bottom! To prevent this culinary catastrophe, there are a few tricks to employ. First, make sure your cheese filling isn’t too wet; drain the ricotta well. Second, don’t overdo the butter between the phyllo layers; a light brushing is all you need. Lastly, preheating your oven properly and baking the pie at the right temperature ensures the phyllo crisps up beautifully. A slightly higher temperature for the first few minutes can also help set the bottom crust.

Leave a Comment