

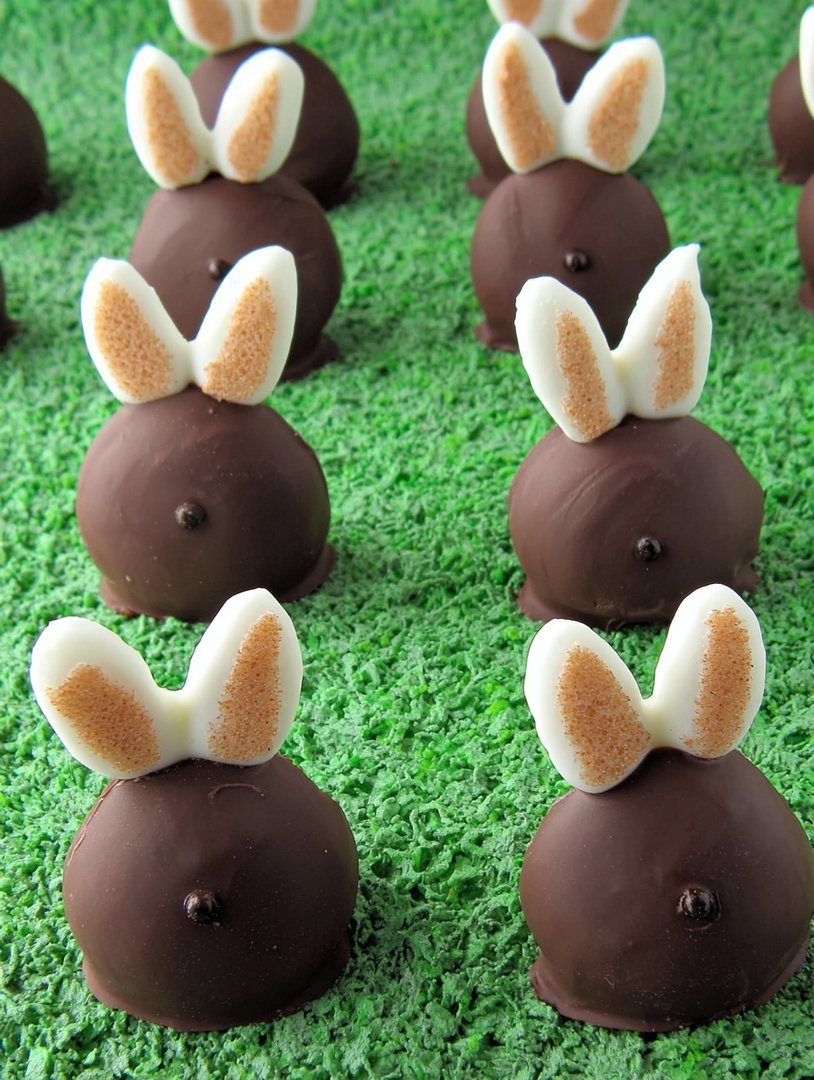
Oh, picture this: a buttery, melt-in-your-mouth cookie, shaped like an adorable bunny, dunked in rich, decadent chocolate. The first bite is pure bliss, a symphony of textures and flavors that dance on your taste buds.
These Chocolate Dipped Bunny Cookies are more than just a dessert; they’re a trip down memory lane, reminiscent of childhood Easters and joyful family gatherings. They’re perfect for a springtime celebration or any occasion that calls for a touch of sweetness and whimsy. Get ready for a delightful baking experience!
Here’s why you’ll absolutely adore this Chocolate Dipped Bunny Cookies Recipe:
- Effortlessly simple, perfect for beginner bakers or those seeking a quick and satisfying treat.
- The combination of buttery cookies and smooth chocolate creates an irresistible flavor experience.
- Their charming bunny shape and chocolate coating make them visually appealing and festive.
- Customize with sprinkles or decorations for endless variations, perfect for gifting or parties.
Ingredients for Chocolate Dipped Bunny Cookies Recipe
Here’s what you’ll need to make this delicious dish:
The full ingredients list, including measurements, is provided in the recipe card directly below.
How to Make Chocolate Dipped Bunny Cookies Recipe
Follow these simple steps to prepare this delicious dish:
Step 1: Prepare the Dough
In a large bowl, cream together the softened butter and granulated sugar until light and fluffy. Beat in the eggs one at a time, then stir in the vanilla extract.
Step 2: Combine Dry Ingredients
In a separate bowl, whisk together the all-purpose flour, baking powder, and salt. Gradually add the dry ingredients to the wet ingredients, mixing until just combined.
Step 3: Chill the Dough
Wrap the dough in plastic wrap and chill for at least 30 minutes. This will prevent the cookies from spreading too much during baking.
Step 4: Cut Out Bunny Shapes
Preheat oven to 375°F (190°C). On a lightly floured surface, roll out the dough to about 1/4 inch thickness. Use bunny-shaped cookie cutters to cut out cookies.
Step 5: Bake the Cookies
Place the cookies on ungreased baking sheets and bake for 8-10 minutes, or until the edges are lightly golden brown. Let the cookies cool on the baking sheets for a few minutes before transferring them to a wire rack to cool completely.
Step 6: Dip in Chocolate
In a heatproof bowl set over a saucepan of simmering water (or in the microwave in 30-second intervals), melt the semi-sweet chocolate chips and coconut oil together until smooth. Dip each cookie into the melted chocolate, allowing the excess to drip off. Place the dipped cookies on parchment paper.
Step 7: Decorate and Set
Immediately sprinkle the dipped cookies with sprinkles, if desired. Let the chocolate set completely before serving. You can speed this up by placing the cookies in the refrigerator for a few minutes.
Transfer to a serving platter and enjoy these delightful Chocolate Dipped Bunny Cookies with a glass of milk or a cup of coffee.
Perfecting the Cooking Process
To achieve chocolate-dipped bunny cookie perfection, start by baking the cookies until just golden. This ensures they remain soft. Cool them completely before dipping. Melting the chocolate slowly prevents burning, guaranteeing a smooth, glossy finish.
Add Your Touch
Want to personalize your chocolate-dipped bunny cookies? Experiment with different extracts like almond or peppermint. Sprinkle chopped nuts, shredded coconut, or colorful sprinkles before the chocolate sets. You can also use white chocolate or a combination of dark and milk chocolate.
Storing & Reheating
Store your adorable chocolate-dipped bunny cookies in an airtight container at room temperature. They will stay fresh for up to a week. No reheating is required – they’re ready to enjoy straight from the container! Just try to resist eating them all at once!
Here are some tips for creating the perfect Chocolate Dipped Bunny Cookies Recipe:
- Ensure your cookies are completely cool before dipping to prevent the chocolate from melting unevenly and creating a gooey mess.
- Use high-quality chocolate for the dipping. This will result in a smoother, richer flavor and a more appealing glossy finish on your bunny cookies.
- Don’t overcrowd the baking sheet when baking the cookies. Give them enough space to spread out, ensuring they bake evenly and retain their cute bunny shape.
(Personal anecdote formated as paragraph subheading)
I still remember the time my nephew decorated these cookies with rainbow sprinkles, turning them into disco bunnies! They were almost too cute to eat…almost! The kids devoured them in seconds.
Alright, gather ’round, cookie aficionados! Let’s talk about the *Chocolate Dipped Bunny Cookies Recipe*, the kind of project that makes your kitchen smell like a chocolate factory and your heart swell with sugary joy. We’re not just baking cookies here; we’re crafting little edible masterpieces. Think of it as a mini-sculpture garden, but instead of marble, we use flour, sugar, and a whole lotta chocolate.
Why Bunny Cookies, Though?
Because bunnies are adorable, duh! But seriously, these cookies are perfect for any occasion, especially when you want to bring a smile to someone’s face. They’re ridiculously fun to decorate, and they’re universally loved. Plus, the chocolate dip? Come on, who can resist a chocolate-covered anything? Let’s be honest, you could dip a shoe in chocolate, and someone would probably try it. (Okay, maybe don’t dip a shoe. Just stick to cookies.)
The Great Cookie Caper
: Gathering Our Supplies
Before we embark on this epic baking adventure, let’s make sure we have all our tools and ingredients ready. This isn’t the time to discover you’re out of flour halfway through. Trust me, I’ve been there. It involves frantic calls to neighbors and questionable substitutions. Let’s avoid that, shall we?
For the Cookie Dough
:
- 2 1/4 cups all-purpose flour (the workhorse of baking)
- 1 teaspoon baking powder (for that lovely lift)
- 1/2 teaspoon salt (a pinch of personality)
- 3/4 cup (1 1/2 sticks) unsalted butter, softened (the key to tender cookies)
- 3/4 cup granulated sugar (sweetness overload!)
- 1/4 cup packed light brown sugar (molasses magic!)
- 1 large egg (the binder)
- 1 teaspoon vanilla extract (a flavor enhancer extraordinaire)
For the Chocolate Dip
:
- 12 ounces semi-sweet chocolate chips (the stars of the show)
- 2 tablespoons vegetable shortening (for that smooth, glossy finish)
- Sprinkles, chopped nuts, shredded coconut (optional, but highly encouraged for maximum bunny pizzazz!)
Bunny Bootcamp
: Making the Dough
Alright, recruits, time to get our hands dirty! First, whisk together the flour, baking powder, and salt in a medium bowl. This ensures everything is evenly distributed, preventing any pockets of baking powder explosions (yes, that’s a thing).
In a separate, larger bowl, cream together the softened butter, granulated sugar, and brown sugar until light and fluffy. This is where your electric mixer becomes your best friend. If you don’t have one, you can use a wooden spoon, but be prepared for a serious arm workout.
Beat in the egg and vanilla extract until well combined. Now, gradually add the dry ingredients to the wet ingredients, mixing until just combined. Be careful not to overmix, or you’ll end up with tough cookies. We want tender bunnies, not chewy monsters.
Divide the dough in half, flatten each half into a disc, wrap them in plastic wrap, and refrigerate for at least 30 minutes. This chilling time is crucial. It allows the gluten to relax, preventing the cookies from spreading too much in the oven. Plus, it makes the dough easier to handle.
Bunny Assembly Line
: Cutting and Baking
Preheat your oven to 375°F (190°C). Line baking sheets with parchment paper. This is a non-negotiable step. Parchment paper prevents the cookies from sticking and makes cleanup a breeze. Nobody wants to spend hours scrubbing burnt cookie residue off baking sheets.
On a lightly floured surface, roll out one disc of dough to about 1/4-inch thickness. Use your favorite bunny cookie cutter to cut out the cookies. Transfer them to the prepared baking sheets, leaving about an inch between each cookie.
Bake for 8-10 minutes, or until the edges are lightly golden brown. Keep a close eye on them. These cookies can go from perfectly baked to burnt offerings in a matter of seconds.
Let the cookies cool on the baking sheets for a few minutes before transferring them to a wire rack to cool completely.
Chocolate Nirvana
: Dipping Time
While the cookies are cooling, it’s time to prepare the chocolate dip. In a heatproof bowl set over a simmering pot of water (or in the microwave in 30-second intervals), melt the chocolate chips and vegetable shortening, stirring until smooth. The vegetable shortening helps the chocolate melt smoothly and gives it a beautiful shine.
Dip each cooled cookie into the melted chocolate, coating about half of the cookie. Place the dipped cookies back on the parchment-lined baking sheets. Immediately sprinkle with your favorite toppings, like sprinkles, chopped nuts, or shredded coconut.
Let the chocolate set completely before serving. This usually takes about 30 minutes at room temperature, or you can speed up the process by placing the cookies in the refrigerator for 15 minutes.
Variations on a Bunny Theme
: Elevating Your Cookie Game
Okay, so you’ve mastered the basic *Chocolate Dipped Bunny Cookies Recipe*. Now it’s time to get creative! Here are a few ideas to take your bunny cookies to the next level:
Double Chocolate Delight
:
Add 1/4 cup of cocoa powder to the dry ingredients for a richer, more intense chocolate flavor.
Citrus Zing
:
Add the zest of one orange or lemon to the cookie dough for a burst of citrusy freshness.
Spiced Bunnies
:
Add 1/2 teaspoon of ground cinnamon or nutmeg to the dry ingredients for a warm, cozy flavor.
Peanut Butter Bliss
:
Drizzle the dipped cookies with melted peanut butter for a salty-sweet combination.
White Chocolate Wonders
:
Use white chocolate chips instead of semi-sweet chocolate for a creamy, vanilla-flavored dip.
Troubleshooting Your Bunny Baking
: Common Cookie Catastrophes and How to Avoid Them
Even the most experienced bakers encounter occasional cookie mishaps. Here are a few common problems and how to solve them:
- **Cookies spreading too much:** The dough was probably too warm. Make sure to chill it for at least 30 minutes before baking. Also, avoid overmixing the dough.
- **Cookies too dry:** You may have added too much flour. Measure the flour carefully, using a kitchen scale if possible. Also, avoid overbaking the cookies.
- **Chocolate not melting smoothly:** Make sure the bowl is completely dry when melting the chocolate. Even a tiny bit of water can cause the chocolate to seize up.
Sharing the Bunny Love
: Perfect Occasions for These Cookies
These *Chocolate Dipped Bunny Cookies Recipe* aren’t just delicious; they’re also incredibly versatile. Here are a few occasions where they’re guaranteed to be a hit:
- **Easter:** Obviously! These cookies are the perfect addition to any Easter basket or dessert table.
- **Birthday Parties:** Who wouldn’t love a bunny-shaped cookie at their birthday party?
- **Baby Showers:** Welcome the new little bunny into the world with these adorable treats.
- **Just Because:** Sometimes, you don’t need a special occasion to bake cookies. Treat yourself and your loved ones to a batch of these delightful bunnies.
The Final Hop
: Enjoying Your Bunny Creations
Congratulations, you’ve successfully baked and decorated your own *Chocolate Dipped Bunny Cookies Recipe*! Now it’s time to sit back, relax, and enjoy the fruits (or should I say, cookies) of your labor. These cookies are best enjoyed with a glass of cold milk, a cup of hot cocoa, or a strong cup of coffee (because let’s be honest, you deserve it after all that baking!). Share them with friends, family, or keep them all to yourself. I won’t judge!
Remember, baking is all about having fun and creating something delicious. So don’t be afraid to experiment, get creative, and make these cookies your own. And most importantly, enjoy the process! After all, life is too short to eat boring cookies.
Conclusion for Chocolate Dipped Bunny Cookies Recipe
These Chocolate Dipped Bunny Cookies are more than just a dessert; they’re a delightful project perfect for unleashing your inner artist. From carefully shaping the bunny silhouettes to adding those final chocolatey touches, the process is just as rewarding as the final, delicious result. Remember to keep your chocolate moisture-free, get creative with your decorations, and store them properly to maintain freshness. So, hop to it and start baking these adorable treats today – you won’t regret it!
Print
Chocolate Dipped Bunny Cookies Recipe
Delicious chocolate dipped bunny cookies recipe recipe with detailed instructions and nutritional information.
- Total Time: 35 minutes
- Yield: 4 servings
Ingredients
- All-purpose flour: 2 1/4 cups
- Baking powder: 1 teaspoon
- Salt: 1/2 teaspoon
- Unsalted butter, softened: 1 cup (2 sticks)
- Granulated sugar: 1 cup
- Large egg: 1
- Vanilla extract: 1 teaspoon
- Semi-sweet chocolate chips: 12 ounces
Instructions
- Step 1: In a medium bowl, whisk together the flour, baking powder, and salt. Set aside.
- Step 2: In a large bowl, cream together the softened butter and sugar until light and fluffy. Beat in the egg and vanilla extract.
- Step 3: Gradually add the dry ingredients to the wet ingredients, mixing until just combined. Do not overmix.
- Step 4: Wrap the dough in plastic wrap and chill for at least 1 hour.
- Step 5: Preheat oven to 375 degrees F (190 degrees C). On a lightly floured surface, roll out the dough to 1/4 inch thickness. Cut out bunny shapes using cookie cutters. Place cookies onto ungreased baking sheets.
- Step 6: Bake for 8-10 minutes, or until edges are lightly golden brown. Let cookies cool on baking sheets for a few minutes before transferring to a wire rack to cool completely. Melt chocolate chips and dip cooled cookies into the chocolate. Place on parchment paper until the chocolate hardens.
Notes
- Store your chocolate-dipped bunny cookies in an airtight container at room temperature to keep them fresh and prevent the chocolate from blooming.
- While not usually reheated, slightly warming the cookies in the microwave for 5-10 seconds can soften the chocolate for a more indulgent experience.
- Serve these adorable bunny cookies with a cold glass of milk or alongside a festive Easter brunch for a delightful treat.
- For a smoother chocolate coating, add a teaspoon of coconut oil to the melted chocolate chips; this will give them a beautiful shine and prevent cracking.
- Prep Time: 15 minutes
- Cook Time: 20 minutes
- Method: Stovetop
- Cuisine: American
FAQs
How do I prevent the chocolate from seizing when making this Chocolate Dipped Bunny Cookies Recipe?
Oh, the dreaded seized chocolate! We’ve all been there, staring into a grainy, unusable mess. The key is moisture control. Ensure your bowl and utensils are bone dry. When melting the chocolate, use a double boiler or microwave in short intervals, stirring frequently. If a little seizing happens, a tiny spoonful of vegetable shortening can sometimes bring it back. But the best defense? Patience and dryness! Trust me; I’ve rescued many chocolate batches from the brink of disaster.
Can I use different types of chocolate for these adorable bunny cookies?
Absolutely! This Chocolate Dipped Bunny Cookies Recipe is all about customization. Milk, dark, white, even ruby chocolate will work wonderfully. Consider the flavor profile you’re aiming for. Dark chocolate offers a bittersweet contrast to the sweet cookie, while white chocolate adds extra sweetness. You can even use different chocolates for different parts of the bunny, like dark chocolate ears on a white chocolate body. Be creative and have fun with it!
How do I store these Chocolate Dipped Bunny Cookies to keep them fresh?
To maintain peak freshness and keep those bunny ears perky, store your Chocolate Dipped Bunny Cookies in an airtight container at room temperature. Layer them between sheets of parchment paper to prevent sticking. Avoid storing them in the refrigerator, as the chocolate can bloom (develop a white coating) due to temperature changes. Stored properly, these delightful treats should stay delicious for up to a week… if they last that long!
What are some fun variations I can try with this Chocolate Dipped Bunny Cookies Recipe?
Let your imagination run wild! Consider adding sprinkles, edible glitter, or chopped nuts to the chocolate before it sets. You could also pipe melted chocolate onto the cookies to create intricate designs or use different colored sugars for a festive touch. For a truly decadent treat, sandwich two cookies together with a layer of frosting or jam. The possibilities are endless! This recipe is a blank canvas for your creativity.


Leave a Comment