

Forget those complicated, oven-baked cheesecakes that require a PhD in pastry-making. Today, we’re diving headfirst into a No-Bake Orange Creamsicle Cheesecake so ridiculously easy, even I can make it and I once set fire to toast. Imagine the vibrant orange hue, the creamy texture, and that perfect balance of tangy and sweet. This isn’t just a dessert; it’s a flavor adventure waiting to happen.
This No-Bake Orange Creamsicle Cheesecake is the perfect answer to your summer dessert dreams. It’s refreshingly light, bursting with citrusy goodness, and effortlessly elegant – ideal for any occasion, from a casual backyard barbecue to a sophisticated dinner party.
It’s unbelievably easy to make.
It tastes like sunshine in a slice.
It’s visually stunning, a true masterpiece.
It’s wonderfully versatile and can be easily customized.
Ingredients for No-Bake Orange Creamsicle Cheesecake
Here’s what you’ll need to make this delicious dish:
The full ingredients list, including measurements, is provided in the recipe card directly below.
How to Make No-Bake Orange Creamsicle Cheesecake
Follow these simple steps to prepare this delicious dish:
Step 1: Preparing the Crust
In a food processor or using a ziploc bag and a rolling pin, crush the graham crackers into fine crumbs. Add the melted vegan butter and pulse until evenly moistened. Press the mixture firmly into the bottom of a springform pan. Chill for at least 30 minutes while you prepare the filling.
Step 2: Making the Orange Cream Cheese Filling
In a large bowl, beat together the softened vegan cream cheese and powdered sugar until smooth and creamy. Gradually whisk in the orange juice and orange zest until fully incorporated. Stir in the Alcohol-free vanilla extract. In a separate small saucepan, whisk together the agar-agar powder and a little bit of cold orange juice before adding it to a simmering saucepan with the remaining orange juice to create the setting agent. Add this simmering mixture slowly into the cream cheese, mixing thoroughly until smooth. Let this cool slightly before adding the whipped vegan cream.
Step 3: Whipping the Vegan Cream and Combining
In a separate chilled bowl, whip the chilled vegan heavy cream until stiff peaks form. Gently fold the whipped cream into the orange cream cheese mixture until just combined. Be careful not to overmix, as this can deflate the cream.
Step 4: Assembling the Cheesecake
Pour the orange cream cheese mixture over the chilled graham cracker crust. Smooth the top with a spatula. Cover the cheesecake and chill in the refrigerator for at least 4 hours, or preferably overnight, to allow the agar-agar to set completely.
Step 5: Serving the Delight
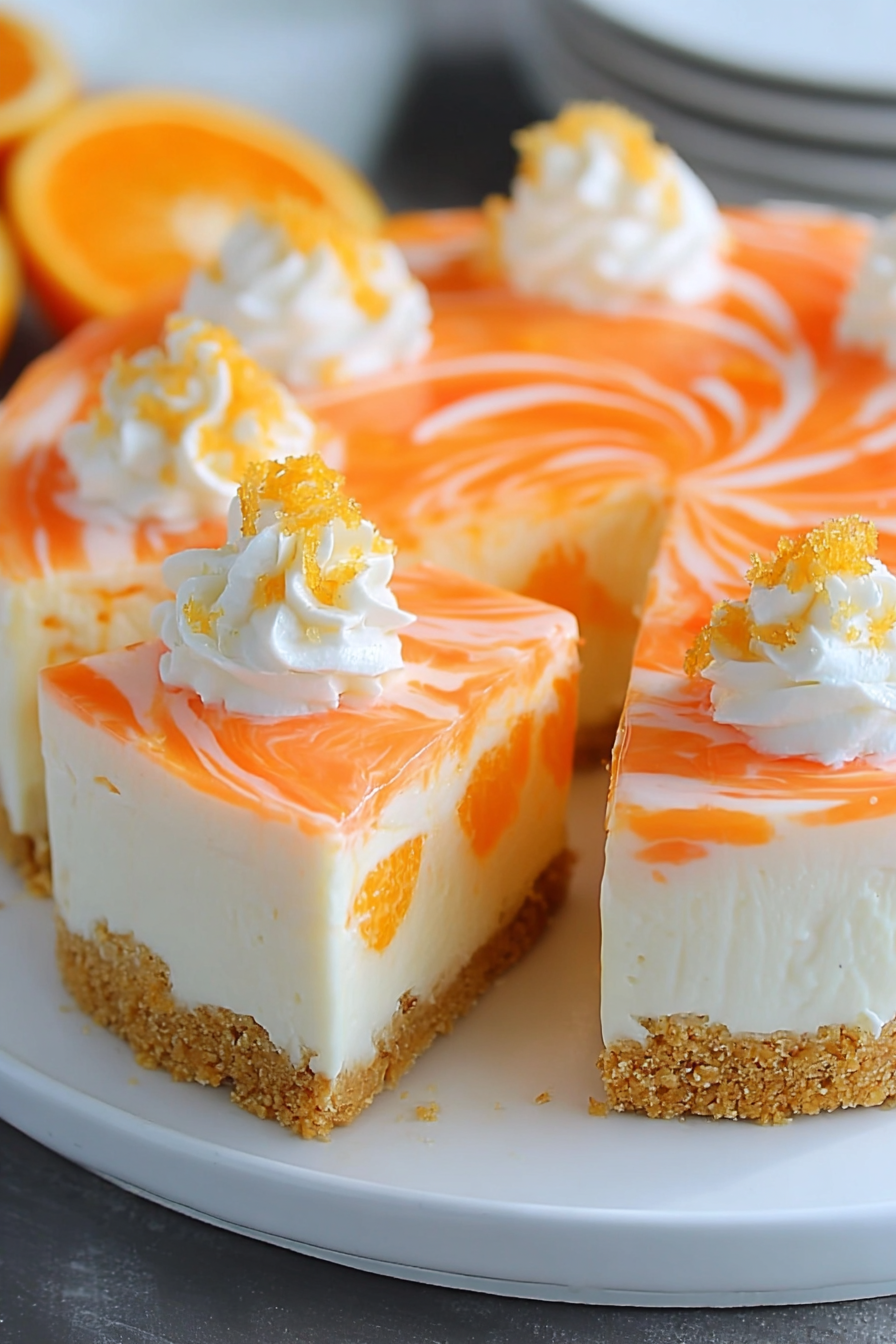
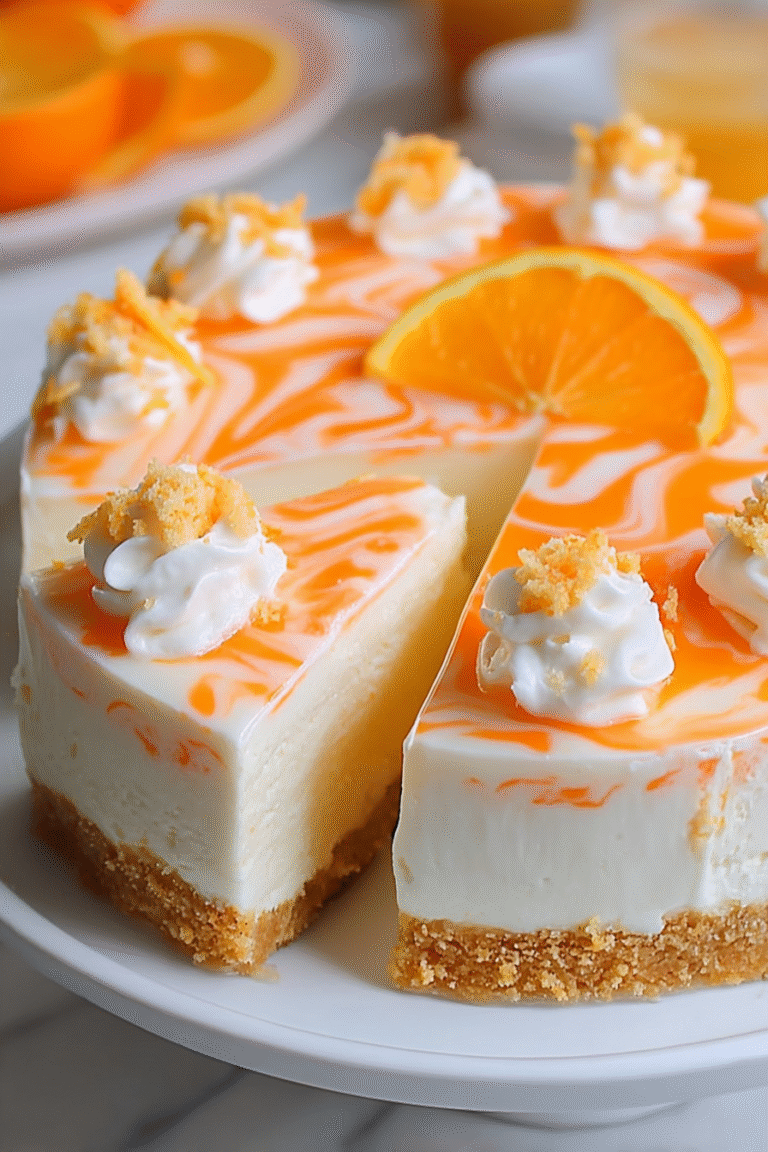
Once set, carefully remove the cheesecake from the springform pan. Slice and serve chilled. Garnish with fresh orange slices, candied orange peel, or a sprinkle of powdered sugar, if desired.
Step 6: Enjoy the Aftermath
Prepare to be amazed. This No-Bake Orange Creamsicle Cheesecake is so incredibly delicious, you’ll want to make it again and again. It’s the perfect dessert for any occasion. And the best part? You can proudly declare you didn’t spend hours slaving over a hot oven.
Enjoy your incredibly easy and delicious No-Bake Orange Creamsicle Cheesecake!
Perfecting the Cooking Process
Prepare the crust first, letting it chill thoroughly. While that chills, whip up the creamy orange filling. Finally, assemble and chill the No-Bake Orange Creamsicle Cheesecake until set. Easy peasy, lemon squeezy!
Add Your Touch
Swap the orange zest for lemon or lime for a different citrus twist. Add a sprinkle of crushed graham crackers to the crust for extra texture. Consider using different types of cream cheese for a subtle flavor variation.
Storing & Reheating
Store your No-Bake Orange Creamsicle Cheesecake in the refrigerator for up to three days. No reheating is needed; this cheesecake is best served cold. Enjoy!
Prepare the crust using a food processor to ensure a perfectly fine crumb consistency. Avoid over-mixing the filling to prevent it from becoming too dense. Chill the cheesecake for at least four hours to allow it to set properly.
I once made this No-Bake Orange Creamsicle Cheesecake for a potluck, and it vanished faster than you could say “Creamsicle!” Everyone raved about its refreshing flavor.
The No-Bake Orange Creamsicle Cheesecake Recipe
The Dreamy Crust
This is where the magic begins. Forget those complicated pie crusts, we’re going for simple and delicious. We are going to make a buttery, crumbly base that complements the creamy orange filling perfectly.
Prepare the crust by combining 1 ½ cups of graham cracker crumbs, ¼ cup of sugar, and 6 tablespoons of melted unsalted butter. Mix until well combined. Press the mixture firmly into the bottom of a 9-inch springform pan. Chill in the refrigerator while you whip up the luscious filling. Trust me, this step is crucial; a cold crust keeps everything in its place.
Whipping Up the Orange Dream
Now for the star of the show: the creamy, dreamy orange filling. This is where the zesty orange flavor shines through.
In a large bowl, beat 16 ounces of cream cheese until smooth and creamy. Gradually add 1 cup of powdered sugar, beating until fully incorporated. Stir in 1 teaspoon of orange zest and ¼ cup of orange juice. The juice adds a lovely tangy-sweet kick to your cheesecake. Continue beating until light and fluffy. Remember, we want that airy texture for a truly delightful experience!
Setting the Stage
: Folding in the Goodness
We are now at the stage where everything comes together. This is where we use a clever trick to make our cheesecake ultra creamy and airy.
In a separate bowl, beat 2 cups of heavy cream until stiff peaks form. Gently fold the whipped cream into the cream cheese mixture until just combined. Do not overmix! We want to retain that beautiful fluffiness.
Pour the filling over the chilled crust and smooth the top with a spatula. Cover the springform pan with plastic wrap and refrigerate for at least 4 hours, or preferably overnight, to allow the cheesecake to set completely.
The Grand Finale
: Orange Creamsicle Bliss
After waiting patiently (the hardest part), it’s time to reveal our masterpiece.
Once set, carefully remove the sides of the springform pan. Garnish the No-Bake Orange Creamsicle Cheesecake with extra orange zest, candied orange slices, or even a drizzle of melted white chocolate. Now, admire your creation. You’ve earned it! Slice and serve this delightful treat and get ready to witness expressions of pure cheesecake heaven. This No-Bake Orange Creamsicle Cheesecake is guaranteed to be a crowd-pleaser. It’s the perfect dessert for any occasion, from casual gatherings to special celebrations. Its bright, citrusy flavors and smooth, creamy texture will leave everyone wanting more. So go ahead, dive in!
FAQs
Can I make this No-Bake Orange Creamsicle Cheesecake ahead of time?
Absolutely! In fact, this no-bake cheesecake is even better the next day (or two!). The flavors have time to meld, and it sets up beautifully in the fridge. Just make sure you give it at least four hours to chill completely before serving, preferably overnight. This allows the creamy orange filling to firm up perfectly and prevents a messy, wobbly dessert. Trust me, patience is key to cheesecake perfection!
What can I use if I don’t have agar-agar?
While agar-agar is a fantastic plant-based gelling agent, you can use other options for this no-bake orange creamsicle cheesecake. Pectin is another excellent choice, although you might need to adjust the amount slightly depending on the type you use. Always follow the package instructions carefully. If you’re feeling adventurous, you can even experiment with carrageenan, but again, precise measurements are vital for achieving the desired consistency.
Is this No-Bake Orange Creamsicle Cheesecake gluten-free?
Yes! This recipe is naturally gluten-free, assuming you use gluten-free graham crackers for the crust. Always double-check the ingredient list of your graham crackers to ensure they’re certified gluten-free if you have any dietary concerns. This makes it a fantastic dessert option for those avoiding gluten. Enjoy guilt-free deliciousness!
How do I prevent the No-Bake Orange Creamsicle Cheesecake from becoming too watery?
The key is to ensure your cream cheese is cold, your orange juice is well-strained, and your agar-agar (or alternative gelling agent) is properly dissolved. If you use too much liquid, the cheesecake might become a little runny. Don’t rush the chilling process; it’s crucial for the cheesecake to set properly. Using a high-quality cream cheese with a lower moisture content can also help achieve a firmer result. Remember, patience is a virtue, especially when it comes to cheesecakes.
Conclusion for No-Bake Orange Creamsicle Cheesecake
This No-Bake Orange Creamsicle Cheesecake is a dreamy dessert that’s surprisingly easy to make. The vibrant orange flavor combined with the creamy cheesecake texture is a delightful treat. Remember to chill it thoroughly for best results. This recipe offers a refreshing and guilt-free alternative to traditional cheesecakes. It’s perfect for summer gatherings or a simple weeknight indulgence. So, ditch the oven and enjoy this delicious, no-bake masterpiece!
No-Bake Orange Creamsicle Cheesecake
Delicious no-bake orange creamsicle cheesecake recipe with detailed instructions and nutritional information.
- Total Time: 35 minutes
- Yield: 4 servings 1x
Ingredients
- 1 (8 ounce) package cream cheese, softened
- 1 (14 ounce) can sweetened condensed milk
- 1 teaspoon vanilla extract
- 1/2 cup orange juice
- 1/4 cup orange zest
- 1 1/2 cups crushed graham crackers
- 1/4 cup melted butter
- 1 cup heavy cream, whipped
Instructions
- Step 1: In a medium bowl, beat together the softened cream cheese and sweetened condensed milk until smooth and creamy. Beat in the vanilla extract, orange juice, and orange zest until well combined.
- Step 2: In a separate bowl, combine the crushed graham crackers and melted butter. Press this mixture into the bottom of a 9-inch springform pan to create the crust.
- Step 3: Pour the cream cheese mixture over the graham cracker crust and spread evenly.
- Step 4: In a separate bowl, whip the heavy cream until stiff peaks form. Gently fold the whipped cream into the cream cheese mixture until just combined. Do not overmix.
- Step 5: Cover the cheesecake and refrigerate for at least 4 hours, or preferably overnight, to allow it to set completely.
- Step 6: Once set, carefully remove the sides of the springform pan. Slice and serve chilled.
Notes
- Store leftover cheesecake in the refrigerator for up to 3 days, tightly covered to maintain its freshness.
- This no-bake cheesecake is best served chilled; avoid reheating as it will affect the texture.
- For a vibrant presentation, garnish each slice with a candied orange peel or a sprinkle of extra orange zest.
- To ensure a smooth and creamy texture, make sure your cream cheese is truly softened to room temperature before mixing.
- Prep Time: 15 minutes
- Cook Time: 20 minutes
- Method: Stovetop
- Cuisine: American


Leave a Comment