
Picture this: fragrant basmati rice, tender chicken marinated in spices that sing, and a symphony of flavors dancing on your tongue. This isn’t just dinner; it’s an Authentic Indian Restaurant-Style Chicken Biryani: An Amazing Ultimate Recipe that transports you straight to the bustling streets of Mumbai.
Craving that authentic Indian restaurant experience at home? This biryani recipe promises to deliver a culinary adventure, bursting with aromatic spices and tender chicken that will have everyone reaching for seconds (and maybe thirds!).
- Experience an explosion of authentic Indian flavors in every bite.
- Enjoy tender, succulent chicken marinated in a symphony of spices.
- Impress your friends and family with a restaurant-quality dish made at home.
- Customize the spice level to your preference, making it perfect for everyone.
Ingredients for Authentic Indian Restaurant-Style Chicken Biryani: An Amazing Ultimate Recipe
Here’s what you’ll need to make this delicious dish:
The full ingredients list, including measurements, is provided in the recipe card directly below.
How to Make Authentic Indian Restaurant-Style Chicken Biryani: An Amazing Ultimate Recipe
Follow these simple steps to prepare this delicious dish:
Step 1: Marinate the Chicken
In a large bowl, combine the chicken pieces with yogurt, ginger-garlic paste, biryani masala, turmeric powder, red chili powder, salt, and lemon juice. Mix well and let it marinate for at least 30 minutes, or preferably overnight in the refrigerator. The longer it marinates, the more flavorful the chicken will be.
Step 2: Prepare the Rice
Rinse the basmati rice thoroughly under cold water until the water runs clear. This removes excess starch and prevents the rice from becoming sticky. Soak the rice in water for 30 minutes. This helps the rice cook evenly and become fluffy. After soaking, drain the rice well.
Step 3: Cook the Chicken
Heat vegetable oil or ghee in a large, heavy-bottomed pot or Dutch oven over medium heat. Add the sliced onions and sauté until golden brown and caramelized, stirring occasionally. This may take about 10-15 minutes. Add the marinated chicken to the pot and cook until the chicken is browned on all sides. Add the diced tomatoes and green chilies. Cook until the tomatoes soften and the oil starts to separate from the mixture. This indicates that the chicken is well-cooked and the flavors have melded together.
Step 4: Layer the Biryani
Spread half of the cooked chicken mixture evenly in the bottom of the pot. Sprinkle a layer of fresh mint and cilantro leaves over the chicken. Spread the soaked and drained basmati rice evenly over the chicken and herb layer. Drizzle saffron-infused milk or water over the rice. This will impart a beautiful golden color and aroma. Add the remaining chicken mixture over the rice. Sprinkle the remaining mint and cilantro leaves over the top. If using, sprinkle rose water and kewra essence over the rice.
Step 5: Steam the Biryani
Cover the pot tightly with a lid. Place the pot over low heat and cook for 20-25 minutes, or until the rice is fully cooked and fluffy. You can also use the “dum” method by sealing the pot with dough to trap the steam. This ensures that the biryani cooks evenly and the flavors are well-infused. After cooking, let the biryani rest for 10 minutes before opening the lid. This allows the steam to settle and prevents the rice from becoming mushy.
Step 6: Serve and Enjoy
Gently fluff the biryani with a fork before serving. Be careful not to break the rice grains. Serve hot with raita (yogurt dip), and your favorite Indian side dishes. Garnish with extra fresh cilantro and mint leaves for a vibrant presentation. Enjoy this Authentic Indian Restaurant-Style Chicken Biryani: An Amazing Ultimate Recipe with your loved ones!
Perfecting the Cooking Process

Timing is everything when creating this culinary masterpiece! First, sear the chicken to lock in those delicious juices. While the chicken rests, begin cooking the rice. As the rice simmers, prepare the aromatic gravy that brings it all together into amazing biryani.
Add Your Touch
Biryani is a blank canvas for your creativity! Experiment with different vegetables like peas or carrots. For a bolder flavor, try adding a pinch of garam masala or a bay leaf. Feel free to adjust the spice level to your personal preference.
Storing & Reheating
To keep your Authentic Indian Restaurant-Style Chicken Biryani fresh, store it in an airtight container in the refrigerator for up to three days. Reheat gently in a microwave or on the stovetop with a splash of broth to maintain moisture and that restaurant taste.
Here are some tips to elevate your Authentic Indian Restaurant-Style Chicken Biryani:
- Soak the rice for at least 30 minutes before cooking to ensure fluffy, separate grains and prevent a mushy biryani texture.
- Don’t overcrowd the pan when searing the chicken, searing in batches helps to achieve a beautiful golden-brown crust and amazing depth of flavor.
- Garnish generously with fresh cilantro and mint after cooking to add a burst of freshness and vibrant color to your biryani.
(Personal anecdote formated as paragraph subheading)
My friend Sara, who usually burns toast, actually nailed this recipe on her first try. She even claimed it tasted better than her favorite takeout spot! This proves anyone can make a star chicken biryani.
Unlocking the Secrets of Authentic Indian Restaurant-Style Chicken Biryani: An Amazing Ultimate Recipe
Have you ever craved that aromatic, flavorful Chicken Biryani you get at your favorite Indian restaurant? The kind that makes your eyes close with each blissful bite? Well, my friend, prepare to ditch the takeout menus! We’re diving headfirst into creating an Authentic Indian Restaurant-Style Chicken Biryani: An Amazing Ultimate Recipe right in your own kitchen!
Now, I know what you’re thinking: “Biryani? That sounds complicated!” Fear not, adventurous home cook! I’m here to guide you through every step of this culinary journey, sprinkled with a dash of humor and a whole lot of flavor. Forget those intimidating recipes with a million steps and hard-to-find ingredients. This recipe is designed for real people, with busy lives and a desire for amazing food, all with easy-to-find ingredients.
The Magic Begins: Gathering Your Arsenal (Ingredients, That Is!)
First things first, let’s gather our troops. We need the right ingredients to wage this delicious war. Think of it as assembling your superhero team, each player with its own superpower, ready to combine forces and create something truly extraordinary. No capes required (though a stylish apron is definitely encouraged!).
Here’s what you’ll need for this Authentic Indian Restaurant-Style Chicken Biryani: An Amazing Ultimate Recipe:
- **Chicken:** About 2 pounds of bone-in, skin-on chicken pieces (thighs and drumsticks are excellent for flavor). Don’t skimp! The bone adds richness to the biryani.
- **Basmati Rice:** 2 cups of good quality basmati rice. This is crucial! Basmati rice has a unique aroma and cooks up perfectly fluffy.
- **Onions:** 2 large onions, thinly sliced. Get ready to shed some tears, but it’ll be worth it!
- **Tomatoes:** 2 large tomatoes, finely chopped.
- **Ginger-Garlic Paste:** 2 tablespoons. You can buy this pre-made, or make your own for an extra burst of freshness.
- **Plain Yogurt:** 1 cup. This tenderizes the chicken and adds a lovely tang.
- **Green Chilies:** 2-3, slit lengthwise (adjust to your spice preference). Handle with care!
- **Fresh Mint and Cilantro:** A generous bunch of each, chopped. Fresh herbs are non-negotiable!
- **Ghee or Oil:** 4 tablespoons. Ghee adds a richer flavor, but oil works just fine.
- **Biryani Masala:** 2-3 tablespoons (store-bought or homemade). This is the heart and soul of the biryani flavor.
- **Whole Spices:** 2 bay leaves, 4-5 green cardamoms, 4-5 cloves, 1-inch cinnamon stick, 1 teaspoon cumin seeds. These add depth and complexity.
- **Saffron Strands:** A pinch, soaked in 1/4 cup warm milk. This adds a beautiful color and subtle flavor.
- **Rose Water (optional):** A few drops. For an extra touch of restaurant-style elegance.
- **Salt:** To taste, of course!
Operation Flavor Town: Marinating the Chicken
Now that you’ve assembled your Avengers, it’s time to prep our star player: the chicken! Marinating is key to infusing it with flavor and ensuring it stays tender and juicy throughout the cooking process.
In a large bowl, combine the chicken pieces with yogurt, ginger-garlic paste, biryani masala, salt, and a squeeze of lemon juice. Mix well, ensuring every piece is coated in this flavorful mixture. Cover the bowl and refrigerate for at least 2 hours, or preferably overnight. The longer it marinates, the deeper the flavor will be. Think of it as a spa day for your chicken, soaking in all the goodness!
The Rice is Right: Preparing the Foundation
While the chicken is enjoying its spa day, let’s move on to the foundation of our masterpiece: the basmati rice.
Rinse the rice thoroughly under cold water until the water runs clear. This removes excess starch and prevents the rice from becoming sticky. Soak the rinsed rice in fresh water for at least 30 minutes. This helps the grains cook evenly and become extra fluffy.
After soaking, drain the rice and set it aside. Now, in a large pot, bring about 6 cups of water to a boil. Add the whole spices (bay leaves, cardamom, cloves, cinnamon stick, and cumin seeds) and salt. Let it simmer for a few minutes to infuse the water with their aroma.
Gently add the drained rice to the boiling water. Cook for about 7-8 minutes, or until the rice is about 70% cooked. It should still have a slight bite to it. Drain the rice and set it aside. Remember, we don’t want to fully cook the rice at this stage, as it will continue to cook during the layering process.
Gravy Train: Building the Flavor Base
Now for the heart of the biryani: the gravy! This is where the magic truly happens, where all the flavors come together in a symphony of deliciousness.
In a large, heavy-bottomed pot or Dutch oven, heat the ghee or oil over medium heat. Add the sliced onions and sauté until golden brown and caramelized. This may take some time, but trust me, it’s worth the effort. Caramelized onions add a depth of sweetness and richness that is essential to the biryani.
Once the onions are beautifully browned, add the ginger-garlic paste and sauté for another minute until fragrant. Be careful not to burn it! Next, add the chopped tomatoes and cook until they soften and release their juices. Now it’s time to add the marinated chicken. Cook the chicken over medium-high heat, stirring occasionally, until it’s seared on all sides. This will help lock in the juices and add a beautiful color.
Reduce the heat to low, cover the pot, and let the chicken cook in the gravy for about 20-25 minutes, or until it’s almost cooked through. Stir occasionally to prevent sticking. The gravy should be thick and luscious, coating the chicken beautifully. If the gravy starts to dry out, add a splash of water or broth.
Layering Like a Pro: Assembling the Masterpiece
Now for the fun part: layering! This is where we transform individual ingredients into a cohesive and stunning dish.
First, spread a layer of the cooked rice over the chicken gravy. Sprinkle with chopped mint and cilantro. Then, add another layer of chicken gravy, followed by another layer of rice, mint, and cilantro. Repeat until all the chicken and rice are used up. The top layer should be rice.
Pour the saffron milk evenly over the top layer of rice. This will add a beautiful color and subtle flavor. Drizzle a few drops of rose water (if using) over the rice.
Cover the pot tightly with a lid. If your lid doesn’t fit snugly, you can seal the edges with aluminum foil to prevent steam from escaping. This is crucial for cooking the biryani properly.
Place the pot over very low heat and cook for about 20-25 minutes, or until the rice is fully cooked and the flavors have melded together. This process is called “dum cooking,” and it’s what gives biryani its signature flavor and texture.
The Grand Finale: Serving and Savoring
Once the biryani is cooked, remove it from the heat and let it rest for 10-15 minutes before serving. This allows the flavors to settle and the rice to absorb any remaining moisture.
Gently fluff the rice with a fork before serving. Be careful not to overmix, as you don’t want to break the rice grains. Garnish with extra fresh cilantro and mint. Serve hot with raita (yogurt dip) and your favorite Indian pickles.
And there you have it: Authentic Indian Restaurant-Style Chicken Biryani: An Amazing Ultimate Recipe, made right in your own kitchen! Prepare to be amazed by the explosion of flavors and the satisfaction of creating something truly special.
The Spice Rack Symphony: Understanding Biryani Masala
Biryani masala is the soul of this dish. While store-bought blends are convenient, crafting your own elevates the experience. Toast whole spices like coriander seeds, cumin seeds, fennel seeds, black peppercorns, cardamom pods, cloves, and dried red chilies. Grind them to a fine powder, and behold – your custom-made symphony of flavor!
Rice Matters: Choosing the Right Grain
Basmati isn’t just any rice; it’s the gold standard for biryani. Its long, slender grains remain separate and fluffy, creating the perfect texture. Always rinse it thoroughly before cooking to remove excess starch. Soaking the rice is a crucial step to achieve that coveted fluffy texture.
The Art of the Dum: Mastering Slow Cooking
“Dum” cooking is the heart of Authentic Indian Restaurant-Style Chicken Biryani: An Amazing Ultimate Recipe. Sealing the pot tightly and cooking over low heat allows the steam to circulate, cooking the rice and chicken to perfection while melding the flavors. Don’t rush this process; patience is rewarded with incredible taste.
Vegetarian Variation: A Plant-Based Twist
Craving biryani but prefer a plant-based option? Swap the chicken for mixed vegetables like cauliflower, carrots, potatoes, and green beans. Tofu or paneer (Indian cheese) also make delicious additions. Adjust cooking times accordingly, ensuring the vegetables are tender yet retain their shape.
Troubleshooting Tips: Common Biryani Blunders and How to Avoid Them
- **Mushy Rice:** Overcooking or using the wrong type of rice can lead to a mushy biryani. Stick to basmati and avoid overcooking.
- **Dry Biryani:** Insufficient moisture during the cooking process can result in a dry biryani. Add a splash of broth or water during layering if needed.
- **Bland Flavor:** Don’t be shy with the spices! Taste and adjust the seasoning as you go. Ensure your biryani masala is fresh and flavorful.
(Personal anecdote formated as paragraph subheading)
I once forgot to add salt to my biryani. Let’s just say the resulting blandness taught me a valuable lesson about paying attention! Always taste as you go!
Conclusion for Authentic Indian Restaurant-Style Chicken Biryani: An Amazing Ultimate Recipe:
So there you have it: your very own guide to conquering the world of biryani, one fragrant grain of rice at a time! This Ultimate Chicken Biryani recipe is your passport to a flavor-packed adventure, recreating those amazing restaurant flavors in your kitchen. Remember the key is patience, quality ingredients, and a good dose of culinary confidence. Gather your spices, sharpen your knives, and prepare to create a dish that will impress even the most discerning palates. Now go forth and biryani!
Print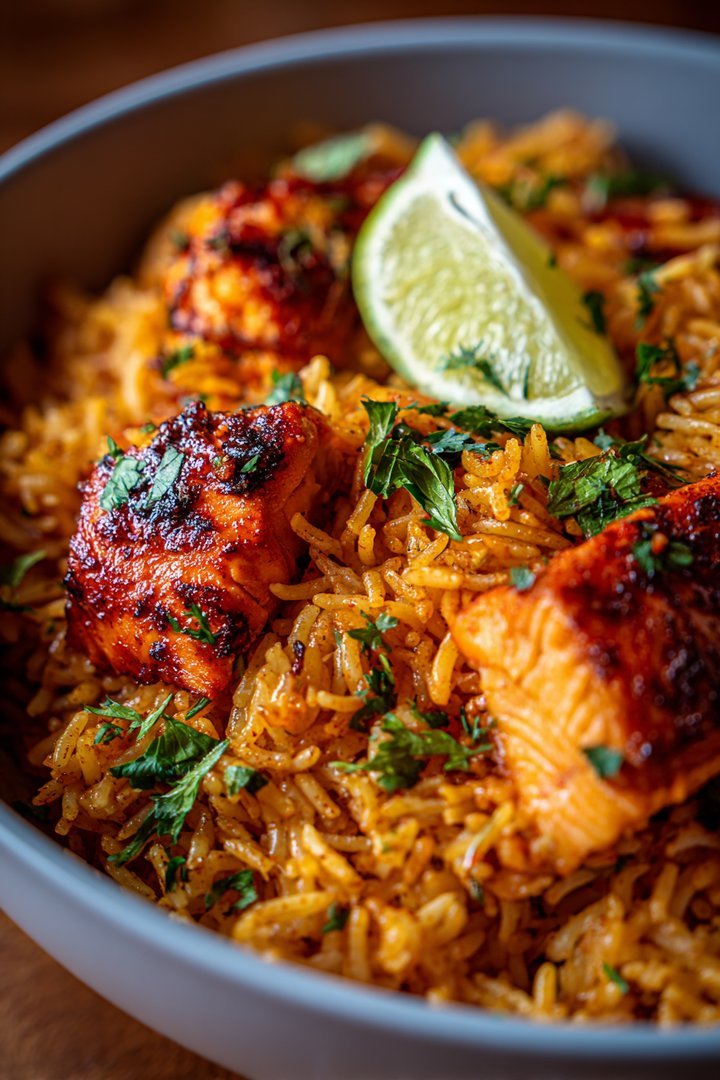
Authentic Indian Restaurant-Style Chicken Biryani: An Amazing Ultimate Recipe
Delicious authentic indian restaurant-style chicken biryani: an amazing ultimate recipe recipe with detailed instructions and nutritional information.
- Total Time: 35 minutes
- Yield: 4 servings
Ingredients
- Chicken pieces, bone-in and skinless: 1.5 lbs
- Basmati rice: 2 cups
- Onions, thinly sliced: 2 large
- Ginger-garlic paste: 2 tablespoons
- Green chilies, slit: 4-6 (adjust to taste)
- Yogurt, plain: 1 cup
- Biryani Masala powder: 3 tablespoons
- Saffron strands: a pinch, soaked in 1/4 cup warm milk
- Ghee (clarified butter): 4 tablespoons
Instructions
- Step 1: Marinate the chicken. In a large bowl, combine the chicken with ginger-garlic paste, yogurt, biryani masala powder, salt, and half of the sliced onions. Mix well and refrigerate for at least 2 hours, or preferably overnight.
- Step 2: Parboil the rice. Wash the basmati rice until the water runs clear. In a large pot, bring plenty of water to a boil. Add the rice and cook until it's about 70% cooked (about 5-7 minutes). Drain the rice and spread it on a large tray to cool slightly.
- Step 3: Fry the remaining onions. Heat ghee in a heavy-bottomed pot or Dutch oven. Fry the remaining sliced onions until golden brown and crispy (birista). Remove half of the fried onions and set aside for garnishing.
- Step 4: Layer the biryani. In the same pot, layer the marinated chicken at the bottom. Spread the parboiled rice evenly over the chicken. Pour the saffron milk over the rice.
- Step 5: Cook the biryani. Sprinkle the remaining fried onions, green chilies, and a tablespoon of ghee over the rice. Cover the pot tightly with a lid and cook on low heat for 25-30 minutes, or until the chicken is cooked through and the rice is tender. Do not lift the lid during the first 20 minutes.
- Step 6: Rest and serve. Once cooked, let the biryani rest for 10 minutes before gently fluffing the rice with a fork. Serve hot with raita (yogurt dip).
Notes
- Store leftover biryani in an airtight container in the refrigerator for up to 3 days.
- Reheat individual portions in the microwave with a splash of water to prevent drying, or gently steam on the stovetop.
- Garnish with fresh cilantro and mint leaves in addition to the reserved fried onions for an extra burst of flavor.
- For the most tender chicken, marinate overnight; the yogurt tenderizes the meat beautifully.
- Prep Time: 15 minutes
- Cook Time: 20 minutes
- Method: Stovetop
- Cuisine: American
FAQs :
What makes this Authentic Indian Restaurant-Style Chicken Biryani recipe so special?
Okay, picture this: you’re craving that incredible biryani from your favorite Indian place, but you’re wearing your comfiest pajamas and the thought of leaving the house is…well, criminal. This recipe is your superhero! It meticulously recreates that restaurant-quality flavor, aroma, and fluffy texture, all from the comfort of your own kitchen. It’s not just a recipe; it’s a culinary adventure, minus the taxi fare and awkward small talk with the waiter. Get ready to impress yourself, your family, and maybe even your pet goldfish with your newfound biryani skills!
Can I use a different type of chicken for this Ultimate Chicken Biryani recipe?
Absolutely! While this recipe sings with chicken thighs (because, let’s be honest, they’re juicy and forgiving), you can definitely switch things up. Chicken breasts will work, but be mindful of cooking time to avoid them drying out. You could even use boneless, skinless chicken pieces if you’re feeling fancy. The beauty of this recipe is its adaptability. Just remember to adjust cooking times accordingly, and you’ll be golden! Feel free to experiment and discover your personal preference for the most Amazing Ultimate Chicken Biryani.
How do I prevent my Chicken Biryani from becoming mushy?
Ah, the dreaded mushy biryani! Fear not, my friend, for I have tips! First, make sure your rice is parboiled correctly. We want slightly firm grains, not fully cooked ones. Secondly, avoid overcrowding the pot. Too much moisture leads to mush. And finally, resist the urge to stir excessively while layering and steaming. A gentle hand is key. If you follow these guidelines, you’ll be serving up fluffy, flavorful biryani that even a seasoned chef would envy.
What’s the best way to reheat leftover Authentic Indian Restaurant-Style Chicken Biryani?
Nobody wants sad, dry biryani leftovers. The secret? Moisture! Add a splash of chicken broth or water when reheating, cover tightly, and microwave in short bursts, stirring occasionally. This will help to rehydrate the rice and prevent it from drying out. Alternatively, you can reheat it in a pan on the stovetop over low heat, again with a splash of liquid and a lid. Leftover biryani can be just as delicious as the first time around – maybe even better!


Leave a Comment