
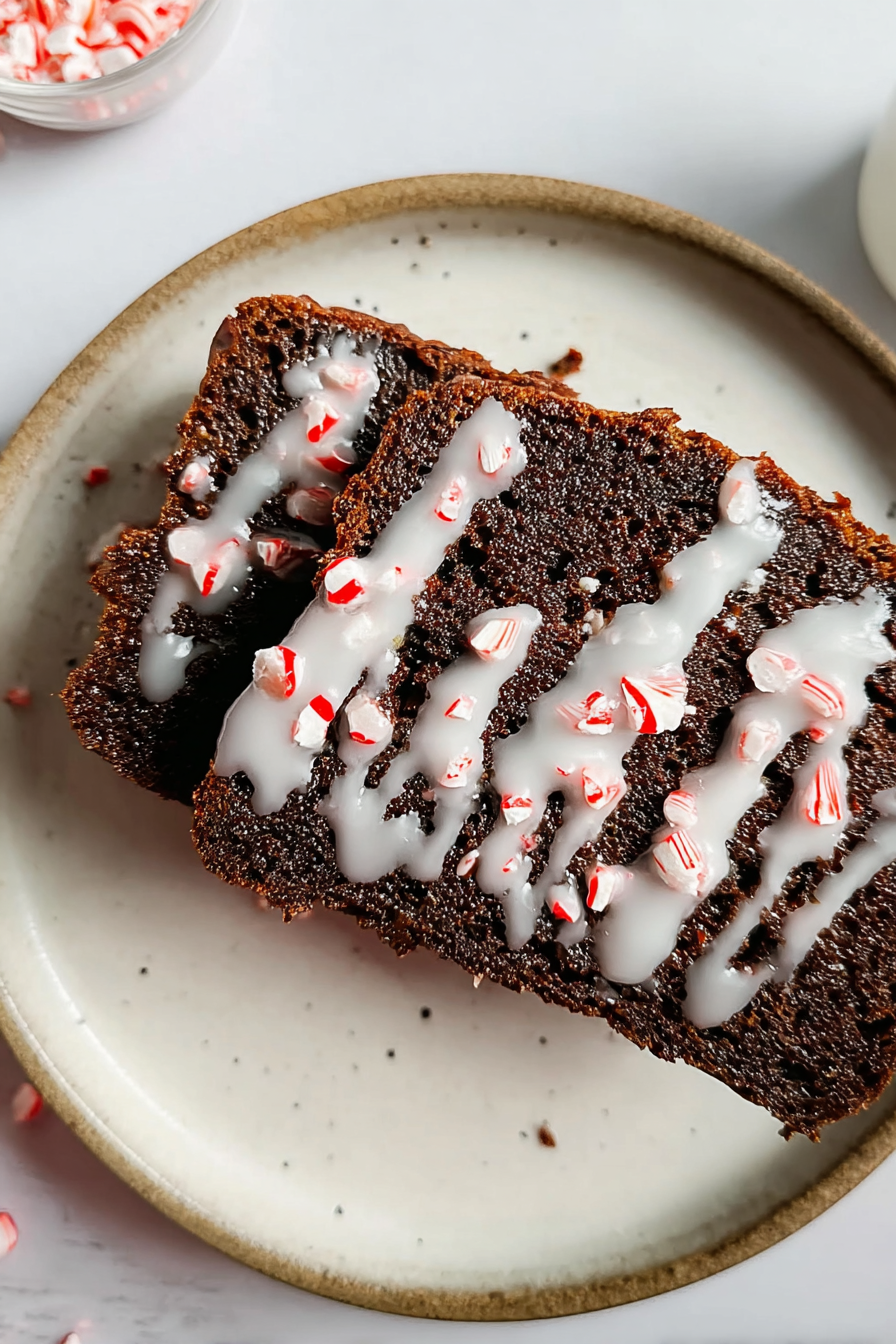
Picture this: the aroma of rich chocolate swirled with the refreshing zing of peppermint, baking into a loaf that’s as comforting as a warm hug on a chilly day. A slice of Chocolate Peppermint Bread is more than just dessert; it’s an experience.
This isn’t just any bread; it’s a symphony of flavors dancing on your tongue, a delightful escape into a winter wonderland of taste. Imagine serving warm slices at your next holiday gathering, guaranteed to impress everyone around. Get ready to bake a treat that is easy, visually appealing, and bursting with the perfect balance of rich chocolate and refreshing peppermint.
Here are a few reasons why you’ll absolutely adore this Chocolate Peppermint Bread:
- Effortlessly create a bakery-worthy treat with simple steps and readily available ingredients, making it perfect for bakers of all skill levels.
- Indulge in the delightful combination of rich chocolate and cool peppermint, delivering a flavor profile that is both comforting and invigorating.
- Impress your friends and family with a beautifully swirled loaf that looks as good as it tastes, making it a stunning centerpiece for any occasion.
- Enjoy this bread as a dessert, snack, or even a unique breakfast treat; its versatility makes it a delightful addition to any meal.
Ingredients for Chocolate Peppermint Bread
Here’s what you’ll need to make this delicious dish:
The full ingredients list, including measurements, is provided in the recipe card directly below.
How to Make Chocolate Peppermint Bread
Follow these simple steps to prepare this delicious dish:
Step 1: Prep and Preheat
Preheat your oven to 350°F (175°C). Grease and flour a 9×5 inch loaf pan to prevent sticking. Trust me, this step is crucial unless you enjoy the thrill of excavating bread from a pan.
Step 2: Whisk the Dry Ingredients
In a large bowl, whisk together the flour, cocoa powder, sugar, baking powder, and salt. This ensures that the baking powder is evenly distributed. Nobody wants a surprise salty bite.
Step 3: Combine the Wet Ingredients
In a separate bowl, whisk together the eggs, vegetable oil, milk, peppermint extract, and Alcohol-free vanilla extract. Make sure everything is well combined for a smooth batter.
Step 4: Mix Wet and Dry
Gradually add the wet ingredients to the dry ingredients, mixing until just combined. Be careful not to overmix; a few lumps are okay. Overmixing leads to tough bread, and nobody wants tough love from their loaf.
Step 5: Add Chocolate Chips
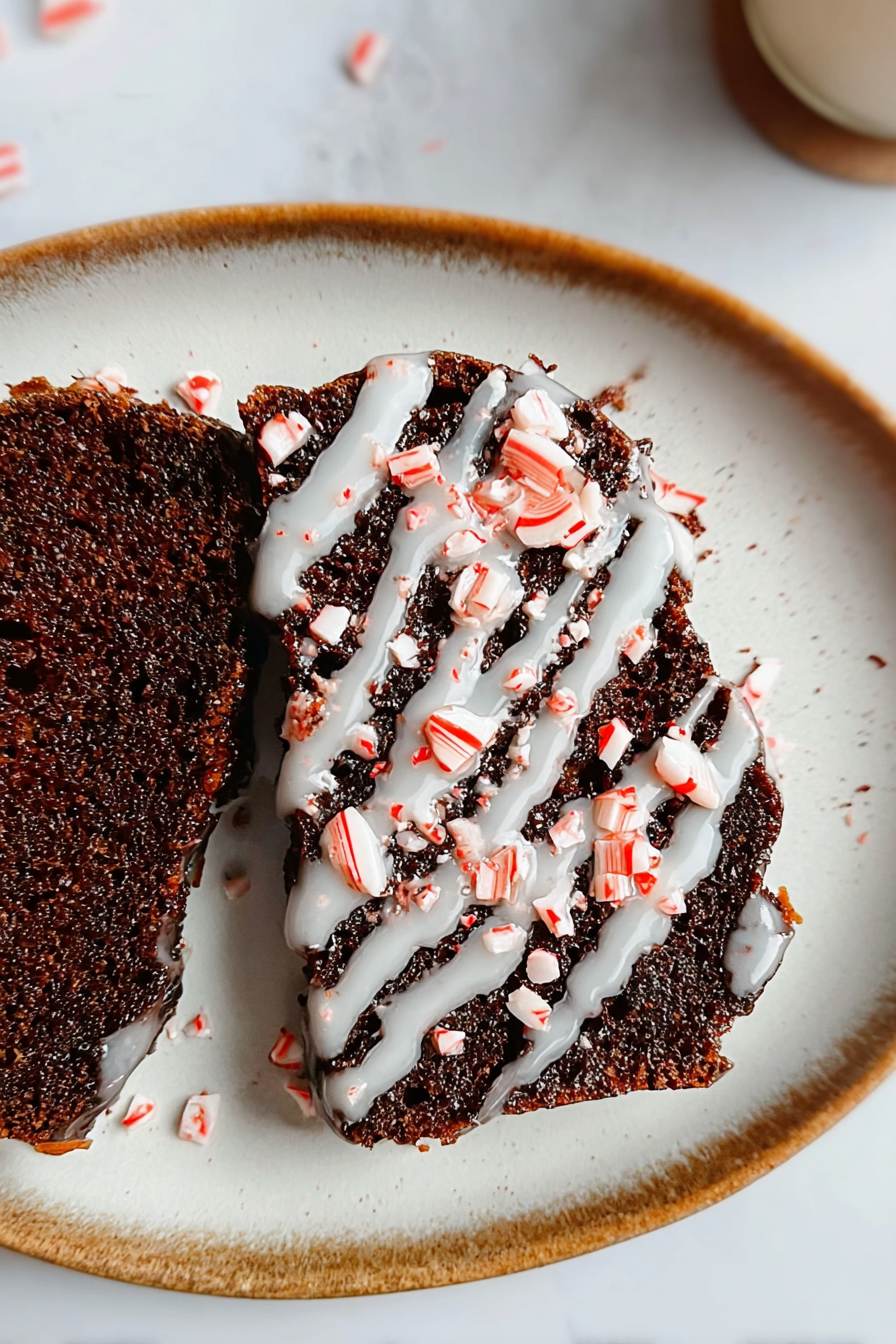
Gently fold in the chocolate chips and half of the crushed peppermint candies. This ensures they are evenly distributed throughout the batter. Reserve the remaining peppermint candies for topping.
Step 6: Bake to Perfection
Pour the batter into the prepared loaf pan and sprinkle the remaining crushed peppermint candies on top. Bake for 50-60 minutes, or until a toothpick inserted into the center comes out clean. Let the bread cool in the pan for 10 minutes before transferring it to a wire rack to cool completely.
Step 7: Slice and Serve
Once cooled, slice and serve this delightful Chocolate Peppermint Bread. Enjoy it with a cup of hot cocoa or coffee for the perfect winter treat.
Tips for the Best Chocolate Peppermint Bread
Want to elevate your Chocolate Peppermint Bread game? Here are a few tricks up my sleeve:
- **Use Quality Ingredients:** The better the ingredients, the better the bread. Splurge on good cocoa powder and peppermint extract for the best flavor.
- **Don’t Overmix:** Overmixing develops the gluten in the flour, resulting in a tough bread. Mix until just combined for a tender crumb.
- **Cool Completely:** Resist the urge to slice the bread while it’s still warm. Allowing it to cool completely ensures it holds its shape and is easier to slice.
- **Add a Glaze:** For an extra touch of sweetness, drizzle a simple glaze over the cooled bread. Mix powdered sugar with a little milk and peppermint extract for a festive finish.
Variations on Chocolate Peppermint Bread
Feel like getting creative? Here are a few fun variations you can try:
Chocolate Peppermint Swirl Bread
Divide the batter in half. Mix one half with extra cocoa powder for a richer chocolate flavor. Swirl the two batters together in the loaf pan for a beautiful marbled effect.
Chocolate Peppermint Chip Bread
Instead of semi-sweet chocolate chips, use dark chocolate or white chocolate chips. Each variation offers a unique twist on the classic flavor.
Chocolate Peppermint Coffee Cake
Transform this bread into a coffee cake by adding a crumb topping. Mix flour, sugar, butter, and a pinch of cinnamon for a delicious, crunchy topping.
Serving Suggestions for Chocolate Peppermint Bread
This Chocolate Peppermint Bread is incredibly versatile. Here are a few serving suggestions to get you started:
- **Breakfast Treat:** Slice and toast a piece of bread for a decadent breakfast. Spread with a little butter or cream cheese for extra indulgence.
- **Dessert Delight:** Serve warm slices with a scoop of vanilla ice cream or a dollop of whipped cream.
- **Holiday Gift:** Wrap a loaf in festive paper and give it as a homemade holiday gift. It’s a thoughtful and delicious present.
- **Party Platter:** Arrange slices on a platter with other holiday treats for a festive party display.
Storing Your Chocolate Peppermint Bread
Proper storage ensures your Chocolate Peppermint Bread stays fresh and delicious:
- **Room Temperature:** Store in an airtight container at room temperature for up to 3 days.
- **Refrigerator:** For longer storage, wrap tightly in plastic wrap and store in the refrigerator for up to a week.
- **Freezer:** For even longer storage, wrap tightly in plastic wrap and then in foil, and freeze for up to 2 months. Thaw overnight in the refrigerator before serving.
Why This Chocolate Peppermint Bread Recipe Works
This recipe is a winner because it strikes the perfect balance of flavors and textures:
- **Rich Chocolate Flavor:** The cocoa powder and chocolate chips provide a deep, satisfying chocolate flavor.
- **Refreshing Peppermint Zing:** The peppermint extract and crushed peppermint candies add a bright, refreshing kick.
- **Moist and Tender Crumb:** The vegetable oil and milk keep the bread moist and tender.
- **Easy to Make:** The simple steps and readily available ingredients make this recipe accessible to bakers of all skill levels.
Final Thoughts on Chocolate Peppermint Bread
This Chocolate Peppermint Bread is more than just a recipe; it’s a celebration of flavors, a nod to the holiday season, and a testament to the joy of baking. Whether you’re a seasoned baker or a kitchen novice, this recipe is sure to bring a smile to your face and warmth to your heart. So go ahead, preheat that oven, and let the magic begin!
Perfecting the Cooking Process
To achieve the best results with this **chocolate peppermint bread**, follow this streamlined approach: First, prepare your dry ingredients. Next, melt your butter and chocolate. Combine wet and dry, and bake until a toothpick comes out clean. This method ensures a uniformly textured loaf.
Add Your Touch
Want to personalize your **chocolate peppermint bread**? Try swapping the semi-sweet chocolate for dark chocolate for a richer flavor. Add a dash of Alcohol-free vanilla extract or alcohol-free almond extract for an extra layer of deliciousness. Consider swirling in cream cheese for a decadent treat.
Storing & Reheating
To keep your **chocolate peppermint bread** fresh, store it in an airtight container at room temperature for up to three days. For longer storage, freeze it. Reheat individual slices in the microwave or oven to restore its warm, comforting texture and flavor.
Here are a few tips to ensure your **chocolate peppermint bread** turns out perfectly:
- Don’t overmix the batter; gently fold the wet and dry ingredients until just combined to prevent a tough loaf.
- Use a toothpick to test for doneness. If it comes out with moist crumbs, bake for a few more minutes.
- Let the bread cool completely before slicing to avoid it crumbling and to ensure a clean cut.
(Personal anecdote formated as paragraph subheading)
I remember the first time I made this bread, my kids devoured it in minutes! It became a holiday tradition and a constant request. The joy it brings is truly heartwarming.
The Story Behind This Chocolate Peppermint Bread
Okay, let’s be real. Baking isn’t always sunshine and sprinkles. Sometimes, it’s more like flour explosions and sugar avalanches. But that’s part of the fun, right? This recipe for **chocolate peppermint bread**? Well, it’s been refined through many such adventures. I like to call them “learning experiences,” but my kitchen sometimes refers to them as “mini-disasters.”
It all started one Winter holiday. I was determined to create the ultimate holiday bread, something that screamed festive cheer with every single bite. I envisioned a symphony of chocolate and peppermint, a dance of flavors that would make everyone sing carols. What I actually created was a dense, slightly burnt, and overwhelmingly pepperminty brick. Not exactly the Winter holiday miracle I was hoping for.
But, like any good baker (or mildly crazy person), I didn’t give up. I tweaked, I adjusted, I experimented. I consulted with my grandma (who, let’s be honest, knows more about baking than Google ever will). And finally, after many trials and tribulations, I landed on this recipe. A recipe that’s not only delicious but also surprisingly easy to make.
This **chocolate peppermint bread** is more than just a recipe; it’s a testament to perseverance, a celebration of holiday flavors, and a reminder that even kitchen disasters can lead to something amazing. So, grab your apron, preheat your oven, and let’s get baking! And don’t worry if things get a little messy. That’s just part of the charm.
Why Chocolate Peppermint? Because Delicious!
Let’s get one thing straight: chocolate and peppermint are a match made in heaven. It’s a flavor combination that’s both comforting and invigorating, rich and refreshing. It’s the culinary equivalent of a warm hug on a cold winter day. And this **chocolate peppermint bread** perfectly captures that magic.
The dark, decadent chocolate provides a rich, grounding base, while the peppermint adds a bright, zesty kick that cuts through the sweetness. It’s a flavor contrast that’s incredibly satisfying and utterly addictive. Trust me, once you’ve tried this bread, you’ll be hooked.
But the appeal of this **chocolate peppermint bread** goes beyond just the flavor. It’s also about the texture. This bread is soft, moist, and slightly chewy, with a delicate crumb that practically melts in your mouth. It’s the kind of bread that you can’t help but reach for another slice of, even when you’re already full.
And let’s not forget about the aroma! The scent of warm chocolate and peppermint wafting through your kitchen is enough to make anyone’s mouth water. It’s a sensory experience that’s both comforting and exciting, a promise of deliciousness to come.
So, why **chocolate peppermint bread**? Because it’s simply irresistible. It’s a flavor combination that’s guaranteed to please, a texture that’s incredibly satisfying, and an aroma that’s utterly intoxicating. What’s not to love?
Ingredients: The Magic Makers
Now, let’s talk ingredients. Because, let’s face it, even the best recipe is only as good as the ingredients you use. And this **chocolate peppermint bread** is no exception.
- **Flour:** All-purpose flour is the workhorse of this recipe, providing structure and substance to the bread. Make sure to measure it accurately for the best results. A little too much, and your bread could be dry.
- **Sugar:** Granulated sugar adds sweetness and moisture to the bread, while also helping to create a tender crumb.
- **Eggs:** Eggs bind the ingredients together and add richness and moisture to the bread. They also help to create a light and airy texture.
- **Butter:** Melted butter adds flavor and moisture to the bread, creating a rich and decadent taste.
- **Chocolate:** Semi-sweet chocolate chips are the star of the show, providing that irresistible chocolate flavor that we all know and love.
- **Peppermint Extract:** Peppermint extract is what gives this bread its signature peppermint flavor. Be careful not to use too much, as it can be overpowering.
- **Baking Powder & Baking Soda:** These leavening agents help the bread to rise, creating a light and airy texture.
- **Salt:** A pinch of salt enhances the flavors of all the other ingredients, creating a more balanced and delicious bread.
- **Buttermilk:** Buttermilk adds a slight tang and helps create a very moist bread. If you do not have buttermilk on hand, you can make your own with milk and lemon juice/vinegar.
These ingredients, when combined in the right proportions, create a bread that is both delicious and satisfying. So, make sure to use high-quality ingredients for the best possible results.
Step-by-Step: Baking Bliss
Alright, it’s time to get down to business and actually bake this **chocolate peppermint bread**. Don’t worry, it’s easier than you might think. Just follow these simple step-by-step instructions, and you’ll be enjoying a warm slice of heaven in no time.
1. **Preheat and Prep: ** Preheat your oven to 350°F (175°C). Grease and flour a loaf pan to prevent sticking. This step is crucial. Trust me, you don’t want to spend hours scrubbing a burnt loaf pan.
2. **Combine Dry Ingredients: ** In a large bowl, whisk together the flour, sugar, baking powder, baking soda, and salt. This ensures that all the dry ingredients are evenly distributed.
3. **Melt Chocolate and Butter: ** In a microwave-safe bowl, melt the chocolate chips and butter together in 30-second intervals, stirring in between, until smooth. Be careful not to overheat the chocolate. Burnt chocolate is a sad chocolate.
4. **Combine Wet and Dry: ** Add the melted chocolate mixture, eggs, buttermilk, and peppermint extract to the dry ingredients. Mix until just combined. Don’t overmix! Overmixing can lead to a tough bread.
5. **Pour into Pan and Bake: ** Pour the batter into the prepared loaf pan and bake for 50-60 minutes, or until a toothpick inserted into the center comes out clean.
6. **Cool and Enjoy: ** Let the bread cool in the pan for 10 minutes before transferring it to a wire rack to cool completely. Slice and enjoy!
See? I told you it was easy! Now, go forth and bake some **chocolate peppermint bread**!
Troubleshooting: Common Baking Blunders
Even with the best recipe and the most careful instructions, baking can sometimes be a bit unpredictable. So, let’s address some common baking blunders that you might encounter while making this **chocolate peppermint bread**.
- **Dry Bread:** If your bread is dry, it could be due to overbaking or using too much flour. Make sure to measure your flour accurately and keep a close eye on the bread while it’s baking.
- **Dense Bread:** If your bread is dense, it could be due to overmixing the batter or using expired leavening agents. Be gentle when mixing the wet and dry ingredients, and make sure your baking powder and baking soda are fresh.
- **Burnt Bread:** If your bread is burnt on the outside but still raw on the inside, it could be due to baking at too high of a temperature. Try lowering the oven temperature and baking for a longer period of time.
- **Uneven Texture:** If your bread has an uneven texture, it could be due to uneven mixing or uneven heat distribution in your oven. Make sure to mix the batter thoroughly and rotate the loaf pan halfway through baking.
Don’t get discouraged if you encounter any of these problems. Baking is a learning process, and even experienced bakers make mistakes sometimes. Just keep practicing, and you’ll be baking perfect **chocolate peppermint bread** in no time!
Serving Suggestions: Beyond the Slice
Okay, you’ve baked your **chocolate peppermint bread**, and it looks absolutely amazing. Now, what do you do with it? Well, besides devouring it slice after slice, of course! Here are a few serving suggestions to take your **chocolate peppermint bread** experience to the next level.
- **Warm with Butter:** A classic for a reason. A warm slice of **chocolate peppermint bread** slathered with butter is pure comfort food.
- **Toasted with Cream Cheese:** Toast a slice of bread and spread it with cream cheese for a decadent breakfast or snack.
- **French Toast:** Use slices of **chocolate peppermint bread** to make French toast for a festive and flavorful twist.
- **Bread Pudding:** Turn leftover bread into a delicious bread pudding for a sweet and satisfying dessert.
- **Ice Cream Sundae:** Crumble **chocolate peppermint bread** over ice cream for a fun and festive sundae topping.
These are just a few ideas to get you started. Feel free to get creative and experiment with your own serving suggestions. The possibilities are endless!
Chocolate Peppermint Bread: A Year-Round Treat
While **chocolate peppermint bread** is often associated with the holidays, there’s no reason why you can’t enjoy it year-round. After all, who says you need a special occasion to indulge in a little bit of deliciousness?
So, whether it’s Winter holiday in July, a summer picnic, or just a random Tuesday, go ahead and bake yourself a loaf of **chocolate peppermint bread**. You deserve it! And who knows, maybe you’ll start a new tradition.
After all, the best traditions are the ones that bring joy and happiness to your life. And what could be more joyful than a warm slice of **chocolate peppermint bread**?
Happy baking!
Conclusion for Chocolate Peppermint Bread:
In short, this **chocolate peppermint bread** is more than just a recipe; it’s an invitation to create joyful memories. With its moist texture, rich chocolate flavor, and refreshing peppermint twist, it’s sure to become a beloved treat for every occasion. Easy to bake and even easier to devour, it’s a delightful way to spread holiday cheer. So, gather your ingredients, preheat that oven, and get ready to bake a loaf of happiness. Happy baking!
Print
Chocolate Peppermint Bread
Delicious chocolate peppermint bread recipe with detailed instructions and nutritional information.
- Total Time: 35 minutes
- Yield: 4 servings
Ingredients
- All-purpose flour: 2 1/2 cups
- Unsweetened cocoa powder: 1/2 cup
- Granulated sugar: 1 cup
- Baking soda: 1 teaspoon
- Salt: 1/2 teaspoon
- Buttermilk: 1 cup
- Vegetable oil: 1/4 cup
- Peppermint extract: 1 teaspoon
- Crushed peppermint candies: 1/2 cup
Instructions
- Step 1: Preheat oven to 350°F (175°C). Grease and flour a 9×5 inch loaf pan.
- Step 2: In a large bowl, whisk together flour, cocoa powder, sugar, baking soda, and salt.
- Step 3: In a separate bowl, combine buttermilk, oil, and peppermint extract.
- Step 4: Add the wet ingredients to the dry ingredients and mix until just combined. Do not overmix. Gently fold in the crushed peppermint candies.
- Step 5: Pour the batter into the prepared loaf pan and bake for 50-60 minutes, or until a wooden skewer inserted into the center comes out clean.
- Step 6: Let the bread cool in the pan for 10 minutes before transferring it to a wire rack to cool completely.
Notes
- To keep your bread moist, store it tightly wrapped at room temperature for up to 3 days.
- For a warm, melty peppermint experience, try reheating individual slices in the microwave for 10-15 seconds.
- Serve slices with a dollop of whipped cream or a scoop of vanilla ice cream for an extra festive treat.
- Don't skip sifting the cocoa powder; this will ensure a smooth batter without any bitter lumps.
- Prep Time: 15 minutes
- Cook Time: 20 minutes
- Method: Stovetop
- Cuisine: American
FAQs:
How do I store my Chocolate Peppermint Bread?
Storing this bread is a breeze! Once it has completely cooled, wrap the loaf tightly in plastic wrap or aluminum foil to keep it moist. Alternatively, you can store it in an airtight container. For longer storage, you can freeze the wrapped loaf for up to two months. When you’re ready to enjoy it, thaw it overnight in the refrigerator. A quick zap in the microwave can also freshen up a slice. This easy storage ensures you always have a slice of deliciousness ready to go!
Can I make Chocolate Peppermint Bread ahead of time?
Absolutely! This bread is a fantastic make-ahead option. Bake it a day or two in advance, let it cool completely, and then wrap it well before storing it in the refrigerator. The flavors actually meld together and intensify over time, making it even more delicious! When you’re ready to serve, you can slice it up and enjoy. Making it ahead of time also frees up your schedule, letting you enjoy the holiday season without any last-minute baking stress.
What can I serve with Chocolate Peppermint Bread?
This bread is incredibly versatile! It’s fantastic on its own with a cup of coffee or tea. You can also serve it with a scoop of vanilla ice cream for a decadent dessert. A drizzle of melted chocolate or a dollop of whipped cream will elevate it even further. For a festive touch, try serving it with cranberry sauce or a side of orange slices. It’s the perfect treat for breakfast, brunch, or a delightful afternoon snack.
Can I customize my Chocolate Peppermint Bread?
Of course! Feel free to get creative with your loaf. You could add chopped walnuts or pecans for extra texture. Swirling in a layer of cream cheese filling before baking will add richness and tanginess. For a brighter peppermint flavor, increase the amount of peppermint extract slightly. If you’re not a fan of dark chocolate, substitute milk chocolate chips. Get creative and tailor the recipe to your own tastes!


Leave a Comment