

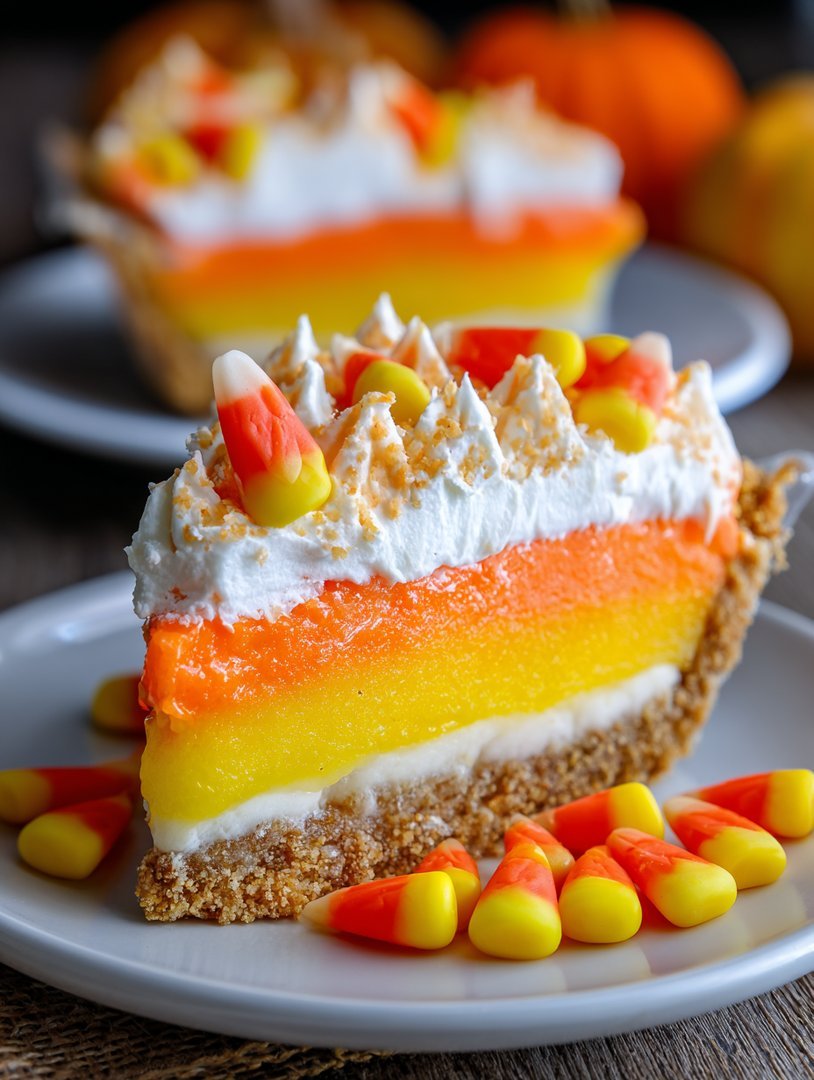
Oh, the siren song of sugar! Just imagine sinking your fork into a fluffy, tri-colored dream: our Layered Candy Corn Pie. This isn’t just dessert; it’s a nostalgic hug, a sweet memory in every single bite.
Fall festivals, cozy sweaters, and the undeniable charm of candy corn – all these wonderful things inspired our decadent Layered Candy Corn Pie. This pie isn’t just a recipe; it’s a celebration of flavors, textures, and the pure joy of creating something amazing. Get ready for a taste adventure that will have everyone begging for a second slice!
Here are a few reasons why you’ll absolutely adore this recipe:
- Effortless assembly makes it a perfect treat for both seasoned bakers and kitchen novices ready to impress.
- The combination of creamy, smooth layers with the sweet, subtle candy corn flavor creates a delightful flavor symphony.
- Its vibrant, colorful presentation makes this layered pie the star of any dessert table, perfect for celebrations.
- Adaptable and versatile, this pie is not only delightful as is, but also serves as a creative canvas for your favorite toppings.
Ingredients for Layered Candy Corn Pie
Here’s what you’ll need to make this delicious dish:
The full ingredients list, including measurements, is provided in the recipe card directly below.
How to Make Layered Candy Corn Pie
Follow these simple steps to prepare this delicious dish:
Step 1: Prepare the Crust
Press the graham cracker crust firmly into the pie dish. If you are feeling ambitious, you can make your own, but a store-bought crust works just fine! Place it in the freezer while you prepare the filling.
Step 2: Make the First Layer (White)
In a large bowl, beat the softened cream cheese and powdered sugar until smooth and creamy. Gently fold in one-third of the whipped heavy cream and vanilla extract. Be careful not to overmix. Pour this mixture evenly over the chilled graham cracker crust and refrigerate for at least 30 minutes.
Step 3: Make the Second Layer (Orange)
In a clean bowl, combine another batch of cream cheese and powdered sugar, beating until smooth. Fold in one-third of the whipped heavy cream and add a few drops of orange food coloring until you reach your desired shade. Now is the time to add half of your agar-agar prepared according to package instructions. Gently spread this layer over the chilled white layer and return the pie to the refrigerator for another 30 minutes.
Step 4: Make the Third Layer (Yellow)
Repeat the process one last time, combining cream cheese, powdered sugar, the last portion of whipped heavy cream, and yellow food coloring in a clean bowl. Incorporate the remaining agar-agar according to package instructions. Spread this layer evenly over the orange layer.
Step 5: Decorate and Chill
Arrange the candy corn in a decorative pattern on top of the yellow layer. Think of it as edible art! Cover the pie loosely with plastic wrap and refrigerate for at least 4 hours, or preferably overnight, to allow the layers to set completely.
Step 6: Serve and Enjoy
Remove the Layered Candy Corn Pie from the refrigerator about 15 minutes before serving to allow it to soften slightly. Cut into slices and prepare for a chorus of “oohs” and “aahs.” This pie is best served chilled and enjoyed with good company!
Perfecting the Cooking Process
The secret to dessert success lies in the sequence. Start by pre-baking the crust to golden perfection. While it cools, meticulously prepare each colorful layer of the candy corn filling. Finally, patiently layer them for a visually stunning treat.
Add Your Touch
Feeling adventurous? Infuse the crust with ginger snaps for a spicy kick, or swap the vanilla extract for almond. For the filling, consider adding a hint of citrus zest to brighten the flavors. This Layered Candy Corn Pie is your canvas!
Storing & Reheating
Keep your masterpiece fresh by storing it in the refrigerator, covered, for up to three days. While this pie is best enjoyed chilled, you can let it sit at room temperature for about 15 minutes before serving for optimal flavor.
Tips for Confection Perfection:
- Always let the crust cool completely before adding the filling to prevent a soggy bottom. This is crucial for maintaining a delightful texture.
- Use a gentle hand when layering the fillings. This prevents the colors from mixing and ensures a vibrant, visually appealing pie.
- For an extra smooth filling, use a fine-mesh sieve to strain the mixture before pouring it into the crust, eliminating any lumps.
(Personal anecdote formated as paragraph subheading)
I remember the first time I made this Layered Candy Corn Pie. My little brother, a notorious sweets critic, declared it “better than store-bought!” That’s when I knew I had a winner.
Unveiling the Magic of Layered Candy Corn Pie
Let’s be honest, folks. When you think of sophisticated desserts, “candy corn” probably doesn’t top the list. I get it. It’s often relegated to the Halloween candy graveyard, a sticky sweet afterthought. But hold on to your hats, because we’re about to revolutionize your perception of this iconic, albeit slightly misunderstood, treat. We’re diving headfirst into the whimsical world of the Layered Candy Corn Pie.
Forget everything you thought you knew about candy corn. This isn’t about haphazardly tossing it into a crust and calling it a day. We’re talking about a meticulously crafted, visually stunning, and surprisingly delicious dessert that will have your guests begging for the recipe. Think of it as a candy corn makeover, a Cinderella story for your taste buds.
And the best part? It’s ridiculously fun to make. Seriously, if you’re looking for a baking project that’s equal parts therapeutic and Instagram-worthy, you’ve struck gold. Prepare to unleash your inner artist as you create the vibrant layers that define this captivating pie.
The Anatomy of an Amazing Layered Candy Corn Pie
So, what exactly makes this Layered Candy Corn Pie so darn special? Let’s break it down, layer by delicious layer:
The Crust: The Foundation of Flavor
We’re not skimping on the crust here. Forget those pre-made, cardboard-esque excuses for crusts. We’re going for a buttery, flaky, melt-in-your-mouth masterpiece. You can certainly use your favorite homemade pie crust recipe, or if you’re short on time (we’ve all been there!), a high-quality store-bought crust will do the trick. But remember, quality in equals quality out.
Consider adding a touch of spice to your crust. A pinch of cinnamon or nutmeg can add a warm, comforting note that complements the sweetness of the candy corn. Or, for a more adventurous twist, try incorporating crushed ginger snaps for a subtle, spicy kick.
The Filling: A Symphony of Sweetness
This is where the magic truly happens. The filling is a creamy, dreamy concoction that perfectly balances the sweetness of the candy corn with a hint of vanilla and a touch of tanginess. We’re using a combination of cream cheese, sweetened condensed milk, and a plant-based gelatin alternative to create a smooth, stable filling that sets beautifully.
And of course, the star of the show: the candy corn! We’re melting it down and incorporating it into the filling to create those iconic layers. But here’s the key: we’re not just throwing the candy corn in willy-nilly. We’re separating it by color and creating individual fillings for each layer. This is what gives the pie its stunning visual appeal.
The Layers: A Work of Art
This is where your inner artist gets to shine. The layering process is surprisingly simple, but it requires a little patience and attention to detail. Start with the yellow layer, then the orange, and finally the white. Be sure to let each layer set slightly before adding the next to prevent the colors from bleeding together.
For extra precision, use an offset spatula to gently spread each layer evenly. And don’t worry if it’s not perfect! A little bit of imperfection adds to the charm of this whimsical dessert.
Ingredients: Gather Your Candy Corn Cavalry
Okay, let’s get down to the nitty-gritty. Here’s what you’ll need to embark on your Layered Candy Corn Pie adventure:
- **For the Crust:**
- 1 1/2 cups all-purpose flour
- 1/2 teaspoon salt
- 1/2 cup (1 stick) cold unsalted butter, cut into cubes
- 1/4 cup cold vegetable shortening, cut into cubes
- 5-7 tablespoons ice water
- **For the Filling:**
- 8 ounces cream cheese, softened
- 1 (14 ounce) can sweetened condensed milk
- 1 teaspoon vanilla extract
- 1 teaspoon plant-based gelling agent (agar-agar, pectin, or carrageenan)
- 1/4 cup water
- 1 (11 ounce) bag candy corn, separated by color
**Important Notes: **
- Make sure your butter and shortening are *cold*. This is crucial for creating a flaky crust.
- Don’t overwork the dough. Overworking the dough will develop the gluten, resulting in a tough crust.
- When separating the candy corn, try to be as precise as possible. This will ensure that the layers are vibrant and distinct.
Step-by-Step Instructions: Let’s Get Baking!
Alright, gather your ingredients, preheat your oven, and let’s get this party started!
1. **Make the Crust: ** In a large bowl, whisk together the flour and salt. Cut in the butter and shortening using a pastry blender or your fingers until the mixture resembles coarse crumbs. Gradually add the ice water, one tablespoon at a time, mixing until the dough just comes together. Form the dough into a disk, wrap it in plastic wrap, and refrigerate for at least 30 minutes.
2. **Pre-bake the Crust: ** On a lightly floured surface, roll out the dough into a 12-inch circle. Transfer the dough to a 9-inch pie plate, trim the edges, and crimp. Prick the bottom of the crust with a fork. Line the crust with parchment paper and fill with pie weights or dried beans. Bake in a preheated oven at 375°F (190°C) for 15 minutes. Remove the parchment paper and pie weights and bake for another 5-10 minutes, or until the crust is golden brown. Let cool completely.
3. **Prepare the Filling: ** In a small saucepan, combine the plant-based gelling agent with 1/4 cup of water. Let it sit for 5 minutes to bloom. Heat over low heat, stirring constantly, until dissolved. Remove from heat and let cool slightly.
4. **Make the Layers: ** In a large bowl, beat the softened cream cheese until smooth. Gradually add the sweetened condensed milk and vanilla extract, mixing until well combined. Divide the mixture into three equal bowls.
5. **Color the Layers: ** In separate microwave-safe bowls, melt the yellow, orange, and white candy corn in the microwave for 30-second intervals, stirring in between, until smooth. Stir the melted yellow candy corn into one bowl of the cream cheese mixture, the melted orange candy corn into another, and the melted white candy corn into the last. Stir in a portion of the dissolved gelling agent mixture into each bowl.
6. **Layer the Pie: ** Pour the yellow filling into the cooled crust. Spread evenly and refrigerate for 30 minutes, or until set. Repeat with the orange filling, and then the white filling, refrigerating for 30 minutes between each layer.
7. **Chill and Serve: ** Once all the layers are set, refrigerate the pie for at least 2 hours before serving. Garnish with extra candy corn, if desired.
Troubleshooting: Tackling Common Pie Problems
Even the most seasoned bakers encounter occasional mishaps. Here are a few common problems and how to fix them:
- **Soggy Crust:** Make sure to pre-bake your crust properly. Blind baking is your friend! Also, ensure the crust is completely cool before adding the filling.
- **Lumpy Filling:** Ensure that the cream cheese is fully softened before mixing. If lumps persist, use an immersion blender to smooth out the filling.
- **Colors Bleeding:** Let each layer set completely before adding the next. Patience is key! If the colors do bleed slightly, don’t panic. It’ll still taste delicious.
Variations and Twists: Unleash Your Creativity
The beauty of this Layered Candy Corn Pie is that it’s incredibly versatile. Here are a few ideas to get your creative juices flowing:
- **Chocolate Crust:** Use a chocolate graham cracker crust for a richer, more decadent flavor.
- **Peanut Butter Layer:** Add a layer of peanut butter filling for a salty-sweet twist.
- **Sprinkle Topping:** Top the pie with festive sprinkles for an extra pop of color and fun.
Remember, there are endless possibilities when it comes to customizing this Layered Candy Corn Pie. Don’t be afraid to experiment and make it your own! Embrace the whimsy, embrace the fun, and most importantly, embrace the candy corn! Now go forth and bake! You got this!
Conclusion for Layered Candy Corn Pie :
So, there you have it! Layered Candy Corn Pie is more than just a dessert; it’s a delightful, festive centerpiece. Remember the key is patience, chilled layers, and a little creativity. Feel free to experiment with flavors and crusts to make it your own. With its striking colors and sweet taste, this pie is guaranteed to impress. Now go forth and bake some happiness! This pie will bring joy to any gathering.
Print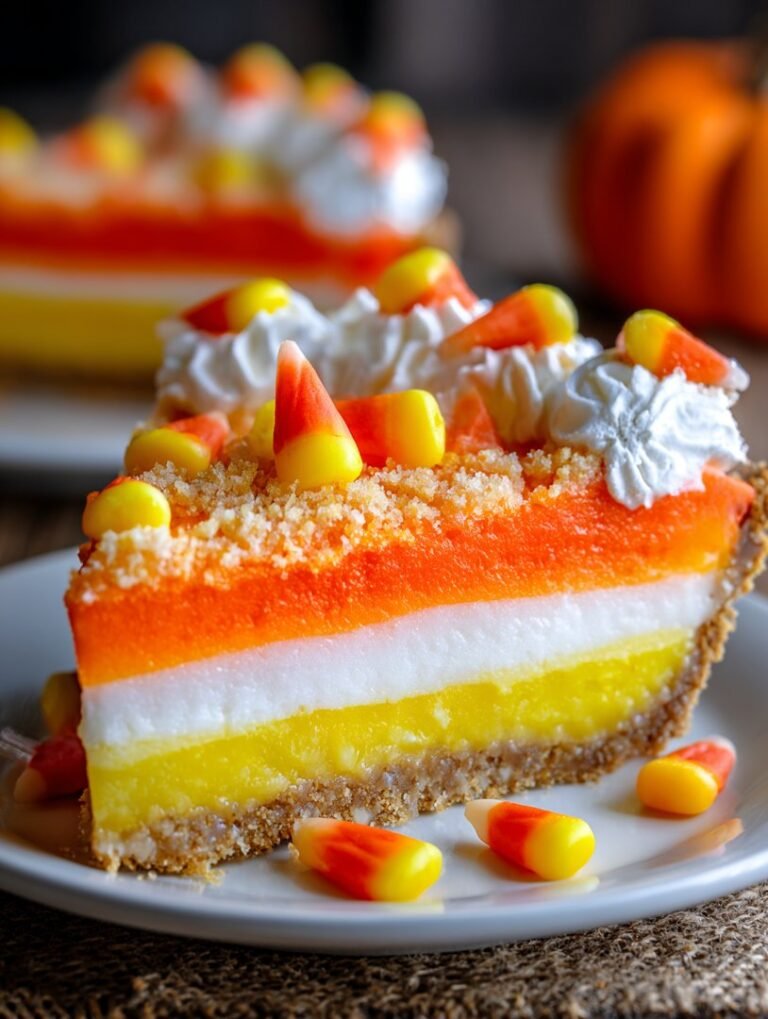
Layered Candy Corn Pie
Delicious layered candy corn pie recipe with detailed instructions and nutritional information.
- Total Time: 35 minutes
- Yield: 4 servings
Ingredients
- Graham cracker crumbs: 1 1/2 cups
- Melted butter: 6 tablespoons
- Cream cheese, softened: 8 ounces
- Powdered sugar: 1 cup
- Heavy cream: 1 1/2 cups, divided
- Vanilla extract: 1 teaspoon
- Yellow gel food coloring
- Orange gel food coloring
Instructions
- Step 1: Combine graham cracker crumbs and melted butter. Press into the bottom of a 9-inch pie plate to form the crust. Chill in the refrigerator for at least 30 minutes.
- Step 2: In a large bowl, beat cream cheese and powdered sugar until smooth and creamy.
- Step 3: In a separate bowl, whip 1 cup of heavy cream with vanilla extract until stiff peaks form. Gently fold the whipped cream into the cream cheese mixture.
- Step 4: Divide the cream cheese mixture into three equal portions. Leave one portion white. Tint one portion yellow with yellow gel food coloring, and the last portion orange with orange gel food coloring.
- Step 5: Spread the orange cream cheese mixture evenly over the chilled graham cracker crust. Gently spread the yellow layer over the orange layer. Finally, top with the white layer.
- Step 6: Whip the remaining 1/2 cup of heavy cream and decorate the pie with dollops of whipped cream if desired. Refrigerate for at least 2 hours before serving.
Notes
- To prevent a soggy crust, ensure the graham cracker mixture is firmly packed and thoroughly chilled before adding the filling.
- Store leftover pie covered in the refrigerator for up to 3 days, but be aware the crust may soften slightly over time.
- For a festive presentation, garnish each slice with candy corn pieces just before serving to maintain their vibrant color and texture.
- Since gel food coloring is highly concentrated, start with a tiny amount and gradually add more to achieve your desired candy corn hues.
- Prep Time: 15 minutes
- Cook Time: 20 minutes
- Method: Stovetop
- Cuisine: American
FAQs :
What is the best way to achieve distinct layers in my Layered Candy Corn Pie?
Patience, my friend, is the secret ingredient! Allow each layer to set slightly before adding the next. Popping the pie into the fridge for about 15-20 minutes between layers helps immensely. Think of it like building a delicious candy corn skyscraper, one level at a time. Also, ensure your base layer is firm enough to support the weight of the subsequent layers, preventing any unwanted mixing. A little extra time ensures a visually stunning and structurally sound Layered Candy Corn Pie.
Can I make this Layered Candy Corn Pie ahead of time?
Absolutely! In fact, this pie is practically begging to be made ahead. It needs time to chill and set properly anyway. Making it a day or two in advance is a genius move. Just keep it covered tightly in the fridge. That way, when the party rolls around, or you’re just craving a slice of autumnal deliciousness, you can unveil your magnificent Layered Candy Corn Pie without any last-minute stress. Talk about a dessert superhero move!
What can I use instead of vanilla extract in the Layered Candy Corn Pie filling?
If you’re not a vanilla fan (gasp!), or you’re simply out, fear not! A dash of almond extract can add a lovely, subtle nutty flavor. Alternatively, a pinch of ground cinnamon or nutmeg can complement the other flavors beautifully, giving it a warm, cozy vibe. You could even try a tiny bit of maple syrup for extra sweetness and depth. Experiment and see what tickles your taste buds. The important thing is to add a little something to enhance the overall flavor profile of your Layered Candy Corn Pie.
My Layered Candy Corn Pie crust is soggy. What went wrong?
A soggy crust is a sad crust! Several culprits could be at play. First, ensure your crust is fully baked before adding the filling. Blind baking with pie weights is your friend! Also, letting the crust cool completely before adding the filling helps prevent condensation. Finally, avoid overfilling the pie. Too much moisture can seep into the crust and make it soggy. A little planning and careful execution will ensure a perfectly crisp and delightful crust for your Layered Candy Corn Pie.


Leave a Comment