
The bright, tangy burst of a perfectly made Raspberry Sorbet is like sunshine in a spoon. It’s a vibrant dance of sweet and tart that can instantly lift your spirits and refresh your palate.
Imagine the tiny ruby-red jewels, each one a concentrated drop of summer, melting on your tongue, leaving a trail of pure berry bliss. This Raspberry Sorbet recipe is your ticket to creating that magic at home, a delightful dessert that’s both simple and spectacular.
- Effortlessly create this refreshing treat with just a few ingredients and minimal preparation.
- Experience the intense, naturally sweet, and tart flavor of fresh raspberries in every spoonful.
- Impress your guests with its stunning vibrant color, making it a show-stopping dessert.
- Enjoy it as a light dessert, a palate cleanser, or a delightful addition to any celebration.
Ingredients for Raspberry Sorbet
Here’s what you’ll need to make this delicious dish:
The full ingredients list, including measurements, is provided in the recipe card directly below.
How to Make Raspberry Sorbet
Follow these simple steps to prepare this delicious dish:
Step 1: Prepare the Raspberry Puree
In a blender or food processor, combine the fresh raspberries and lemon juice. Blend until completely smooth. You should have a vibrant, beautiful puree.
Step 2: Make the Sugar Syrup
In a saucepan, combine the water, sugar, and corn syrup. Heat over medium heat, stirring constantly, until the sugar is completely dissolved. Let the mixture cool completely.
Step 3: Combine and Churn
Once the sugar syrup is cool, pour it into the raspberry puree. Stir well to combine. Pour the mixture into your ice cream maker and churn according to the manufacturer’s instructions. This usually takes about 20-25 minutes.
Step 4: Freeze for Perfection
After churning, the sorbet will be soft. Transfer it to an airtight container and freeze for at least 2-3 hours, or until firm enough to scoop. This will allow the flavors to meld and the texture to fully develop.
Step 5: The Scoopable Dream
Remove the sorbet from the freezer a few minutes before serving to soften slightly. This will make it easier to scoop and enjoy its delightful texture.
Step 6: Serve and Enjoy!
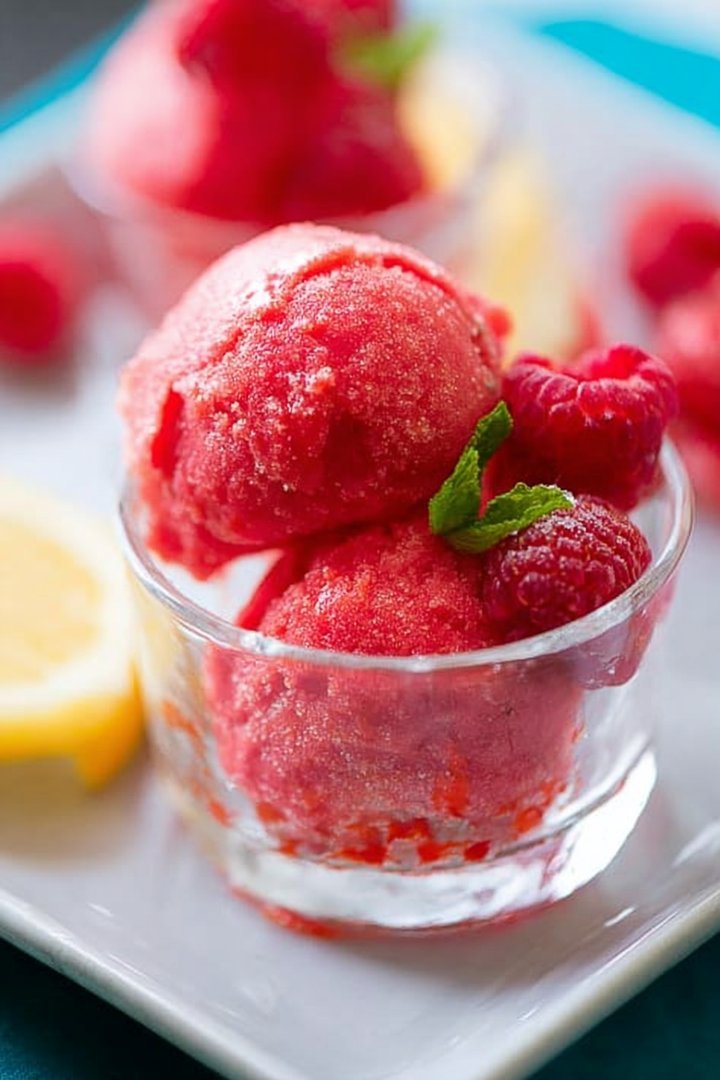
Serve scoops of Raspberry Sorbet in bowls or glasses. Garnish with fresh raspberries or mint sprigs for an extra touch of elegance. Enjoy immediately, and prepare to be transported to berry heaven!
Perfecting the Cooking Process
To achieve the best Raspberry Sorbet, freeze your raspberries first. This step ensures a smoother texture. Blend the frozen raspberries with the sugar syrup until creamy. Finally, churn in an ice cream maker for the perfect consistency. This sequence guarantees a delightful dessert.
Add Your Touch
Feel free to experiment! Substitute blackberries or strawberries for a different flavor profile. A squeeze of lemon juice brightens the taste. For added sweetness, consider a touch of honey. These simple swaps create a personalized Raspberry Sorbet.
Storing & Reheating
Store your Raspberry Sorbet in an airtight container in the freezer. It will keep for up to two weeks. No reheating is necessary; simply scoop and serve. If it becomes too hard, let it sit at room temperature for a few minutes.
Here are a few tips to help you create the perfect Raspberry Sorbet:
- Ensure your raspberries are fully frozen before blending for a smoother, less icy texture. Partial freezing can result in a grainy consistency.
- Don’t over-churn the sorbet in the ice cream maker. Over-churning can cause the sorbet to become too hard and less enjoyable.
- Before serving, let the sorbet sit at room temperature for 5-10 minutes to soften slightly, enhancing its flavor and texture.
(Personal anecdote formated as paragraph subheading (very important! don’t write any title for this paragraph))
I remember the first time I made this for my niece’s birthday. She declared it the “bestest thing ever!” Her sticky raspberry smile was all the validation I needed.
The Allure of Homemade Raspberry Sorbet
Raspberry Sorbet. Just the name conjures images of sunny afternoons, garden parties, and that delightful tingle you get behind your ears when something is just *so* refreshing. Forget those store-bought tubs filled with unpronounceable ingredients and a vague “berry” flavor. We’re talking about the real deal: a vibrant, intensely flavored, homemade Raspberry Sorbet that will make your taste buds sing opera.
Why bother making your own sorbet? Well, for starters, you control the ingredients. No mystery additives, no artificial colors that make your tongue glow in the dark. Just pure, unadulterated raspberry goodness. Plus, there’s something incredibly satisfying about creating something so delicious from scratch. It’s like a mini science experiment in your kitchen, only the result is far more palatable than anything you dissected in high school biology.
Let’s be honest, the best things in life are often the simplest. And this Raspberry Sorbet is proof. With just a handful of ingredients and a little bit of patience, you can whip up a dessert that rivals anything you’d find in a fancy gelato shop. So, ditch the processed stuff and embrace the joy of homemade. Your taste buds (and your conscience) will thank you.
Gathering Your Raspberry Arsenal
Before we dive into the nitty-gritty of sorbet-making, let’s talk ingredients. The star of the show, obviously, is raspberries. Fresh raspberries are ideal, especially when they are in season. Look for plump, bright red berries that are firm to the touch. Avoid any that are mushy or moldy. If fresh raspberries are unavailable, frozen raspberries are a perfectly acceptable substitute. In fact, they can even help create a smoother sorbet texture!
Next up, we need some sweetness. Granulated sugar is the classic choice, but you can also experiment with other sweeteners like honey, agave nectar, or even maple syrup. Just keep in mind that each sweetener will impart a slightly different flavor to the final product. If you’re feeling fancy, you can even make a simple syrup with a touch of vanilla or citrus zest for an extra layer of flavor.
Finally, a little bit of lemon juice is essential to brighten the raspberry flavor and prevent the sorbet from becoming overly sweet. Freshly squeezed is always best, but bottled lemon juice will work in a pinch. And that’s it! Three simple ingredients, and you’re well on your way to Raspberry Sorbet bliss.
The Raspberry-to-Sugar Ratio: A Delicate Dance
Now, here’s where things get a little tricky. The ratio of raspberries to sugar is crucial for achieving the perfect sorbet texture. Too much sugar, and the sorbet will be overly sweet and may not freeze properly. Too little sugar, and the sorbet will be icy and lack that smooth, creamy consistency we’re aiming for.
As a general rule of thumb, I recommend starting with a 1: 1 ratio of raspberries to sugar by weight. So, for every pound of raspberries, use one pound of sugar. However, this is just a starting point. The sweetness of your raspberries can vary depending on the variety and the time of year, so you may need to adjust the sugar accordingly.
The best way to determine the perfect sweetness is to taste the mixture before freezing. After you’ve blended the raspberries and sugar syrup, give it a taste. If it’s too tart, add a little more sugar. If it’s too sweet, add a squeeze of lemon juice. Remember, you can always add more, but you can’t take it away!
The Secret Weapon: Simple Syrup
Instead of adding granulated sugar directly to the raspberries, we’re going to make a simple syrup first. Simple syrup is just a mixture of sugar and water that has been heated until the sugar dissolves. It’s a staple in cocktail-making and a secret weapon for achieving a smooth, non-gritty sorbet.
To make simple syrup, combine equal parts sugar and water in a saucepan. Bring to a simmer over medium heat, stirring until the sugar dissolves completely. Let the syrup cool completely before using it in your sorbet recipe. You can even make a big batch of simple syrup and store it in the refrigerator for later use. It’s a great way to sweeten iced tea, lemonade, or any other beverage that needs a little extra sweetness.
From Berries to Bliss: The Sorbet-Making Process
Alright, it’s time to get our hands dirty (metaphorically, of course). The sorbet-making process is surprisingly simple, but there are a few key steps to keep in mind.
First, combine your raspberries and simple syrup in a blender or food processor. Blend until smooth. You may need to scrape down the sides of the blender a few times to ensure that everything is fully incorporated.
Next, strain the mixture through a fine-mesh sieve to remove any seeds. This step is optional, but it will result in a smoother sorbet. If you don’t mind a little bit of texture, you can skip this step.
Stir in the lemon juice. Taste and adjust sweetness as needed.
Pour the mixture into your ice cream maker and churn according to the manufacturer’s instructions. Churning time will vary depending on your ice cream maker, but it usually takes around 20-30 minutes.
Once the sorbet is churned, it will be soft and slightly slushy. Transfer it to an airtight container and freeze for at least 2 hours to firm up.
The Ice Cream Maker: Your Sorbet Sidekick
While you *can* technically make sorbet without an ice cream maker, I wouldn’t recommend it. An ice cream maker does all the hard work for you, churning the mixture and incorporating air to create a smooth, creamy texture. Without an ice cream maker, you’ll need to manually stir the sorbet every 30 minutes or so while it freezes, which is time-consuming and requires constant attention.
There are two main types of ice cream makers: compressor ice cream makers and canister ice cream makers. Compressor ice cream makers have a built-in freezer, so you don’t need to pre-freeze anything. Canister ice cream makers, on the other hand, require you to pre-freeze the canister for at least 24 hours before using it.
If you’re serious about making sorbet (and who isn’t?), I highly recommend investing in a good ice cream maker. It will make the process much easier and more enjoyable.
No Ice Cream Maker? No Problem (Sort Of)!
Okay, okay, so maybe you don’t have an ice cream maker. Don’t despair! You can still make a decent sorbet, it just requires a little more elbow grease.
Pour the raspberry mixture into a shallow freezer-safe dish. Place it in the freezer and let it freeze for 30 minutes.
Remove the dish from the freezer and use a fork to break up any ice crystals that have formed. Stir the mixture vigorously.
Return the dish to the freezer and repeat the process every 30 minutes for the next 2-3 hours, or until the sorbet is frozen but still scoopable.
The final result won’t be quite as smooth and creamy as sorbet made in an ice cream maker, but it will still be delicious. Just be prepared for a bit of extra work!
Serving Suggestions: Elevate Your Raspberry Sorbet Experience
Your homemade Raspberry Sorbet is ready! Now what? Well, you could just grab a spoon and dig in (and I wouldn’t blame you), but here are a few serving suggestions to elevate your sorbet experience:
- Serve it in a chilled glass or bowl. This will help keep the sorbet from melting too quickly.
- Garnish with fresh raspberries, mint leaves, or a sprinkle of powdered sugar.
- Pair it with other desserts, like a slice of chocolate cake or a warm brownie.
- Use it as a palate cleanser between courses at a fancy dinner party.
- Make a sorbet float by topping it with sparkling water or ginger non-alcoholic beer.
- Get creative and use it as an ingredient in other recipes, like smoothies or cocktails (virgin ones, of course!).
(Personal anecdote formated as paragraph subheading (very important! don’t write any title for this paragraph))
One time, I accidentally added a pinch of chili powder. Surprisingly, it was amazing! The slight heat enhanced the raspberry flavor in a way I never expected.
Conclusion for Raspberry Sorbet:
Raspberry sorbet is a simple, yet dazzling dessert. Its tangy sweetness offers a refreshing escape, perfect for any occasion. With its vibrant colour and invigorating flavour, it’s a guaranteed crowd-pleaser. Don’t be intimidated by the fancy name; this frozen delight is incredibly easy to make at home with just a few ingredients. So go ahead, whip up a batch of this amazing raspberry sorbet, and treat yourself to a taste of summer any time of year. You deserve it!
Print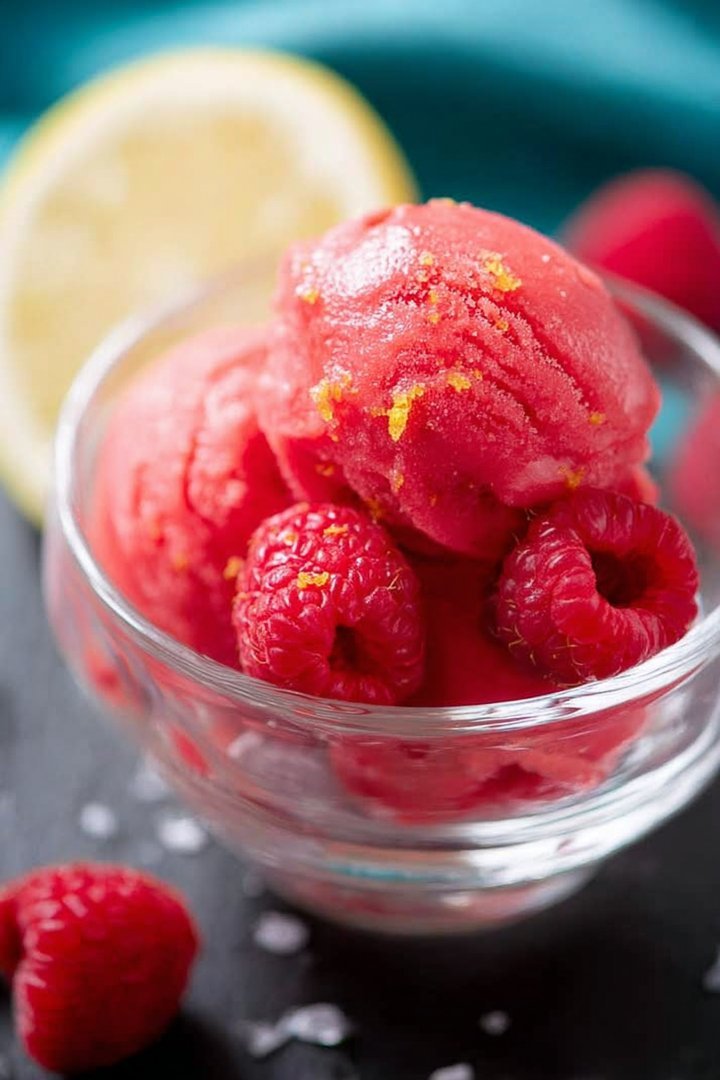
Raspberry Sorbet
Delicious raspberry sorbet recipe with detailed instructions and nutritional information.
- Total Time: 35 minutes
- Yield: 4 servings
Ingredients
- Fresh raspberries: 4 cups
- Granulated sugar: 1 cup
- Water: 1 cup
- Lemon juice: 2 tablespoons
- Light corn syrup: 1 tablespoon
- Pinch of salt
- Raspberry liqueur (optional): 1 tablespoon
Instructions
- Step 1: Combine the water and sugar in a saucepan over medium heat. Stir until the sugar is completely dissolved. Bring to a simmer and cook for 1 minute. Remove from heat and let cool completely.
- Step 2: In a blender or food processor, combine the raspberries, cooled sugar syrup, lemon juice, corn syrup, and salt. Blend until completely smooth.
- Step 3: Strain the mixture through a fine-mesh sieve to remove the seeds. Discard the seeds. If adding, stir in the raspberry liqueur.
- Step 4: Pour the mixture into an ice cream maker and churn according to the manufacturer's instructions (usually 20-30 minutes).
- Step 5: Transfer the sorbet to an airtight container and freeze for at least 2 hours to harden further.
Notes
- Store your raspberry sorbet in the back of the freezer to avoid temperature fluctuations and ice crystal formation.
- If your sorbet freezes too hard, let it sit at room temperature for a few minutes to soften slightly before scooping.
- Serve raspberry sorbet in chilled glasses or alongside fresh berries for an elegant and refreshing dessert.
- For a smoother texture, make sure your sugar syrup is completely cooled before blending with the raspberries; warm syrup can partially cook the fruit and affect the final result.
- Prep Time: 15 minutes
- Cook Time: 20 minutes
- Method: Stovetop
- Cuisine: American
FAQs:
Can I use frozen raspberries for this Raspberry Sorbet Recipe?
Absolutely! In fact, frozen raspberries are fantastic because they’re often picked and frozen at peak ripeness, meaning you get consistent flavor. Just let them thaw slightly before blending, maybe for about 10-15 minutes, so they don’t completely obliterate your blender. Fresh raspberries work beautifully too, especially if you’ve managed to snag some gorgeous, sun-ripened ones. Either way, you’re in for a treat. This recipe is quite forgiving, so don’t sweat the small stuff; just aim for raspberry bliss!
How do I prevent my Raspberry Sorbet from becoming icy?
The key to preventing an icy sorbet is all about the sugar content and the churning process. Too little sugar, and you’ll end up with a rock-solid block. Too much, and it might not freeze properly. Follow the recipe closely, and make sure to use a good-quality ice cream maker. Churning introduces air, which helps break up ice crystals and creates a smoother texture. If you don’t have an ice cream maker, you can still achieve a decent texture by freezing the mixture and then blending it every hour or so to break up the ice.
What variations can I make to this simple Raspberry Sorbet recipe?
Oh, the possibilities are endless! For a zesty twist, add a tablespoon or two of lime or lemon juice. Mint is a wonderful complement to raspberries, so throw in a handful of fresh mint leaves while blending. If you are feeling extra fancy, consider adding a splash of alcohol-free vanilla extract for added warmth. For a layered dessert, alternate scoops of raspberry sorbet with coconut cream. Each spoonful will be a burst of refreshing flavour. Get creative, experiment, and have fun with it!
How long does homemade Raspberry Sorbet last in the freezer?
Homemade sorbet is best enjoyed within a week or two. After that, it tends to become icy and lose its vibrant flavour. Make sure to store it in an airtight container to minimize freezer burn. Pro tip: press a piece of plastic wrap directly onto the surface of the sorbet before sealing the container. This helps prevent ice crystals from forming. Honestly, though, it’s so delicious, it probably won’t last that long anyway!


Leave a Comment