
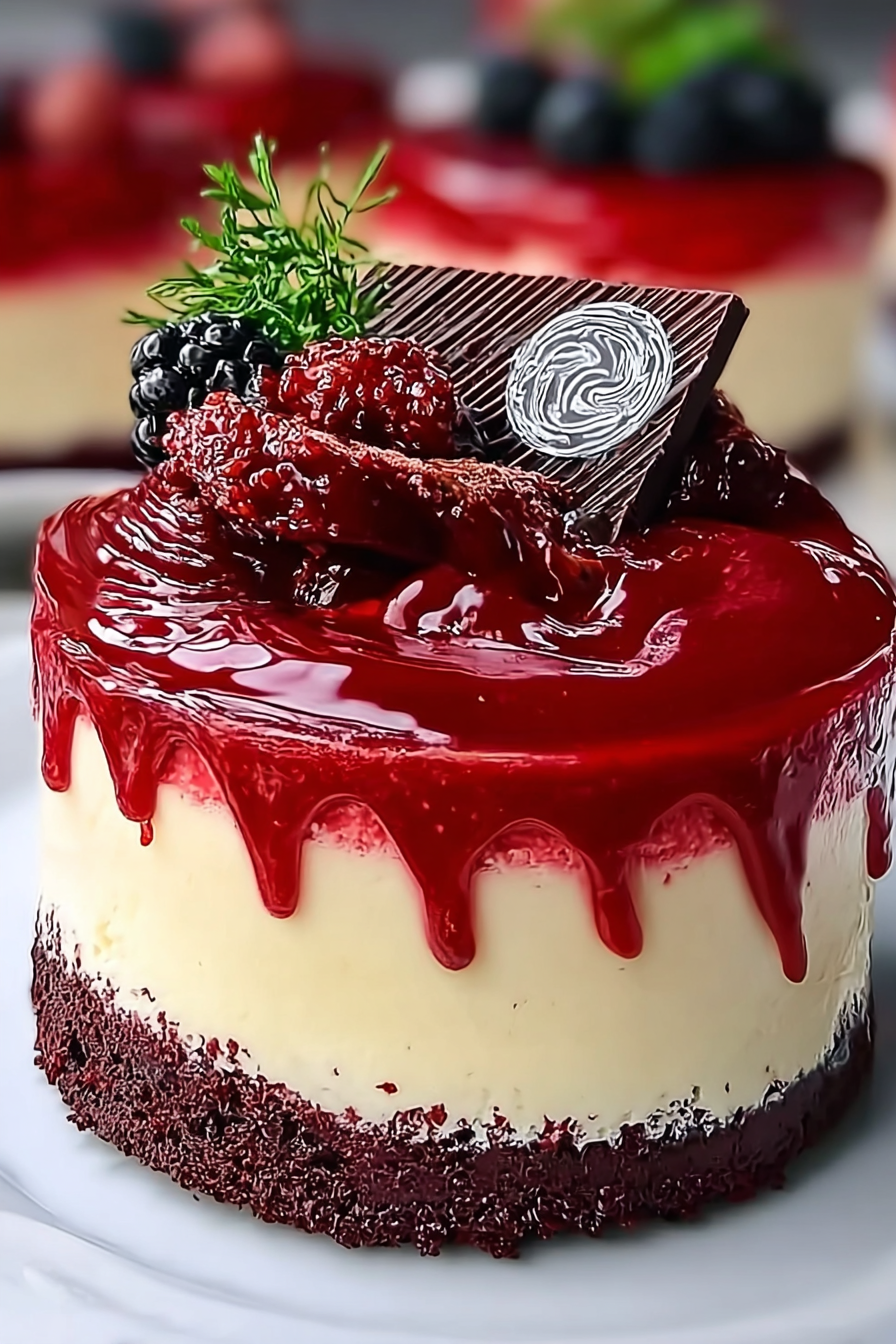
Ah, Red Velvet Cheesecake. Just the name itself conjures images of velvety smoothness, a decadent dance of flavors, and a dessert so good, it’s practically illegal. It’s the kind of treat that makes you want to hide in a closet with a fork and a spoon, away from prying eyes.
This isn’t just cheesecake; it’s a love story in dessert form, a symphony of textures, and a celebration of everything that’s right with the world. Perfect for any occasion.
Here’s what makes this Red Velvet Cheesecake recipe a must-try:
- Effortlessly combines the tangy richness of cheesecake with the subtle cocoa notes of red velvet for a flavor explosion.
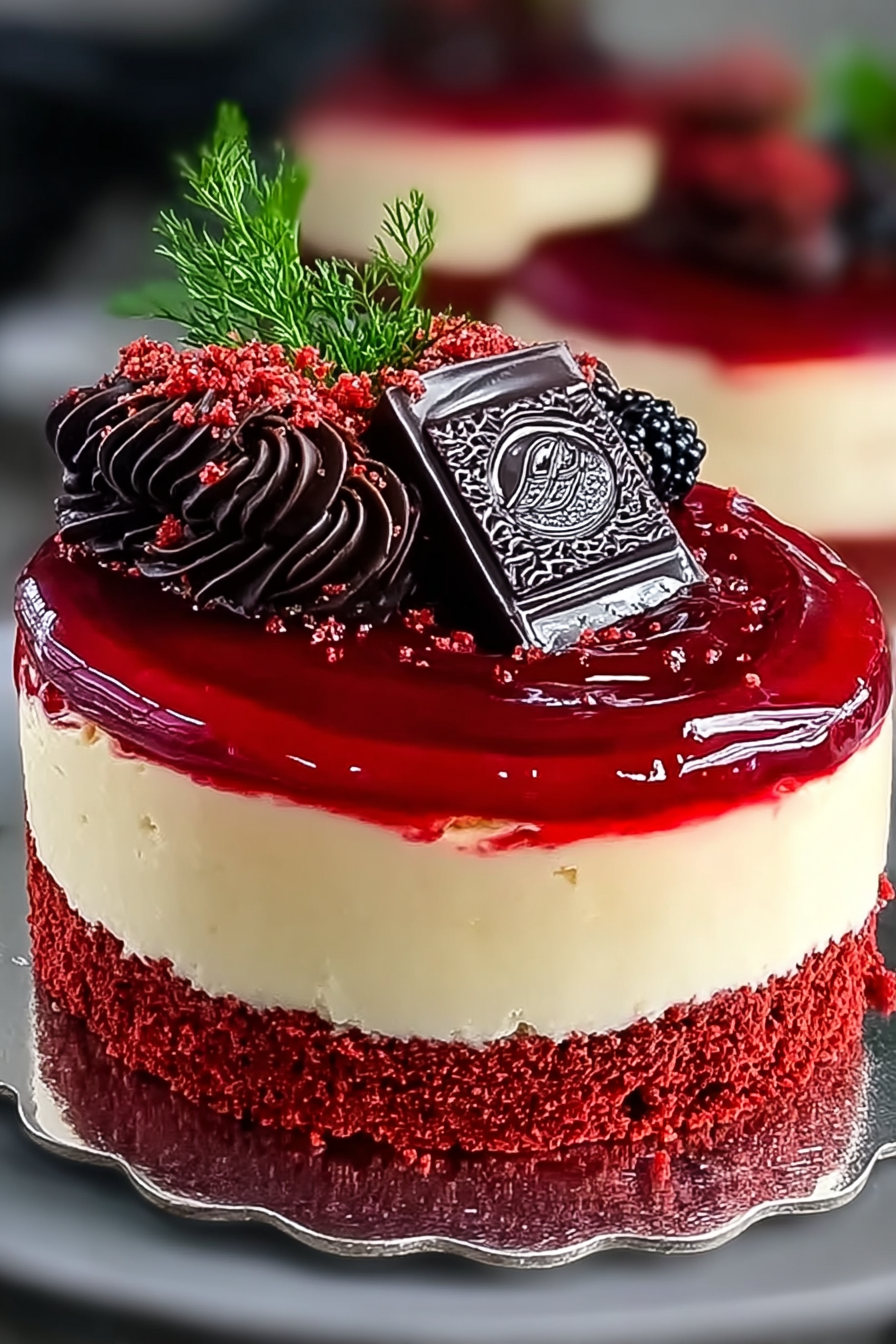
- Visually stunning with its vibrant red hue and creamy white layers, this dessert is guaranteed to impress your friends and family.
- Enjoy this versatile dessert at holiday gatherings, birthday parties, or as a luxurious treat any day of the week, just because.
- With simple ingredients and straightforward instructions, this recipe is surprisingly easy to follow, promising a perfect result every time.
Ingredients for Red Velvet Cheesecake
Here’s what you’ll need to make this delicious dish:
The full ingredients list, including measurements, is provided in the recipe card directly below.
How to Make Red Velvet Cheesecake
Follow these simple steps to prepare this delicious dish:
Step 1: Prepare the Red Velvet Cake Layers
Preheat your oven to 350°F (175°C). Grease and flour two 9-inch round cake pans. In a large bowl, whisk together flour, sugar, cocoa powder, baking soda, and salt. In a separate bowl, combine buttermilk, oil, eggs, red food coloring, and Alcohol-free vanilla extract. Gradually add the wet ingredients to the dry ingredients, mixing until just combined. Divide batter evenly between the prepared cake pans.
Step 2: Bake the Cake Layers
Bake for 25-30 minutes, or until a toothpick inserted into the center comes out clean. Let the cakes cool in the pans for 10 minutes before inverting them onto a wire rack to cool completely.
Step 3: Make the Cheesecake Layer
While the cake layers are cooling, prepare the cheesecake layer. In a large bowl, beat cream cheese and sugar until smooth and creamy. Add sour cream, eggs, and Alcohol-free vanilla extract, and beat until just combined. Be careful not to overmix.
Step 4: Assemble the Cheesecake
Place one red velvet cake layer in the bottom of a springform pan. Pour the cheesecake batter over the cake layer. Top with the second red velvet cake layer.
Step 5: Bake the Red Velvet Cheesecake
Bake for 50-60 minutes, or until the cheesecake is set around the edges but still slightly jiggly in the center. Turn off the oven and let the cheesecake cool in the oven with the door slightly ajar for 1 hour. This helps prevent cracking.
Step 6: Chill and Serve
Remove the cheesecake from the oven and let it cool completely at room temperature. Cover and chill in the refrigerator for at least 4 hours, or preferably overnight. Before serving, run a knife around the edge of the springform pan to loosen the cheesecake. Remove the sides of the pan and slice into wedges. Serve chilled and prepare for the applause.
Perfecting the Cooking Process
For a flawless execution, tackle the cheesecake layer first. Let it cool completely before even thinking about the red velvet portion. This prevents any unfortunate mingling of colors or textures, ensuring cheesecake perfection!
Add Your Touch
Want to jazz things up? A hint of orange zest in the cheesecake layer adds a citrusy zing. Or, swirl some cherry preserves into the red velvet batter for an extra layer of fruity decadence. Go wild!
Storing & Reheating
Leftovers (if there are any!) should be wrapped tightly and stored in the refrigerator. This cheesecake is best enjoyed cold, straight from the fridge. Avoid freezing, as it can alter the texture.
Here are some tips to help you make the best possible Red Velvet Cheesecake:
- Don’t over-mix the cheesecake batter! Over-mixing incorporates too much air, which can cause the cheesecake to crack during baking. Gentle is key.
- Use full-fat cream cheese, please! The reduced-fat versions just don’t have the same richness and can result in a less stable cheesecake. Treat yourself!
- Let the cheesecake cool completely in the oven with the door slightly ajar. This gradual cooling helps prevent cracking. Patience is a virtue, especially in baking.
(Personal anecdote formated as paragraph subheading)
I remember the first time I made this for a bake sale. It was gone in minutes! People were practically wrestling over the last slice. I knew then I had a real winner.
The Red Velvet Cheesecake Revelation
Okay, let’s talk about this Red Velvet Cheesecake. I know, I know, it sounds intimidating. Two desserts in one? Is it worth it? Friends, let me assure you, it is absolutely, positively, 100% worth it. This isn’t just dessert; it’s an experience. It’s a conversation starter, a declaration of love (or at least, a declaration of serious baking skills), and a guaranteed crowd-pleaser.
Think about it: the tangy, creamy lusciousness of a classic cheesecake, swirled together with the subtle cocoa notes and vibrant color of red velvet cake. It’s like a dessert romance novel, full of drama, passion, and a satisfyingly sweet ending. And the best part? It’s easier to make than you think. Trust me, if I can do it (and I’ve had my fair share of kitchen disasters), you can absolutely nail this.
We’re not just baking a cake here; we’re creating a masterpiece. So, grab your apron, preheat that oven, and let’s embark on this delicious adventure together. Prepare for a symphony of flavors and textures that will have your taste buds singing. This Red Velvet Cheesecake will become your go-to dessert for holidays, birthdays, or any occasion that calls for a little bit of extra magic.
Gather Your Arsenal (Ingredients, That Is)
Before we dive into the baking extravaganza, let’s make sure we have all our ingredients lined up. This is crucial because nobody wants to be halfway through a recipe only to discover they’re missing a key component (like the time I tried to make cookies without flour… disaster!). So, take a deep breath, double-check your pantry, and let’s get organized.
For the Cheesecake Layer, you’ll need:
- Cream cheese (the full-fat kind, because we’re not messing around here): About 32 ounces, softened to room temperature. This is non-negotiable.
- Granulated sugar: 1 cup, for that perfect sweetness.
- Eggs: 2 large, to bind everything together.
- Sour cream: ½ cup, for added tang and creaminess.
- Alcohol-free vanilla extract: 1 teaspoon, because vanilla makes everything better.
For the Red Velvet Layer, you’ll need:
- All-purpose flour: 1 ½ cups, the foundation of our cake.
- Granulated sugar: ¾ cup, because we like our cake sweet (but not *too* sweet).
- Unsweetened cocoa powder: 2 tablespoons, for that signature red velvet flavor.
- Baking soda: 1 teaspoon, for that perfect rise.
- Salt: ½ teaspoon, to balance out the sweetness.
- Buttermilk: 1 cup, the secret ingredient for a moist cake. Don’t skip this!
- Vegetable oil: ½ cup, for tenderness.
- Red food coloring: 2 tablespoons, for that iconic red hue. Gel food coloring is preferred for vibrancy.
- Apple cider vinegar: 1 teaspoon, to activate the baking soda.
- Alcohol-free vanilla extract: 1 teaspoon, because, as we established, vanilla is life.
And finally, for the Crust:
- Chocolate wafer crumbs: 1 ½ cups. You can use a food processor or a rolling pin and a zip-top bag.
- Unsalted butter: 5 tablespoons, melted.
These ingredients, when combined with a little bit of love and a dash of baking magic, will transform into the most glorious Red Velvet Cheesecake you’ve ever tasted.
Preparing the Battlefield (aka Your Kitchen)
Now that we have our ingredients ready, let’s talk about equipment. You’ll need:
- A 9-inch springform pan: This is essential for easy cheesecake removal. Trust me, you don’t want to try getting a cheesecake out of a regular cake pan.
- A stand mixer or hand mixer: For creaming together the ingredients.
- Mixing bowls: Because you can never have too many mixing bowls.
- Measuring cups and spoons: Precision is key in baking.
- Spatula: For scraping down the sides of the bowl and ensuring everything is well combined.
- Parchment paper: To line the bottom of the springform pan.
- Aluminum foil: To create a water bath (more on that later).
Crust Me, This Is Important (Making the Crust)
First up, the crust! In a medium bowl, combine the chocolate wafer crumbs and melted butter. Press this mixture evenly into the bottom of your springform pan. I like to use the bottom of a measuring cup to really pack it in there. Bake at 350°F (175°C) for 8-10 minutes. Let it cool completely before adding the filling. This pre-baking step ensures a crispy, flavorful crust that won’t get soggy.
Cheesecake Dreams (Making the Cheesecake Layer)
Now for the star of the show, the cheesecake! In a large bowl, beat the softened cream cheese and granulated sugar until smooth and creamy. This is where your stand mixer (or hand mixer) comes in handy. Add the eggs one at a time, mixing well after each addition. Stir in the sour cream and Alcohol-free vanilla extract. Pour this mixture over the cooled crust and set aside.
Red Velvet Rhapsody (Making the Red Velvet Layer)
In a separate bowl, whisk together the flour, sugar, cocoa powder, baking soda, and salt. In another bowl, combine the buttermilk, vegetable oil, red food coloring, apple cider vinegar, and Alcohol-free vanilla extract. Add the wet ingredients to the dry ingredients and mix until just combined. Be careful not to overmix!
The Swirl of Destiny (Combining the Layers)
Now comes the fun part! Gently spoon dollops of the red velvet batter over the cheesecake layer. Use a knife or skewer to swirl the two batters together. Don’t overdo it – you want to create a marbled effect, not completely blend the layers.
The Water Bath Revelation
This is where the water bath comes in. Wrap the bottom of your springform pan tightly with aluminum foil to prevent water from seeping in. Place the wrapped pan inside a larger baking pan. Carefully pour hot water into the larger pan until it reaches about halfway up the sides of the springform pan. The water bath helps the cheesecake bake evenly and prevents it from cracking.
Bake at 325°F (160°C) for 55-70 minutes, or until the cheesecake is set around the edges but still slightly wobbly in the center. Turn off the oven and let the cheesecake cool in the oven with the door slightly ajar for an hour. This gradual cooling process helps prevent cracking.
Remove the cheesecake from the water bath and let it cool completely on a wire rack. Once cooled, cover and refrigerate for at least 4 hours, or preferably overnight. This allows the flavors to meld together and the cheesecake to set properly.
The Grand Finale (Serving and Enjoying)
Once the cheesecake is thoroughly chilled, remove it from the springform pan. Run a thin knife around the edges to loosen it if necessary. Serve chilled and prepare for the compliments to roll in.
This Red Velvet Cheesecake is delicious on its own, but you can also dress it up with a dollop of whipped cream, a drizzle of chocolate sauce, or a sprinkle of fresh berries. The possibilities are endless!
Conclusion for Red Velvet Cheesecake :
This Red Velvet Cheesecake is more than just a dessert; it’s an experience. From the vibrant red hue to the creamy, tangy filling and the satisfying crunch of the crust, every bite is a celebration. Whether you’re making it for a special occasion or just a cozy night in, this recipe is sure to impress. Embrace the process, don’t be afraid to experiment, and most importantly, enjoy every delicious moment. So go ahead, bake up a slice of happiness, and let the red velvet magic begin!
Print
Red Velvet Cheesecake
Delicious red velvet cheesecake recipe with detailed instructions and nutritional information.
- Total Time: 35 minutes
- Yield: 4 servings
Ingredients
- All-purpose flour: 1 1/2 cups
- Granulated sugar: 1 1/2 cups
- Unsweetened cocoa powder: 2 tablespoons
- Baking soda: 1 teaspoon
- Salt: 1/2 teaspoon
- Buttermilk: 1 cup
- Vegetable oil: 1/2 cup
- Red food coloring: 2 tablespoons
- White vinegar: 1 teaspoon
- Cream cheese (softened): 32 ounces
- Eggs: 4 large
- Vanilla extract: 1 teaspoon
- Sour cream: 1 cup
- Powdered sugar: 1/2 cup
- Graham crackers: 1 1/2 cups (crushed)
- Melted butter: 6 tablespoons
Instructions
- Step 1: Preheat oven to 350°F (175°C). Grease and flour a 9-inch springform pan. In a large bowl, whisk together flour, sugar, cocoa powder, baking soda, and salt.
- Step 2: In a separate bowl, combine buttermilk, oil, red food coloring, vinegar, and vanilla extract. Add the wet ingredients to the dry ingredients and mix until just combined.
- Step 3: Pour batter into the prepared springform pan and bake for 25-30 minutes, or until a toothpick inserted into the center comes out with moist crumbs. Let cool completely.
- Step 4: In a large bowl, beat the softened cream cheese until smooth. Gradually add powdered sugar, beating until combined. Beat in eggs one at a time, then stir in sour cream and vanilla extract.
- Step 5: In a separate bowl, mix graham cracker crumbs and melted butter. Press the mixture into the bottom of another 9-inch springform pan. Pour cheesecake batter over the crust and bake for 55-70 minutes at 325 degrees, or until the edges are set but the center still has a slight wobble. Turn oven off, crack the oven door, and let the cheesecake cool in the oven for 1 hour to prevent cracking.
- Step 6: Remove the cheesecake from the oven and let cool completely at room temperature. Cover and refrigerate for at least 4 hours, or preferably overnight, before serving.
Notes
- For best flavor, store leftover red velvet cheesecake tightly covered in the refrigerator for up to 5 days.
- While reheating isn't usually recommended for cheesecake, a small slice can be gently warmed in the microwave for 10-15 seconds to enhance the creamy texture.
- Garnish each slice with fresh berries and a dusting of cocoa powder for an elegant presentation.
- Chef's tip: Ensure your cream cheese is fully softened to avoid lumps and achieve that perfectly smooth, velvety cheesecake texture.
- Prep Time: 15 minutes
- Cook Time: 20 minutes
- Method: Stovetop
- Cuisine: American
FAQs :
Can I make red velvet cheesecake ahead of time?
Absolutely! In fact, making this decadent treat ahead of time is highly recommended. The flavors meld together beautifully as it chills in the refrigerator. You can prepare it up to two days in advance. Just wrap it tightly in plastic wrap or store it in an airtight container to prevent it from drying out or absorbing any rogue refrigerator odors. This allows the cream cheese filling to fully set, resulting in a richer and more delightful experience when you finally slice into it. The hardest part is waiting, trust me!
What is the best way to cut a cheesecake?
Ah, the age-old question! To achieve those pristine, envy-inducing slices, heat a long, thin knife under hot water. Wipe the blade clean and dry between each cut. The heat helps the knife glide smoothly through the creamy texture, preventing any messy sticking. Alternatively, you can use unflavored dental floss or a wire cheese cutter for an equally clean result. Just remember to take your time and savor each slice! This method prevents the cheesecake from crumbling and ensures every piece is a work of art.
How do I prevent my cheesecake from cracking?
Cracking is the bane of every cheesecake baker’s existence, but fear not! A few simple tricks can help prevent this heartbreak. First, avoid overbaking the cheesecake. It should still have a slight jiggle in the center when you take it out of the oven. Second, use a water bath! This gentle cooking method ensures even heat distribution and helps prevent the cheesecake from drying out and cracking. Finally, let the cheesecake cool gradually in the oven with the door slightly ajar. Sudden temperature changes are a cheesecake’s worst enemy.
Can I freeze red velvet cheesecake?
Yes, you absolutely can freeze this luscious creation! To freeze it properly, wrap the cooled cheesecake tightly in several layers of plastic wrap, followed by a layer of aluminum foil. This will protect it from freezer burn and prevent it from absorbing any unwanted flavors. When you’re ready to enjoy it, thaw it in the refrigerator overnight. Freezing is a great way to have a slice of happiness readily available for those unexpected cravings. Just be sure to label it with the date so you know how long it has been in the freezer.


Leave a Comment