
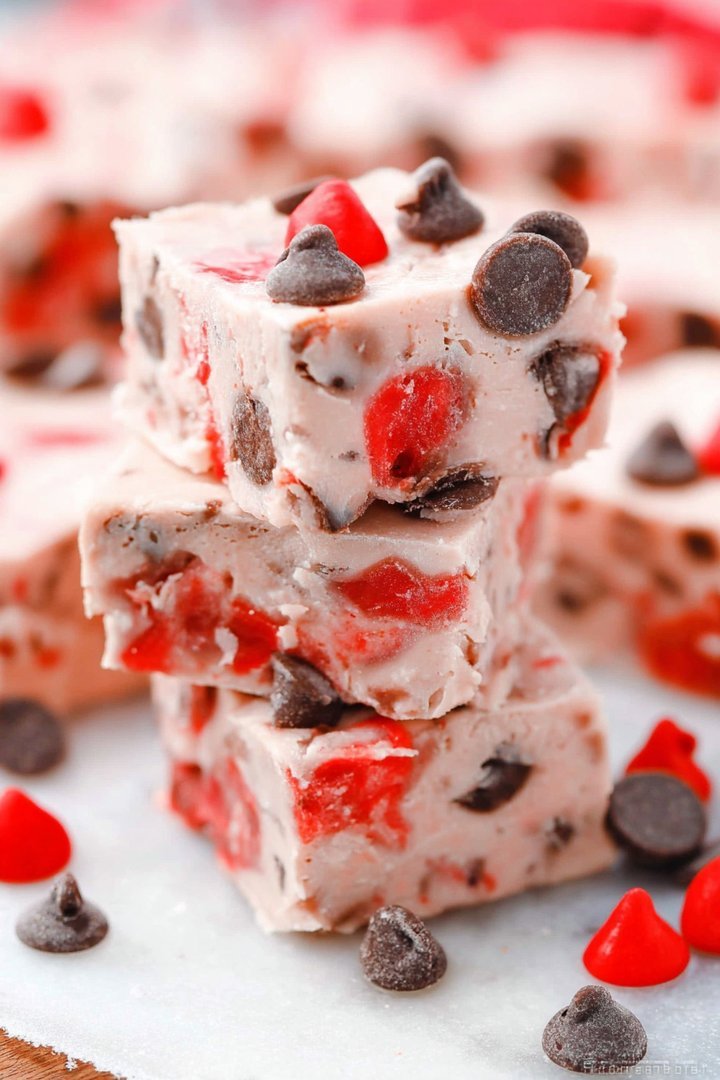
Imagine biting into a square of pure bliss, where the creamy richness of fudge meets the burst of sweet cherries and the playful crunch of dark chocolate. That’s Cherry Garcia Fudge, a symphony of textures and flavors dancing on your taste buds.
This isn’t your grandma’s plain old fudge; this is a fun, sophisticated treat perfect for celebrating any occasion, or just because you deserve a little something special. Get ready to ditch the ordinary and dive headfirst into a world of irresistible deliciousness.
Here are a few reasons why you’ll absolutely adore this Cherry Garcia Fudge:
- Effortlessly crafted with minimal ingredients, this recipe guarantees a delectable dessert even for kitchen novices.
- The harmonious blend of sweet cherries, rich chocolate, and creamy fudge creates an unforgettable taste sensation.
- Its beautiful swirls and vibrant colors make it an impressive and delightful addition to any dessert table.
- Perfect as a thoughtful homemade gift, a delightful party treat, or simply a sweet indulgence any time of day.
Ingredients for Cherry Garcia Fudge
Here’s what you’ll need to make this delicious dish:
The full ingredients list, including measurements, is provided in the recipe card directly below.
How to Make Cherry Garcia Fudge
Follow these simple steps to prepare this delicious dish:
Step 1: Prepare the Pan
Line an 8×8 inch baking pan with parchment paper, leaving an overhang on two sides. This will make it easy to lift the fudge out later. Set aside.
Step 2: Melt the Fudge Base
In a large, microwave-safe bowl, combine the sweetened condensed milk, white chocolate chips, and unsalted butter. Microwave in 30-second intervals, stirring after each interval, until completely melted and smooth. Be careful not to overheat the chocolate; it should be melted but not burnt.
Step 3: Add Flavor and Texture
Stir in the Alcohol-free almond extract and chopped maraschino cherries into the melted white chocolate mixture. Ensure the cherries are evenly distributed throughout the fudge base.
Step 4: Incorporate the Dark Chocolate
Gently fold in the dark chocolate chunks. You can leave some chunks whole or lightly chop them for a more even distribution. Avoid over-mixing to maintain distinct chocolate pieces.
Step 5: Chill and Set
Pour the fudge mixture into the prepared pan and spread it evenly. Gently press down on the surface to ensure a smooth finish. Cover the pan with plastic wrap and refrigerate for at least 2 hours, or until the fudge is firm.
Step 6: Cut and Serve
Once the fudge is firm, lift it out of the pan using the parchment paper overhang. Place the fudge on a cutting board and cut it into squares. Serve chilled and enjoy the delightful combination of cherries, chocolate, and creamy fudge.
Perfecting the Cooking Process
To craft the ultimate Cherry Garcia Fudge, melt the chocolate first, then prepare your cherry mixture. Incorporate everything gently to maintain the cherry integrity. Finally, chill until firm – patience is key to fudge perfection!
Add Your Touch
Feel free to swap dark chocolate for milk, or even white chocolate for a completely different vibe. Experiment with different nut extracts to complement the cherries. A splash of alcohol-free vanilla extract can deepen the flavor too.
Storing & Reheating
Store your Cherry Garcia Fudge in an airtight container at room temperature for up to a week, or in the refrigerator for longer. There’s no need to reheat, as fudge is best enjoyed at cool temperatures.
Three crucial tips for achieving fudge nirvana:
- Ensure your chocolate is completely melted and smooth before adding other ingredients to avoid a grainy texture in your Cherry Garcia creation.
- Don’t overmix the cherry and nut mixture into the chocolate; gentle folding preserves the beautiful swirls and pockets of cherry goodness.
- Chill the fudge for the recommended time; this allows it to set properly, resulting in the perfect soft, yet firm, consistency that makes fudge so divine.
(Personal anecdote formated as paragraph subheading)
The first time I made this, my nephew declared it tasted like “happiness in a square,” and honestly, there’s no better compliment. It’s been a hit at every gathering since.
The Hilarious History of My Fudge Failures (and Triumphs!)
Let’s be honest, we’ve all been there. Staring blankly at a recipe, thinking, “How hard can this be?” Only to end up with a kitchen catastrophe that would make Gordon Ramsay weep. Fudge, my friends, has been the source of more than one of my culinary mishaps. I once tried to make it on a particularly humid day, and it turned into a sticky, gooey mess that resembled something you’d find stuck to the bottom of a movie theater seat. Not my finest moment. But hey, every disaster is a learning opportunity, right? I now have a dedicated “fudge-friendly” weather app.
What Makes This Cherry Garcia Fudge So Darn Good?
Besides the obvious fact that it tastes like a dream, this Cherry Garcia Fudge is more than just a sweet treat. It’s a little bit of nostalgia, a whole lot of deliciousness, and a surprisingly easy recipe to master. The combination of rich, dark chocolate, sweet cherries, and crunchy nuts is a classic for a reason. It’s like a party in your mouth, a celebration of flavors and textures that will leave you wanting more. Plus, let’s be real, who can resist anything with “Cherry Garcia” in the name? It’s practically a guaranteed crowd-pleaser. This isn’t just any fudge; this is Cherry Garcia Fudge!
The Secret Ingredient: A Dash of Mischief
Okay, so maybe it’s not *actually* an ingredient, but a little bit of fun and experimentation is crucial to any successful recipe. Don’t be afraid to get creative! Want to add a sprinkle of sea salt on top? Go for it! Feeling adventurous? Try using a different type of nut. The beauty of fudge is that it’s incredibly forgiving. As long as you have good quality chocolate and a healthy dose of enthusiasm, you can’t go wrong. And if you do mess up? Well, that’s what takeout is for. But trust me, this recipe is so easy, even the most kitchen-challenged among us can pull it off.
Ingredient Spotlight: Cherries, the Star of the Show
Let’s talk about cherries, shall we? These little red jewels are the heart and soul of this fudge. I prefer using fresh cherries when they’re in season, but frozen cherries work just as well. Just make sure to thaw them completely and pat them dry before adding them to the fudge. Nobody wants soggy fudge! The key is to find cherries that are sweet and slightly tart. This provides a lovely contrast to the rich, dark chocolate. And if you’re feeling extra fancy, you can even use a mix of different types of cherries. Just be sure to pit them first, unless you want to surprise your guests with a dental hazard.
Nuts About Nuts: Choosing Your Crunch Factor
Walnuts are the traditional choice for Cherry Garcia, but feel free to experiment with other nuts. Almonds, pecans, or even macadamia nuts would be delicious. Just be sure to toast them lightly before adding them to the fudge. This will bring out their flavor and add a satisfying crunch. And if you’re allergic to nuts, don’t worry! You can easily leave them out altogether. The fudge will still be delicious. Or, you can substitute them with something else, like chopped pretzels or even some toasted coconut flakes. The possibilities are endless!
Step-by-Step: Making Cherry Garcia Fudge Like a Pro
Alright, let’s get down to business. Here’s a detailed, step-by-step guide to making this Cherry Garcia Fudge. Follow these instructions carefully, and you’ll be enjoying a decadent treat in no time. And remember, don’t be afraid to have fun with it! Cooking should be enjoyable, not stressful.
1. Gather your ingredients: Chocolate, sweetened condensed milk, cherries, nuts, alcohol-free vanilla extract, and a pinch of salt.
2. Melt the chocolate: In a double boiler or microwave, melt the chocolate until it’s smooth and glossy. Be careful not to burn it!
3. Combine the ingredients: Stir in the sweetened condensed milk, alcohol-free vanilla extract, and salt. Mix well until everything is combined.
4. Add the cherries and nuts: Gently fold in the cherries and nuts. Be careful not to overmix!
5. Pour into a pan: Pour the fudge into a lined 8×8 inch baking pan.
6. Chill: Refrigerate for at least 2 hours, or until the fudge is firm.
7. Cut and enjoy: Cut the fudge into squares and enjoy!
Troubleshooting: Common Fudge Fails and How to Fix Them
Even with the best recipe, things can sometimes go wrong. Here are some common fudge fails and how to fix them:
- Fudge is too soft: You probably didn’t chill it long enough. Pop it back in the fridge for another hour or two.
- Fudge is too hard: You may have overcooked the chocolate. Next time, be sure to melt it gently and avoid overheating.
- Fudge is grainy: This could be due to using poor quality chocolate or overmixing. Use good quality chocolate and mix gently.
Beyond the Basics: Cherry Garcia Fudge Remixes
Want to take your fudge game to the next level? Here are a few ideas for remixing this classic recipe:
- Add a swirl of peanut butter: For a Reese’s-inspired twist, swirl in some peanut butter before chilling.
- Make it vegan: Use vegan chocolate and sweetened condensed milk for a plant-based treat.
- Add a boozy kick: Okay, scratch that! Remember the rules. But you could try a cherry extract for an extra punch.
- Top it with sprinkles: Because who doesn’t love sprinkles?
The Final Verdict: Is This Fudge Worth the Effort?
Absolutely! This Cherry Garcia Fudge is easy to make, incredibly delicious, and guaranteed to impress. It’s the perfect treat for any occasion, from holiday parties to cozy nights in. So go ahead, give it a try. You won’t regret it. And if you do, well, at least you’ll have a funny story to tell. Happy fudging!
Conclusion for Cherry Garcia Fudge
Cherry Garcia Fudge is a delightful treat that is easier to make than it looks! With its rich chocolate base, sweet cherry bursts, and a hint of almond flavor, this fudge is a guaranteed crowd-pleaser. Whether you are making it for a holiday, a special occasion, or simply to satisfy your sweet tooth, this recipe is a winner. So go ahead, indulge in a little bit of fudge heaven, and watch it disappear in minutes. Happy baking and happy snacking!
Print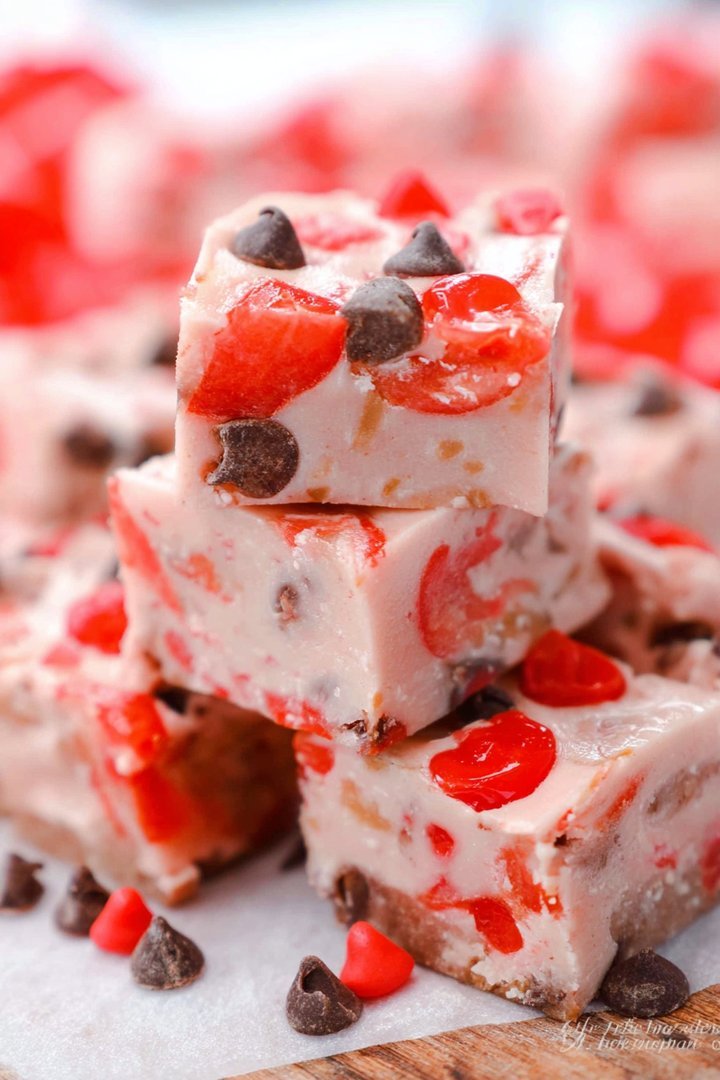
Cherry Garcia Fudge
Delicious cherry garcia fudge recipe with detailed instructions and nutritional information.
- Total Time: 35 minutes
- Yield: 4 servings 1x
Ingredients
- 3 cups granulated sugar
- 3/4 cup (1 1/2 sticks) unsalted butter, cut into pieces
- 2/3 cup evaporated milk
- 12 oz semi-sweet chocolate chips
- 7 oz jar marshmallow creme
- 1 teaspoon vanilla extract
- 1/2 cup dried cherries, chopped
- 1/4 cup white chocolate chips or chunks, for topping
Instructions
- Step 1: Line an 8×8 inch baking pan with parchment paper, leaving overhang on the sides.
- Step 2: In a heavy-bottomed saucepan, combine the sugar, butter, and evaporated milk. Cook over medium heat, stirring constantly, until the mixture comes to a rolling boil.
- Step 3: Continue to boil for 5 minutes, stirring constantly to prevent burning. Remove from heat.
- Step 4: Stir in the semi-sweet chocolate chips until melted and smooth. Add the marshmallow creme and vanilla extract; stir until fully incorporated.
- Step 5: Fold in the chopped dried cherries. Pour the mixture into the prepared pan and spread evenly.
- Step 6: Sprinkle the top with white chocolate chips. Gently press the white chocolate chips into the fudge. Let cool completely at room temperature, then refrigerate for at least 2 hours before cutting into squares. Use the parchment paper overhang to lift the fudge out of the pan for easier cutting.
Notes
- Store leftover fudge in an airtight container in the refrigerator for up to a week to maintain its firm texture.
- Reheating isn't recommended, as it can alter the fudge's consistency; enjoy it chilled or at room temperature for the best flavor.
- Serve Cherry Garcia Fudge in small squares alongside a scoop of vanilla ice cream for a decadent dessert pairing.
- To prevent a grainy texture, ensure the sugar is fully dissolved before the mixture comes to a boil, stirring constantly.
- Prep Time: 15 minutes
- Cook Time: 20 minutes
- Method: Stovetop
- Cuisine: American
FAQs
Can I use frozen cherries for this Cherry Garcia Fudge recipe?
Absolutely! Frozen cherries work perfectly well, especially when fresh cherries are out of season. Just be sure to thaw them completely and drain off any excess juice before adding them to your fudge mixture. Otherwise, your fudge might end up a little too soft. Nobody wants a melty mess, unless you’re going for a cherry-flavored milkshake situation. Consider it a kitchen experiment – but for fudge perfection, thaw and drain! This helps maintain the correct consistency and ensures your fudge sets properly. Trust me, your taste buds will thank you.
How do I store Cherry Garcia Fudge to keep it fresh?
Storing your Cherry Garcia Fudge is a breeze! Once it’s set and cut into squares, keep it in an airtight container. For short-term storage (a few days), the fridge is your best bet. If you want to enjoy it for longer, wrap individual pieces tightly in plastic wrap and store them in the freezer. When you’re ready for a sweet treat, simply thaw a piece or two in the refrigerator. Just be sure to hide it well – this fudge has a habit of disappearing quickly!
What’s the best type of chocolate to use for Cherry Garcia Fudge?
For the ultimate Cherry Garcia Fudge experience, use high-quality chocolate. I prefer a combination of semi-sweet and dark chocolate to balance sweetness and richness. But hey, feel free to experiment! Milk chocolate will create a sweeter fudge, while using all dark chocolate will give it a more intense flavor. Just make sure whatever you choose, it’s a chocolate you genuinely enjoy eating on its own. After all, why would you bake with something you wouldn’t snack on?
Can I add other ingredients to my Cherry Garcia Fudge?
Get creative and customize this fudge to your heart’s content! While the classic Cherry Garcia flavor is pretty perfect, you can definitely add other goodies. Try mixing in some chopped walnuts or almonds for extra crunch. A swirl of white chocolate can add a pretty contrast. For a little kick, add a pinch of sea salt on top. Just remember to not overdo it, you want the cherry and chocolate to still shine. Think of it as accessorizing – a little goes a long way!


Leave a Comment