

The moment that first spoonful of creamy vanilla custard hits your tongue, you understand the hype immediately. This isn’t just dessert; it’s pure, delightful nostalgia served chilled, proving that sometimes, the simplest things are the absolute best.
We are finally diving into the legendary layers of the authenticMagnolia Bakery Banana Pudding, transforming your kitchen into a famous New York dessert haven.
- Remarkably simple preparation requiring no baking and only minimal kitchen skills, perfect for hosting even the most impressive last-minute gatherings.
- A sublime blend of rich vanilla, perfectly ripened bananas, and crunchy wafer cookies creates a balanced, deeply comforting taste experience.
- Stunning, rustic layered presentation that instantly impresses guests and looks fantastic displayed prominently on any casual or formal dessert table.
- Easily scalable recipe, excellent for crafting delicious single servings or preparing a large family-style bowl, ready in under 30 minutes of active prep time.
The Legend of the Famous Layered Dessert
I remember the first time I tried to make “famous” banana pudding at home. It involved a box of instant mix, milk that was slightly past its prime, and a desperate hope that somehow, the universe would transform my sad, watery slurry into the thick, cloud-like perfection I had dreamed of. Spoiler alert: The universe declined. The result was a culinary catastrophe that resembled chunky, pale banana soup, and I had to serve cookies on the side just so people wouldn’t drown in the bowl.
This experience led me on a sacred quest to find the real deal—the recipe that didn’t just look good in pictures but tasted like a hug from an award-winning pastry chef. That quest, thankfully, ended when I learned the secrets behind the incredibly popularMagnolia Bakery Banana Pudding. The true magic of this dish isn’t complicated; it lies in selecting the right ingredients and exercising a tiny bit of patience, which, let’s be honest, is usually the hardest part when faced with something this tempting.
What makes this specific layered dessert transcendent? It’s the texture. It strikes that perfect balance between rich creaminess and light fluffiness, holding up beautifully against the subtle crunch of the vanilla wafers and the soft slices of ripe banana. Many home recipes fall short because they use standard instant pudding, resulting in that disappointing, flimsy texture. We avoid that trap entirely. We are going to stabilize our custard base with whipped cream and a touch of condensed sweetness, ensuring every bite feels like floating on a cloud. Forget everything you thought you knew about simple banana desserts; this is the definitive, luxurious version.
The Secret to Achieving That Signature Creamy Texture
If there’s one non-negotiable step in this process, it’s managing the custard base. Traditionally, homemade custards can be time-consuming and prone to scrambling. The genius of the Magnolia version is that it achieves an incredible, decadent depth of flavor without the fuss of stovetop cooking. This specific method relies on stabilizing standard pudding mix—yes, we are using a boxed ingredient, but we are elevating it far beyond its humble origins—with the luxurious addition of sweetened condensed milk and freshly whipped cream. The condensed milk not only adds a unique, caramelly depth but also provides the necessary sugar and structure to interact with the pudding base, creating a texture that can only be described as silken.
Whipping the heavy cream separately until stiff peaks form and then gently folding it into the mixture is the crucial technique. This aeration step incorporates lightness, transforming the heavy custard into that famous, ethereal mousse consistency. If you skip this, or if you fold too aggressively, your pudding will be dense. The key is gentle incorporation—imagine you are persuading the ingredients to marry, not throwing them into a wrestling match. This careful technique is what separates the novices from the purists when recreating the legendaryMagnolia Bakery Banana Puddingat home, guaranteeing success every single time.
Gathering Your Supplies
Here’s what you’ll need to make this delicious dish:
- Sweetened Condensed MilkThis ingredient is non-negotiable for achieving that signature richness and stabilizing the pudding base perfectly.
- Cold WaterUsed initially to mix with the pudding powder, ensuring it dissolves smoothly and begins to activate before incorporating the heavier creams.
- Instant Vanilla Pudding MixChoose a high-quality brand, specifically the instant variety, as the cook time and preparation hinges on its quick-setting properties.
- Heavy Whipping CreamMust be very cold to whip properly into stiff, airy peaks, which is essential for creating the light, voluminous texture of the final product.
- Vanilla Wafer CookiesThese are the structural foundation and provide a necessary, delightful crunch that contrasts beautifully with the soft custard and fruit.
- Ripe BananasSelect bananas that are yellow with just a few brown freckles; they should be ripe enough for maximum sweetness but firm enough to hold their shape when sliced.
The full ingredients list, including measurements, is provided in the recipe card directly below.
Assembling Your Masterpiece
Follow these simple steps to prepare this delicious dish:
Step 1: Preparing the Base Custard Mixture
In a very large bowl, combine the cold water and the sweetened condensed milk. Whisk thoroughly until the two liquids are completely uniform. Next, add the instant vanilla pudding mix powder to the liquid mixture. Continue whisking for about three minutes until the mixture thickens slightly and there are no lumps remaining from the pudding powder. Cover the bowl loosely and place it in the refrigerator to chill and set for at least four hours, or preferably overnight, to allow the base structure to fully develop.
Step 2: Whipping the Cream
Once the custard base is chilled and firm, turn your attention to the heavy cream. Using either a stand mixer fitted with a whisk attachment or a high-powered hand mixer, whip the cold heavy cream on medium-high speed. Continue mixing until the cream reaches stiff peaks. This means when you lift the whisk, the peaks should stand upright without drooping at the tips. Be careful not to over-whip, which can result in butter.
Step 3: Folding and Incorporating
Gently remove the chilled custard base from the refrigerator. Using a large rubber spatula, scrape about one-third of the whipped cream mixture into the pudding base. Fold this first portion in slowly and deliberately, ensuring you incorporate the cream fully to lighten the mixture. Once blended, add the remaining whipped cream and fold gently until no streaks of white cream remain, making sure the final mixture is fluffy and uniformly light yellow.
Step 4: Layering the Pudding
Select your serving vessel—a large, clear glass bowl works best for showcasing the beautiful layers. Begin by placing a layer of vanilla wafer cookies across the bottom of the dish, ensuring the entire base is covered. Next, layer fresh, thinly sliced bananas over the cookies. Finally, spoon approximately one-third of the prepared, airy custard over the bananas and cookies, spreading it carefully to cover all components evenly. Repeat this process two more times: cookies, bananas, and then the creamy custard mixture, finishing with a final layer of the vanilla pudding.
Step 5: The Crucial Chilling Time
This is where patience truly pays off. Cover the assembled dessert with plastic wrap, pressing the wrap gently against the surface of the pudding to prevent a skin from forming. Return the dish to the refrigerator for a minimum of four hours, but eight to twelve hours is optimal. The extended chilling time allows the vanilla wafers to soften completely, absorbing the flavors of the creamy custard, resulting in the desired cake-like texture.
Transfer to individual glass cups or enjoy straight from the large bowl, perhaps garnishing with a few extra wafer crumbles right before serving for the perfect finishing touch.
Presentation and Enjoyment Tips
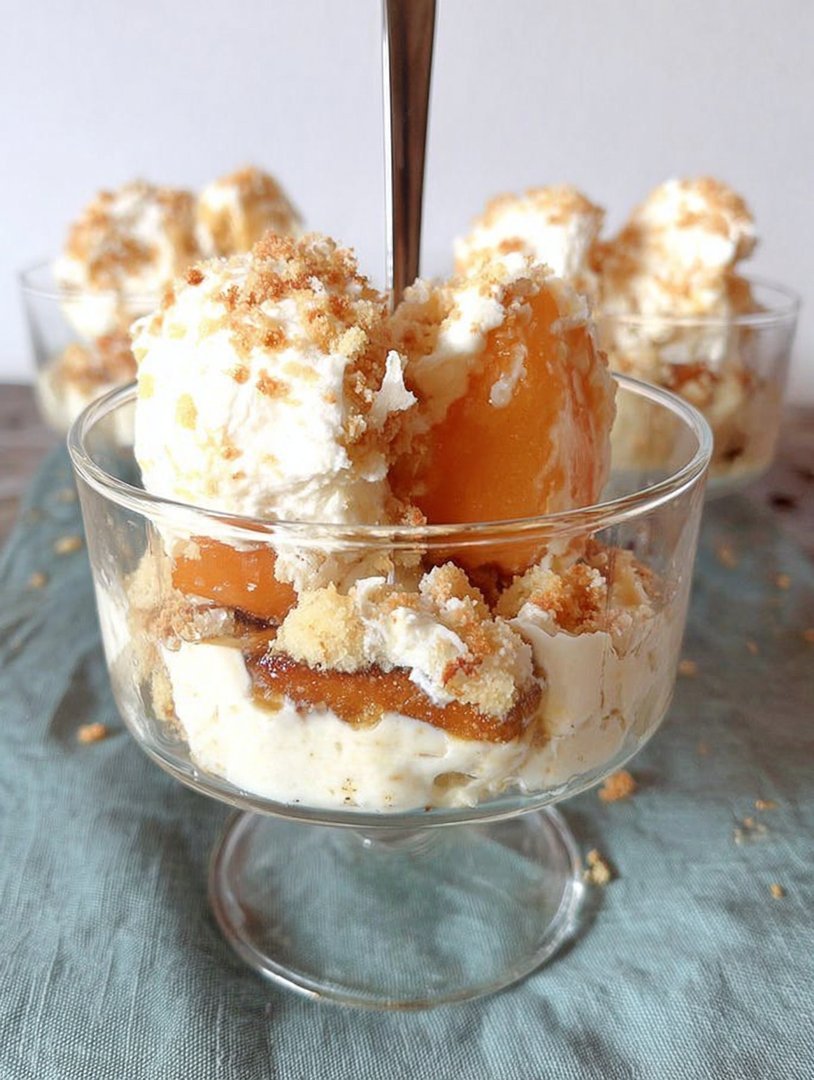
While the chilling time is essential for softening the wafers and allowing the flavors to meld, the presentation is what elevates this from a simple dessert to a centerpiece. Because theMagnolia Bakery Banana Puddinghas such distinctive, beautiful layers, choosing the right dish is crucial. A clear glass trifle bowl is perfect for family gatherings, allowing everyone to admire the creamy custard, the pale bananas, and the golden wafers stacked high.
For a more elegant presentation suitable for dinner parties, consider layering the pudding in individual clear mason jars or even martini glasses. This makes serving effortless and provides everyone with their own mini-masterpiece. When layering, ensure the banana slices are visible along the sides of the glass if using individual containers, creating a visually appealing stripe effect.
Selecting the Perfect Bananas
The type of banana you choose makes a huge difference in the final taste and texture of this creamy dessert. You should aim for ripe but not overly bruised bananas. If they are too green, they lack the necessary sweetness, and their texture will remain hard even after chilling. If they are too brown, they will mush out completely when sliced and turn the custard grey much faster. The ideal banana has a vibrant yellow peel with a few small brown spots—this indicates peak ripeness, maximum sweetness, and an interior that is still firm enough to hold up beautifully in the layered pudding.
Slice the bananas about a quarter of an inch thick. This ensures they are substantial enough to provide texture but thin enough to absorb some of the surrounding moisture without feeling intrusive. Remember to slice the bananas right before you layer them; pre-slicing can lead to rapid browning, diminishing the overall visual appeal of the final dessert.
A Note on Customization and Serving Temperature
While the classic version is undeniably perfect, you can subtly customize this recipe. Some people like to include a tiny pinch of sea salt in the whipped cream before folding to enhance the sweetness, or perhaps add a teaspoon of good quality vanilla bean paste to the custard for extra depth. Just remember that the purity of the vanilla flavor is key to matching the original recipe, so avoid adding conflicting flavors.
Always serve banana pudding cold, directly from the refrigerator. This dessert relies entirely on being chilled to maintain its firm, yet airy structure. Remove it from the fridge only minutes before serving. If you plan to garnish with additional whipped cream or cookie crumbles, add them immediately before serving, as prolonged contact with the chilled pudding will cause them to soften or deflate prematurely. This attention to temperature and timing ensures every spoonful delivers the refreshing, iconic taste of authenticMagnolia Bakery Banana Pudding.
I must confess that I have a long-standing, slightly obsessive relationship with dessert. It’s the kind of relationship where I analyze ingredient ratios and debate the structural integrity of whipped cream in my spare time. But there is one particular dessert that hijacked my soul the moment I took the first spoonful in a bustling New York City bakery: the legendaryMagnolia Bakery Banana Pudding. It’s not just dessert; it’s nostalgia, a cloud of creamy perfection suspended between crunchy vanilla wafers and soft, sweet banana slices. For years, I chased that feeling, attempting to replicate the delicate balance of texture and flavor, often resulting in soups of sadness or overly stiff cement-like custards.
The secret, as I painfully learned, isn’t about complicated techniques. It’s about patience and the precise alchemy of four simple components. This recipe isn’t just a copycat; it’s an homage—a streamlined, foolproof method to bring that iconic, velvety sunshine into your own kitchen without needing a culinary degree or a flight to Manhattan. Prepare yourself, because once you taste this iteration of the perfect banana dessert, all other puddings will pale in comparison.
The Accidental Discovery of Sunshine on a Plate
I once tried making a “quick” banana pudding for a potluck, skipping the necessary chill time. It was a disaster, soupy and sad. My redemption came accidentally when I forgot the bowl in the fridge for two full days. The resulting creamy, thick texture was identical to the famous Magnolia Bakery Banana Pudding, proving patience is the true secret ingredient.
The Legend of Vanilla Wafers and Cream
The beauty of this recipe lies in its simplicity and the remarkable transformation that occurs during the chilling process. While many desserts require hot ovens or delicate tempering, this layered delight demands only time. The resulting pudding base is uniquely rich, thanks to the combination of high-quality instant pudding and sweetened condensed milk, which provides a depth of flavor that a simple cooked custard often misses. We skip the eggs and the stove entirely, focusing instead on creating that perfect, cloud-like base that holds the wafers and bananas in sweet suspension.
The key difference between a good banana pudding and a truly divine one, like thisMagnolia Bakery Banana Puddinginterpretation, comes down to how the whipped cream is integrated. We aim for light, airy folds, ensuring we maintain that fluffy texture, which prevents the final product from settling into a dense, overwhelming mass. This creamy texture is what sets the standard for this iconic dessert.
Ingredients List for the Dreamiest Dessert
You need surprisingly few ingredients for this spectacular dessert, but quality matters, especially with the vanilla wafers and the bananas.
- 1 (14-ounce) can sweetened condensed milk
- 1 ½ cups ice-cold water
- 1 (3.4-ounce) package instant vanilla pudding mix (must be instant)
- 3 cups heavy whipping cream
- 1 teaspoon pure vanilla bean paste (optional, but recommended)
- 4 to 5 medium ripe bananas, sliced into 1/4-inch pieces
- 1 (11-ounce) box vanilla wafers
Prepping Your Perfect Layers
Before you dive into the mixing, make sure you have everything ready. Bananas should be ripe but not overly speckled—you want them sweet, but firm enough to hold up when sliced. Also, ensure your heavy cream is truly cold; this helps immensely when whipping it to stiff peaks. Gather a large glass trifle bowl or a 9×13 inch baking dish for assembly, depending on how you plan to serve this creamy delight.
Start by slicing the bananas. Keep the slices uniform; consistency in size ensures consistent texture throughout the dessert. Lay out the vanilla wafers as well. This recipe is all about efficient layering, so having your components staged is half the battle won. We need to create the perfect setting for the final product, which is arguably the world’s most famous banana dessert.
Perfecting the Cooking Process
Since this is a no-bake wonder, the “cooking” process focuses on chilling. First, create the custard mixture thoroughly, ensuring no lumps. Second, allow that mixture to thicken completely, ideally overnight. Finally, assemble the layers right before the required four-hour setting time to keep the wafers perfectly textured—soft but not mushy.
Whipping Up the Magic Base
First, tackle the custard base. In a large bowl, whisk together the sweetened condensed milk and the ice-cold water until thoroughly combined. This mixture must be perfectly smooth. Now, add the instant vanilla pudding mix and continue whisking for about two minutes. The mixture will start to thicken almost immediately; that’s exactly what we want. Cover this bowl tightly with plastic wrap and chill it in the refrigerator for at least four hours, although chilling it overnight is highly recommended for maximum stability.
Once the base is completely chilled and thick, it’s time to add the airy element. In a separate, very cold bowl (using a chilled metal bowl helps), whip the heavy cream and the optional vanilla bean paste using an electric mixer until stiff peaks form. The cream should hold its shape when you lift the whisk. Gently fold about one-third of the whipped cream into the chilled custard base using a spatula, lightening the mixture. Then, gently fold in the remaining whipped cream until everything is seamlessly combined. Do not overmix; the goal is to keep as much air in the mixture as possible to achieve that cloud-like texture synonymous with the Magnolia Bakery Banana Pudding experience.
The Assembly Line
Now for the fun part: building the tower of perfection. Take your chosen dish and begin the layering process. Start with a layer of vanilla wafers covering the bottom of the dish. Next, place a layer of sliced bananas neatly over the wafers. These two layers act as the foundation for the creamy middle.
Spoon roughly one-third of the cream mixture over the bananas and wafers, spreading it gently to cover everything evenly. Repeat this process: a layer of wafers, followed by a layer of bananas, and then another third of the cream mixture. Finish with a final layer of wafers and bananas, topped with the last portion of the pudding. For a truly authentic presentation, garnish the top with a few extra wafers, slightly crushed, or perhaps a few more decorative banana slices.
Once assembled, cover the dish tightly and refrigerate for a minimum of four hours. The necessary chilling time allows the wafers to soften and absorb the creamy goodness, transforming them from crunchy snacks into tender, cake-like layers that melt in your mouth. This waiting period is critical—do not skip it.
Add Your Touch
While the classic is king, feel free to customize. Swap out vanilla wafers for ginger snaps if you crave spice, or add a dash of pure vanilla paste for intensified flavor. For a richer color and flavor, try layering in a sprinkle of finely grated dark chocolate or a dusting of cinnamon between the layers.
Storing & Reheating
Store this dessert tightly covered in the refrigerator for up to three days; the texture actually improves overnight. Avoid freezing, as bananas turn black and mushy upon thawing. Reheating is unnecessary, as this masterpiece is best served chilled, straight from the fridge.
My cousin, a staunch anti-banana dessert enthusiast, tried this blindfolded and declared it the best thing he had ever tasted. I finally admitted it was banana pudding after he finished the whole cup.
Chef’s Insider Tips for Perfect Pudding
- Use slightly under-ripe bananas for the best results; they hold their shape better during the chill time and prevent the pudding from becoming overly sweet.
- Never use instant pudding mix; the crucial texture and flavor profile of this recipe rely entirely on using proper, high-quality full-fat condensed milk and instant vanilla pudding.
- Whip the heavy cream until stiff peaks form before folding it into the chilled custard mixture; this ensures maximum air incorporation and guarantees a light, cloud-like texture.
Conclusion for Magnolia Bakery Banana Pudding
Recreating the iconic Magnolia Bakery Banana Pudding might seem daunting, but this streamlined recipe proves that dessert nirvana is surprisingly attainable. By mastering the sequence—chilling the custard base thoroughly and patiently folding in stiff-peaked cream—you achieve that unmistakable, luxurious texture. Remember that patience truly is the most important ingredient; allowing the wafers time to soften is the key to achieving the legendary consistency. Serve this magnificent, creamy layered delight at your next gathering and watch it disappear faster than you can say “extra wafers.” This recipe delivers pure, unadulterated comfort with every single spoonful, making it a guaranteed favorite in your household.
Print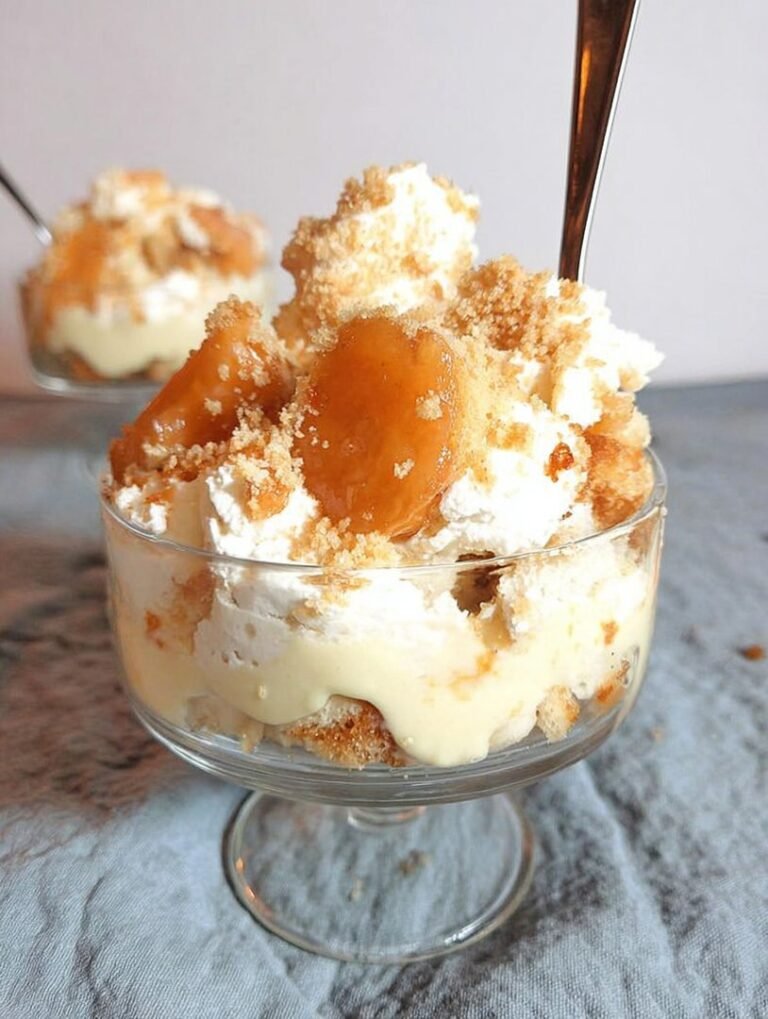
Magnolia Bakery Banana Pudding
Craving the authentic taste? This simple, no-bake recipe yields a velvety, chilled dessert where dense, cold pudding meets airy whipped cream.
- Total Time: 35 minutes
- Yield: 4 servings
Ingredients
- Heavy Cream: 3 cups (very cold)
- Sweetened Condensed Milk: 1 (14-ounce) can
- Cold Water: 1 1/2 cups
- Instant Vanilla Pudding Mix: 1 (5.1-ounce) box (large size)
- Vanilla Bean Paste: 1 teaspoon
- Nilla Wafers: 1 (12-ounce) box
- Ripe Bananas: 4 to 6, sliced into 1/4-inch thick rounds
Instructions
- Step 1: In a large bowl, whisk together the cold water, sweetened condensed milk, and vanilla pudding mix until smooth. Cover the mixture and refrigerate for at least 4 hours, or preferably overnight, until firm and chilled.
- Step 2: Pour the cold heavy cream into the bowl of a stand mixer fitted with the whisk attachment (or use a handheld mixer). Beat on medium-high speed until medium-stiff peaks form, approximately 2 to 3 minutes.
- Step 3: Remove the chilled pudding mixture from the refrigerator. Gently fold the vanilla powder and the firm pudding mixture into the whipped cream using a spatula until just combined, being careful not to overmix and deflate the cream.
- Step 4: Begin layering the pudding in a 4-quart glass bowl or deep serving dish. Spread a thin layer of the pudding mixture on the bottom, followed by a layer of Nilla Wafers, then a layer of sliced bananas. Repeat the layers (pudding, wafers, bananas) until all ingredients are used, finishing with a thick layer of the pudding mixture on top.
- Step 5: Cover the dish tightly with plastic wrap and refrigerate for a minimum of 4 hours, up to 8 hours. This allows the wafers to soften and absorb the pudding for the optimal texture before serving.
Notes
- Store leftovers tightly covered in the refrigerator for up to 3 days, as the bananas will start to weep and brown after prolonged storage.
- This is a strictly chilled dessert; for the best creamy texture, serve straight from the refrigerator after the recommended 4 to 8 hours of softening time.
- For an elegant presentation, reserve a handful of whole Nilla Wafers and a few fresh banana slices to garnish the finished top layer right before serving.
- For maximum volume, ensure your heavy cream is extremely cold and fold the whipped cream into the chilled pudding base very gently to avoid deflating the airy mixture.
- Prep Time: 15 minutes
- Cook Time: 20 minutes
- Method: Stovetop
- Cuisine: American


Leave a Comment