
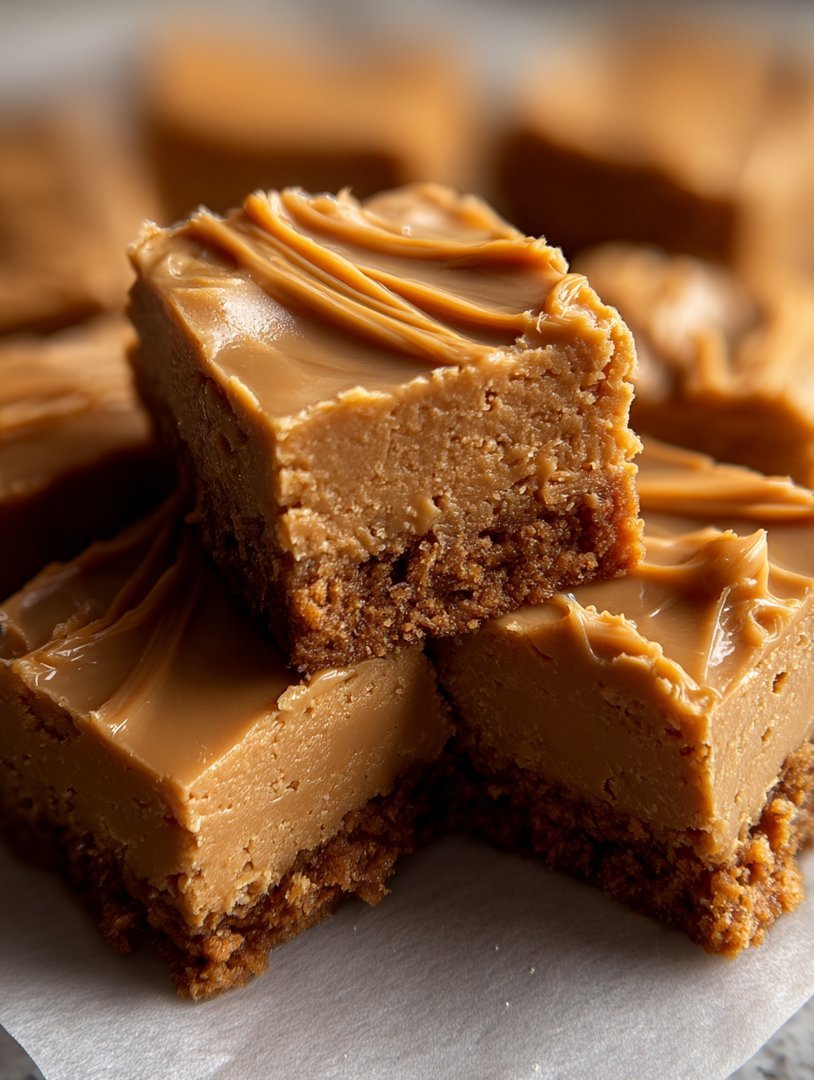
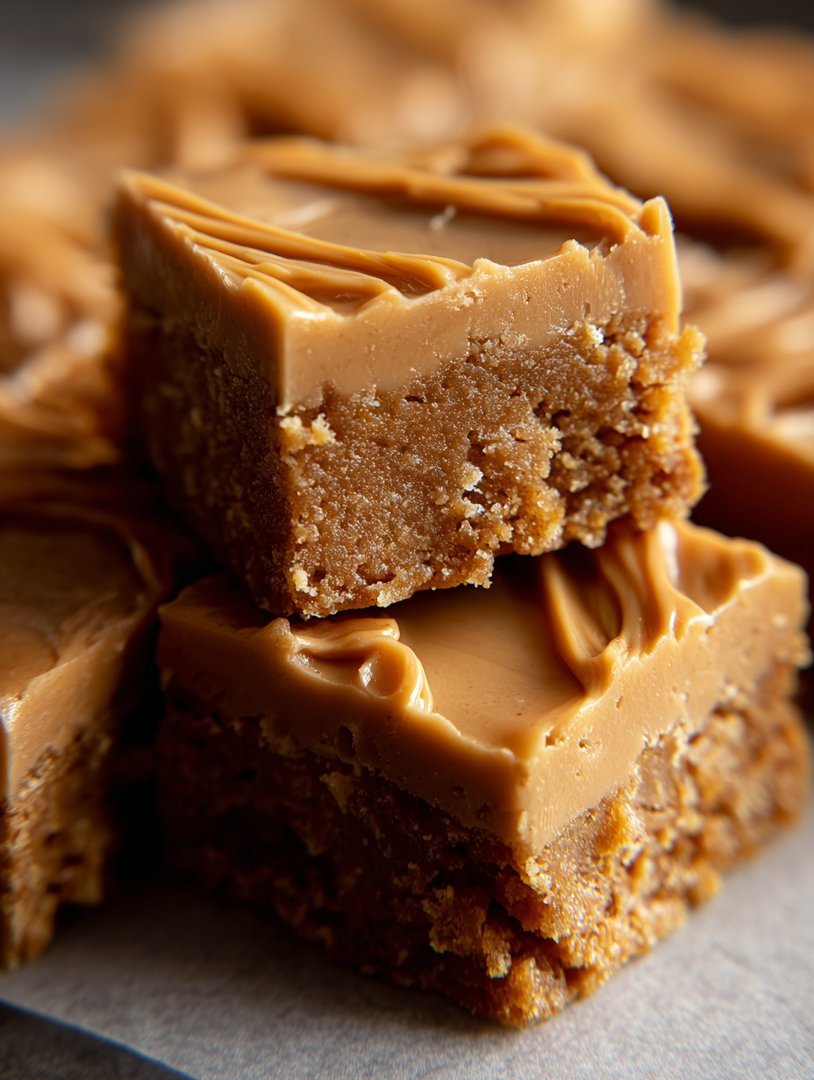
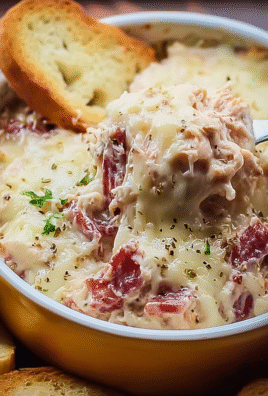
Remember that fleeting moment of pure bliss in the school cafeteria when the metal tray hit your table and sitting right there was the legend—the mythical, marvelous, glorious dessert? That nostalgia hits hard, especially when discussing the perfect, crumbly, and unbelievably decadentPeanut Butter Lunch Lady Bars.
These bars are the undisputed champions of nostalgia baking, combining a soft, chewy crust with a thick layer of creamy peanut butter frosting. Get ready to ditch the bland adult snacks and embrace your inner elementary school superstar with this guaranteed crowd-pleaser.
- This recipe delivers that iconic sweet and salty balance, featuring a rich, buttery base and an intensely creamy peanut butter topping.
- Preparation is incredibly quick and uses standard pantry staples, making these nostalgic treats perfect for spontaneous baking sessions or busy afternoons.
- The visual appeal is simple yet comforting, with a thick, golden base beneath a generous blanket of swirled peanut butter delight.
- These bars are famously versatile, ideal for packed lunches, potlucks, bake sales, or simply enjoying with a large glass of cold milk after a long day.
The Legend of the Cafeteria Dessert: A Culinary Time Machine
If you grew up attending school in North America, you know the power of the lunch line. It wasn’t just about sustenance; it was an exercise in strategic maneuvering toward the holy grail of food service—the dessert station. And towering above all the pre-packaged treats and mediocre cookies stood the bar, usually square, often slightly asymmetrical, and always smelling faintly of pure childhood joy. These beloved treats were served by the legendary Lunch Ladies, whose secret recipes rivaled the best pastry chefs, making thesePeanut Butter Lunch Lady Barsthe stuff of legend.
The beauty of this recipe lies in its simplicity and its ability to instantly transport you back to those simpler times. Forget fancy techniques and complicated ingredients; this is comfort food reduced to its most satisfying, chewy essence. We are talking about maximum flavor payoff for minimum effort. The base is forgiving, the frosting comes together in a flash, and the resulting bar is a symphony of textures—slightly crunchy edges, a moist, dense center, and a velvety smooth topping that melts in your mouth. This isn’t just baking; it is participating in a sacred tradition of American school cuisine, and frankly, we deserve a slice of that history.
Decoding the Perfect Crumbly Base
Many bar recipes use flour and sugar, but the authentic version of the base forPeanut Butter Lunch Lady Barsincorporates old-fashioned rolled oats. Adding oats provides that signature chewiness and the slightly rustic texture that defines this particular bar. Skipping the oats results in a sad, dry cookie bar, and nobody wants a sad bar. When mixing the base, remember that patience is overrated. You are looking for a cohesive dough that clumps together easily but remains slightly crumbly. The key is distributing the melted butter evenly without overworking the mixture.
Another crucial factor is the baking vessel. While some chefs opt for smaller pans, an authentic, thick bar requires a specific 9×13 inch pan. Lining the pan with parchment paper is a non-negotiable step. Not only does this guarantee easy removal (essential when you are eager to consume), but it also helps achieve uniform heating, preventing those dreaded overly dark corners. Press the base firmly into the prepared pan. We meanfirmly. Use the bottom of a measuring cup or a flat spatula to create a tight, even layer. This compression is what gives the bar its structural integrity, allowing it to support that glorious, heavy layer of frosting we are about to apply.
Mastering the Five-Minute Peanut Butter Frosting
If the base is the foundation of nostalgia, the frosting is the extravagant roof. This creamy peanut butter layer must be thick, smooth, and intensely peanut-forward. We achieve this through a simple combination of powdered sugar, softened butter, vanilla, and plenty of creamy peanut butter. Use smooth peanut butter here; chunky varieties interrupt the perfect velvety texture we are aiming for, leading to structural disappointments when slicing.
The secret to a perfect frosting is ensuring your butter is truly softened, not melted. If the butter is too warm, the frosting will be runny and slide right off the warm base, creating a messy, sticky situation. If the butter is too cold, the frosting will be lumpy and difficult to spread, tearing up the delicate baked crust underneath. Aim for room temperature perfection—soft enough to yield easily when pressed, but solid enough to hold its shape. Beat the butter and peanut butter first until pale and fluffy, then gradually incorporate the powdered sugar and vanilla. Spread this decadent topping immediately over the warm baked base. The residual warmth of the bars helps the frosting set perfectly as it cools, marrying the two textures into one harmonious bite.
Essential Tips for Achieving Bar Perfection
While the recipe is straightforward, a few expert tips separate a good bar from a transcendentPeanut Butter Lunch Lady Bar. Getting the texture right is paramount. You want chewy, not hard, and moist, not greasy. Temperature control plays a vital role in both the baking process and the cooling process, ensuring that the finished product holds its shape beautifully when cut.
Cooling and Cutting: The Patience Test
This is where most amateur bakers make their critical error: impatience. You absolutely must allow the bars to cool completely before cutting them. We know, the aroma emanating from the kitchen is almost physically painful, demanding immediate consumption, but resist the urge. Cutting warm bars, especially those topped with soft frosting, results in a mushy, distorted mess. Ideally, you should let the bars cool at room temperature for at least two hours, or, if time is short, refrigerate them for 30 to 45 minutes until the frosting is firm to the touch.
Once cooled, use a sharp, non-serrated knife to slice the bars. Running the knife under hot water and wiping it dry between cuts helps achieve clean, professional-looking edges. For the true nostalgic experience, cut them into generous 2-inch squares, the exact size that looked enormous to you back in fourth grade. Storing them in an airtight container at room temperature maintains their freshness and chewiness for up to five days, though honestly, they rarely survive past the first afternoon.
Ingredient Swaps and Customizations
While the classic recipe is unbeatable, minor adjustments can cater to different preferences or dietary needs. For the base, if you prefer a less intense butter flavor, you can substitute half of the butter with margarine, although the resulting depth of flavor will be slightly reduced. Ensure any substitutes are unsalted so you can control the overall sodium content.
Regarding the peanut butter itself, while traditional creamy peanut butter is recommended for the smoothest frosting, feel free to use natural, unsweetened peanut butter in the base mixture if you want to slightly reduce the sugar content, though you might need a tiny splash of milk or a plant-based beverage to help the base mixture bind. For those looking for a slight textural variation, a small handful of miniature chocolate chips sprinkled over the base before baking adds an excellent dimension without compromising the integrity of the classic bar structure. Remember, customization is fun, but respect the core structure that makes the Peanut Butter Lunch Lady Bars so iconic!
Ingredients for Peanut Butter Lunch Lady Bars
Here’s what you’ll need to make this delicious dish:
- All-Purpose FlourProvides the foundational structure for the bar base, ensure it is measured accurately by scooping and leveling.
- Rolled OatsUse old-fashioned, whole rolled oats to achieve the essential chewiness and texture characteristic of these bars.
- Brown SugarAdds moisture and a deeper molasses flavor to the crust, contributing to the rich golden color.
- Unsalted ButterUsed both melted in the base and softened in the frosting; using unsalted allows you to control the overall saltiness.
- Baking SodaActs as a leavening agent, giving the bars a slight lift and helping them maintain a tender crumb.
- SaltEssential for balancing the sweetness and enhancing the flavor of the peanut butter in both the base and the frosting.
- Peanut ButterUse a creamy, shelf-stable variety for the best results in both the crust mixture and the smooth topping.
- Powdered Sugar (Confectioners’ Sugar)This finely milled sugar creates the required smooth, thick, and lump-free texture for the decadent frosting.
- Milk or Plant-Based BeverageA small amount is necessary to reach the perfect consistency for the frosting, ensuring it is spreadable but not runny.
- Vanilla PowderEnhances the overall flavor profile, adding depth to the sweet components of the bar and the frosting.
The full ingredients list, including measurements, is provided in the recipe card directly below.
How to Make Peanut Butter Lunch Lady Bars
Follow these simple steps to prepare this delicious dish:
-
Prepare the Oven and Baking Pan
Preheat your oven to 350°F (175°C). Line a 9×13 inch baking pan completely with parchment paper, leaving an overhang on the sides to assist with lifting.
-
Mix the Base Ingredients
In a large mixing bowl, combine the flour, rolled oats, brown sugar, baking soda, and salt. Pour in the melted butter and three-quarters cup of the creamy peanut butter and mix on low speed until a thick, crumbly dough forms, ensuring all dry ingredients are incorporated.
-
Bake the Crust
Press the dough firmly and evenly into the prepared 9×13 inch pan using a spatula or the bottom of a glass. Bake the crust for 15 to 18 minutes, or until the edges are lightly golden brown and the center looks set. Remove the pan from the oven and place it on a wire rack.
-
Whip Up the Creamy Frosting
While the crust is still warm, prepare the frosting. In a separate bowl, cream together the softened butter and the remaining creamy peanut butter until light and fluffy. Gradually beat in the powdered sugar, vanilla powder, and milk until the mixture is completely smooth and thick.
-
Frost and Cool the Bars
Spread the creamy peanut butter frosting generously and quickly over the warm baked crust, moving from the center outward. Allow the bars to cool completely at room temperature for at least two hours to allow the frosting to set firmly before slicing.
Transfer to a cutting board and slice into uniform squares for the perfect finishing touch.
The Legend of the Cafeteria Dessert
There exists a dessert so iconic, so infused with the essence of childhood nostalgia, that simply smelling it can transport you back to plastic trays and questionable government-issued milk cartons. I am talking, of course, about those magnificent, often-overlooked titans of the dessert world: thePeanut Butter Lunch Lady Bars. These aren’t fancy; they don’t require ten different types of artisanal chocolate or a degree in patisserie. They are wonderfully simple—a creamy, rich peanut butter base, a crisp oat crust, and a smooth chocolate frosting that somehow always tasted better on a Tuesday afternoon after dodgeball.
My quest to recreate these legendary squares started innocently enough. I yearned for that specific texture, that perfect balance of salty-sweetness that only a true lunch lady could master. I spent years trying different recipes—some too dry, some too crumbly, and far too many that skipped the critical step of baking the base, resulting in a sad, fudgy mess.
It turns out, the secret ingredient isn’t love, though that certainly helps; it’s patience, attention to detail, and probably a tiny, ancient recipe card stained with years of chocolate and spilled milk. The beauty of this recipe lies in its straightforward nature. It uses pantry staples, requires minimal equipment, and delivers maximum flavor impact. If you need a dessert that tastes like a hug from the past and earns immediate rave reviews from anyone lucky enough to snag a piece, look no further. We are about to dive into the definitive guide to recreating the authentic, nostalgic bar that defined cafeteria dessert perfection.
The Anatomy of Perfection: Crust, Filling, and Frosting
To truly appreciate the glory of the classic peanut butter squares, you must understand the holy trinity of their construction. First, the crust: typically oats and butter, baked until just golden, providing the necessary chew and structure. Second, the filling: a massive, glorious layer of sweetened, velvety peanut butter goodness that melts slightly into the warm crust. Finally, the frosting: a quick, fudgy topping spread while the base is still warm, allowing the layers to fuse into a single, cohesive dessert unit.
The magic happens when the warm crust meets the cool, creamy peanut butter mixture and then receives the final, smooth blanket of chocolate. It’s a process that sounds complicated but is startlingly simple. It’s an exercise in controlled layering, and the results are always worth the minimal effort required. Forget those no-bake versions; we are going full authentic here, replicating the bake-shop quality that makes these squares unforgettable.
Ingredients You Will Need
Gathering your supplies is the easiest part. You likely already have most of these components lurking in your pantry right now. Ensure you use plain, processed peanut butter (the kind that holds its shape) rather than natural separation varieties for the best textural results.
For the Crust and Base
- 1 1/2 cups all-purpose flour
- 1 cup rolled oats (not instant)
- 1 cup packed light brown sugar
- 1 teaspoon baking soda
- 1 cup (2 sticks) unsalted butter, melted
- 1 1/2 cups creamy peanut butter, divided
- 1 1/4 cups granulated sugar
- 2 large eggs
- 1 teaspoon vanilla powder
- Pinch of salt
For the Rich Chocolate Frosting
- 1/2 cup (1 stick) unsalted butter
- 1/2 cup cocoa powder (unsweetened)
- 4 cups powdered sugar
- 1/2 cup milk (whole or 2%)
- 1 teaspoon vanilla powder
Step-by-Step Instructions for Bar Supremacy
Creating the Foundation
Preheat your oven to 350°F (175°C). Lightly grease and flour a 9×13 inch baking pan, or line it with parchment paper for easy removal later. This pan size is crucial for achieving that classic thickness.
- In a large bowl, whisk together the flour, oats, brown sugar, and baking soda. Add the melted butter and mix until just combined, forming a thick, crumbly dough.
- Press about two-thirds of this mixture firmly and evenly into the bottom of the prepared pan. Save the remaining mixture for the topping layer.
- Bake the crust for 10 minutes. This pre-baking step is essential for establishing a sturdy foundation.
The Peanut Butter Filling
While the crust is partially baking, prepare the glorious filling that defines these nostalgic cafeteria treats. This is where the magic really happens, turning a simple bar into an obsession.
- In a separate mixing bowl, combine the remaining 1/2 cup of creamy peanut butter, granulated sugar, eggs, vanilla powder, and salt. Beat these ingredients until they are light and fluffy, usually about 2 minutes with a hand mixer.
- Pour the peanut butter mixture evenly over the partially baked crust.
- Crumble the remaining crust mixture over the peanut butter layer. This creates a delightful textured topping.
- Return the pan to the oven and bake for an additional 20-25 minutes, or until the topping is lightly golden brown and the center is set.
- Remove the pan from the oven and let it cool slightly while you make the frosting. You want the base to be warm, not piping hot, when the frosting goes on.
The Finishing Touch: Fudge Frosting
The frosting is fast, but it requires concentration. It needs to be glossy and spreadable right away before it sets up.
- In a medium saucepan, melt the 1/2 cup of butter over medium heat. Once melted, remove from heat and whisk in the cocoa powder until smooth.
- Add the powdered sugar alternately with the milk, mixing until you achieve a smooth, rich consistency. Stir in the vanilla powder. If the frosting seems too thick, add milk a tablespoon at a time until spreadable.
- Immediately pour the chocolate frosting over the warm peanut butter bars. Spread it quickly and evenly to the edges.
- Allow the bars to cool completely—ideally several hours or even overnight—before cutting them into squares. This ensures clean cuts and fully set layers.
My sister once tried to cut these bars immediately after frosting them, declaring she couldn’t wait another second. The result? A sticky, gooey, delicious disaster that required spoons instead of serving tongs. Trust me, waiting is the hardest but most crucial step to achieving bakery-quality squares.
The Accidental Discovery of Sunshine on a Plate
My mother, a notorious recipe improviser, once misplaced her cookbook and recreated these squares purely from memory, accidentally doubling the peanut butter. The result was a richer, denser, almost impossibly creamy bar that tasted exactly like sunshine filtered through a school cafeteria window, a true surprise.
Perfecting the Cooking Process
For maximum efficiency, begin by preparing and pre-baking the crust first. While the crust is in the oven, whip up the peanut butter filling and measure out the frosting ingredients. This minimizes downtime and ensures the entire process moves smoothly from start to finish.
Add Your Touch
Customize these nostalgic treats by swapping half the peanut butter for almond butter for a different nut profile. You could also sprinkle flaky sea salt on top of the chocolate frosting for a gourmet flair, or add a half teaspoon of cinnamon to the crust mixture for warmth and depth.
Storing & Reheating
Store these bars in an airtight container at room temperature for up to five days, or keep them chilled in the refrigerator for slightly longer. While they don’t require reheating, if you prefer a softer, fudgier consistency, microwave a bar for 10 seconds. They also freeze beautifully if individually wrapped.
My neighbor, an actual retired lunch lady, tasted these and confessed they were better than the original institutional recipe, noting that the addition of oats in the crust elevates the whole experience immensely. High praise indeed!
Three Tips for Lunch Lady Bar Mastery
-
Do not overbake the base layer; pulling the bars when the edges are just barely golden prevents them from becoming dry or crumbly, keeping them soft and moist.
-
Ensure your powdered sugar is sifted before incorporating it into the chocolate frosting; this prevents unwelcome lumps and guarantees that signature velvety smooth texture.
-
Use room temperature eggs and peanut butter for the filling. This makes them incorporate smoothly and prevents the mixture from separating while you are blending it together.
Conclusion for Peanut Butter Lunch Lady Bars
Recreating the iconicPeanut Butter Lunch Lady Barsis more than just baking; it is a delicious journey back to simpler times. By focusing on quality ingredients, executing the simple layering process correctly, and, crucially, allowing adequate cooling time, you ensure an irresistible outcome. These bars provide the perfect combination of textures and flavors—the chewy oat crust, the dense peanut butter filling, and the rich, smooth chocolate frosting. They are truly the gold standard of simple baking and guarantee happiness with every single square. Make a batch today and watch them disappear faster than you can say “recess.”
Print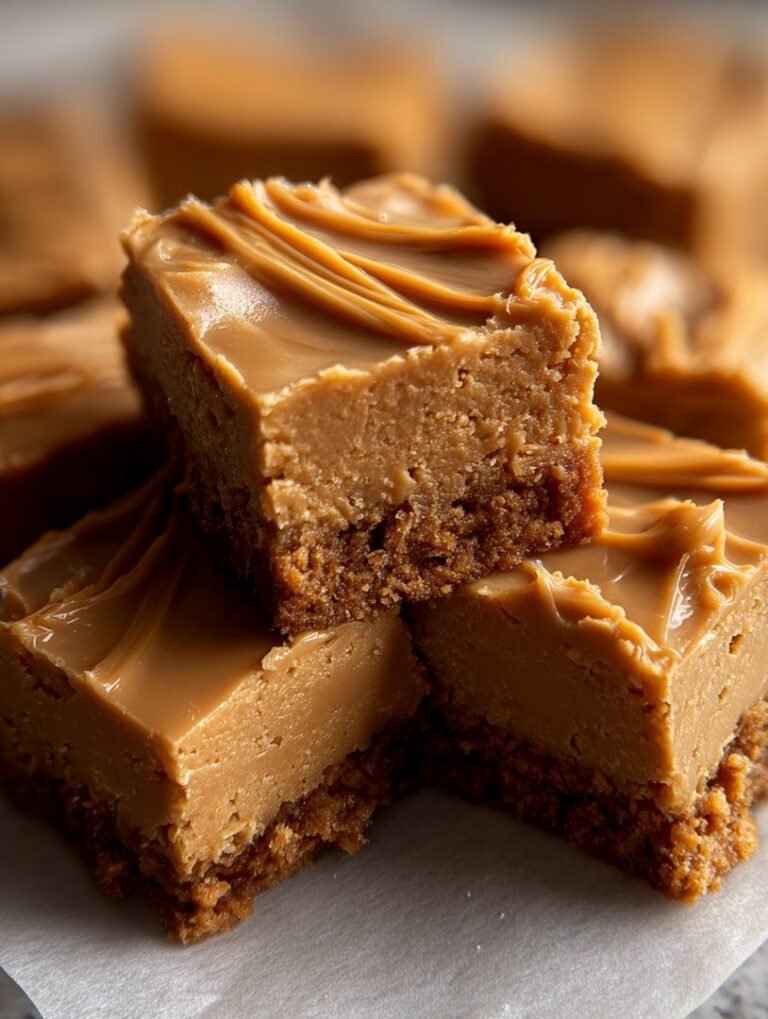
Peanut Butter Lunch Lady Bars
Relive cafeteria nostalgia! These no-bake Lunch Lady Bars are dense, fudgy, and packed with graham cracker and peanut butter flavor.
- Total Time: 35 minutes
- Yield: 4 servings 1x
Ingredients
- 2 cups graham cracker crumbs (about 1 sleeve)
- 1 cup creamy peanut butter (for the base)
- 1/2 cup (1 stick) unsalted butter, melted
- 2 cups powdered sugar (confectioners' sugar)
- 1 teaspoon vanilla bean paste
- 1 cup semi-sweet chocolate chips
- 1 tablespoon vegetable shortening (or coconut oil)
Instructions
- Step 1: Line a 9×13 inch baking pan with parchment paper, leaving an overhang on the sides for easy removal, and set aside. In a large bowl, combine the graham cracker crumbs, 1 cup of creamy peanut butter, 1/2 cup melted butter, powdered sugar, and vanilla powder until a thick, uniform dough forms.
- Step 2: Press the peanut butter mixture firmly and evenly into the prepared 9×13 inch pan. Ensure the layer is tightly packed, reaching all corners and edges. Place the pan in the refrigerator for at least 30 minutes to set the base layer.
- Step 3: Prepare the chocolate topping. In a microwave-safe bowl, combine the chocolate chips and the vegetable shortening. Microwave in 30-second intervals, stirring thoroughly between each interval, until the mixture is smooth and completely melted.
- Step 4: Pour the melted chocolate mixture over the chilled peanut butter base. Use an offset spatula to quickly spread the chocolate into a thin, even layer across the top.
- Step 5: Return the pan to the refrigerator and chill for at least 1-2 hours, or until the chocolate topping is completely firm. Once set, lift the bars out using the parchment paper overhang, slice into squares, and serve.
Notes
- Store leftover bars tightly sealed in the refrigerator for up to one week, or freeze them for up to two months layered with parchment paper.
- For the ideal tender-chewy texture, remove the bars from the fridge and let them temper at room temperature for 10 to 15 minutes before cutting and serving.
- Try serving these squares chilled alongside a tall glass of cold milk, or chop them up and sprinkle them over vanilla ice cream for a unique frozen dessert topping.
- The addition of vegetable shortening to the chocolate topping is the secret to a perfect, glossy finish that slices neatly without cracking or sticking to the knife.
- Prep Time: 15 minutes
- Cook Time: 20 minutes
- Method: Stovetop
- Cuisine: American
Leave a Comment