
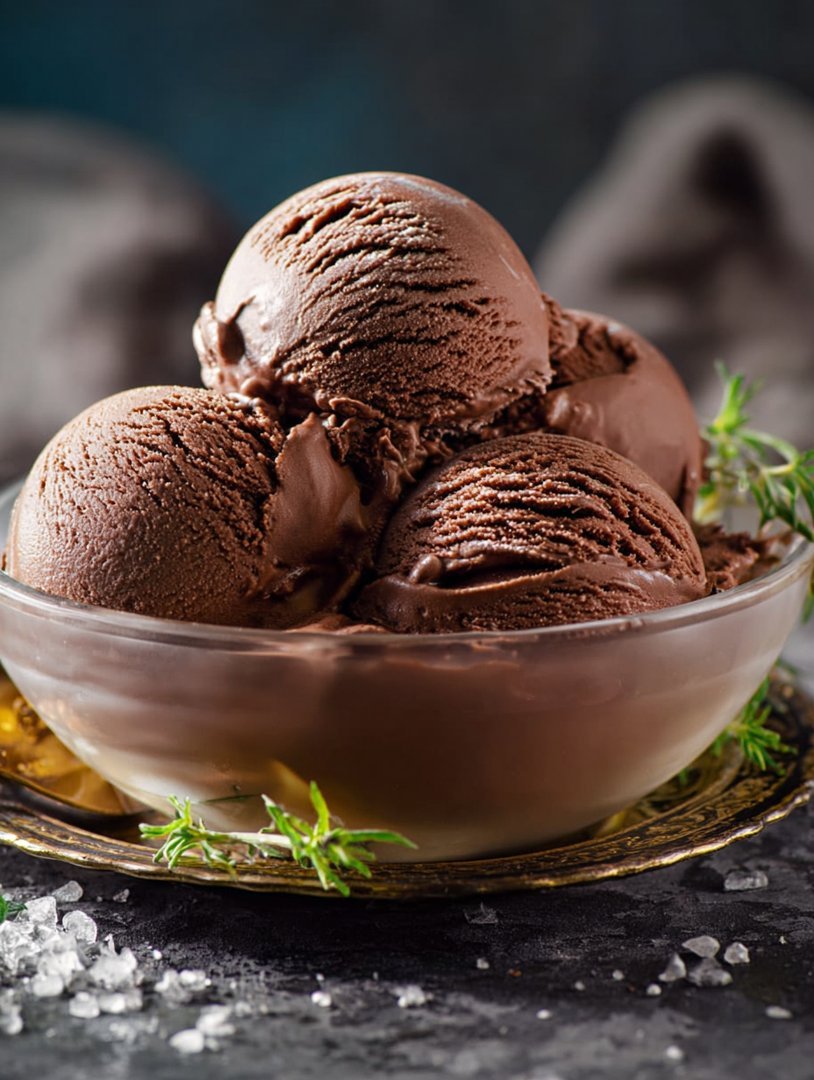
Oh, friends, let’s talk about the siren song of sweets, the creamy dream that is, without a doubt, a homemade Chocolate Custard Ice Cream Recipe! It’s a dance of rich chocolate and velvety custard, a cool embrace on a warm day.
Imagine this: it is a hot summer afternoon, laughter echoes in the air, and a bowl of this decadent delight appears. Suddenly, every worry melts away, replaced by pure, unadulterated joy, a chocolatey hug for your soul that leaves you feeling refreshed and absolutely content.
- Effortless to create, delivering a decadent treat with minimal fuss.
- A rich, unforgettable chocolate flavor, perfectly balanced with a smooth custard base.
- Visually stunning with its deep, luxurious color and creamy texture.
- Incredibly versatile; enjoy it on its own or as a perfect complement to other desserts.
Ingredients for Chocolate Custard Ice Cream Recipe
Here’s what you’ll need to make this delicious dish:
The full ingredients list, including measurements, is provided in the recipe card directly below.
How to Make Chocolate Custard Ice Cream Recipe
Follow these simple steps to prepare this delicious dish:
Step 1: Whisk the Base
In a medium saucepan, whisk together the heavy cream, whole milk, granulated sugar, and salt. Ensure everything is well combined before moving to the next step.
Step 2: Temper the Egg Yolks
In a separate bowl, whisk the egg yolks until they are light and slightly pale. Slowly drizzle a small amount of the warm cream mixture into the egg yolks while whisking constantly to temper them. This prevents the eggs from scrambling when added to the saucepan.
Step 3: Cook the Custard
Pour the tempered egg yolk mixture back into the saucepan with the remaining cream mixture. Cook over medium heat, stirring constantly with a rubber spatula, until the custard thickens enough to coat the back of the spatula. This usually takes about 5-7 minutes. Be careful not to boil the mixture.
Step 4: Add Chocolate and Vanilla
Remove the saucepan from the heat and stir in the unsweetened cocoa powder, vanilla extract, and chocolate chips until everything is smooth and fully incorporated. Ensure there are no lumps of cocoa powder.
Step 5: Chill the Mixture
Pour the chocolate custard mixture through a fine-mesh sieve into a bowl to remove any potential lumps. Cover the bowl with plastic wrap, pressing it directly onto the surface of the custard to prevent a skin from forming. Refrigerate for at least 4 hours, or preferably overnight, to allow the mixture to cool completely.
Step 6: Churn and Freeze
Pour the chilled chocolate custard mixture into your ice cream maker and churn according to the manufacturer’s instructions. Once churned, transfer the ice cream to an airtight container and freeze for at least 2-3 hours to allow it to firm up to a scoopable consistency.
Serve scoops of this rich chocolate custard ice cream in bowls or cones and enjoy the perfect Chocolate Custard Ice Cream Recipe!
Tips for the Perfect Chocolate Custard Ice Cream Recipe (formated as H2 subheading)
Let’s get real: Even the best recipes sometimes need a little tweaking, a little personal touch, or maybe just a heads-up about potential pitfalls. So, before you dive headfirst into making this divine **chocolate custard ice cream recipe**, let’s talk about a few insider secrets. Think of these as your culinary cheat codes to ice cream nirvana.
Choosing the Right Cocoa Powder (formated as H3 subheading)
Okay, cocoa powder might seem like a no-brainer, but trust me, it can make or break your **chocolate custard ice cream recipe**. You have two main contenders: Dutch-processed and natural cocoa powder. Dutch-processed cocoa powder has been treated to neutralize its acidity, giving it a smoother, mellower flavor. Natural cocoa powder, on the other hand, is more acidic and has a stronger, more intense chocolate flavor. For this recipe, I highly recommend Dutch-processed cocoa powder. It blends seamlessly into the custard and gives you that velvety smooth **chocolate custard ice cream recipe** that we’re all dreaming about.
Taming the Custard: Avoiding Scrambled Eggs (formated as H3 subheading)
Ah, the dreaded scrambled egg custard! This is probably the biggest fear when making any custard-based dessert, including our **chocolate custard ice cream recipe**. But fear not, my friend! The key is all in the tempering. Tempering is just a fancy word for slowly raising the temperature of the egg yolks so they don’t cook too quickly. When you’re adding the warm cream mixture to the egg yolks, do it gradually and whisk constantly. Think of it as a gentle dance, not a wild tango. If you see any signs of the eggs starting to curdle, immediately remove the saucepan from the heat and whisk like your life depends on it.
The Chilling Effect: Why Patience is a Virtue (formated as H3 subheading)
I know, I know, waiting is the worst. Especially when there’s **chocolate custard ice cream recipe** involved. But trust me on this one: chilling the custard base thoroughly is crucial. At least 4 hours, but preferably overnight. Why? Because chilling allows the flavors to meld together and the custard to fully thicken. Plus, it ensures that your ice cream maker can do its job properly. If the custard is too warm, it won’t freeze properly, and you’ll end up with a soupy mess. So, be patient, my friend. Good things come to those who wait (and chill their custard).
Adding a Little Oomph: Flavor Variations (formated as H3 subheading)
While this **chocolate custard ice cream recipe** is pretty darn perfect as is, there’s always room for a little experimentation. Feel free to add a splash of coffee extract for a mocha twist, or a pinch of cinnamon for a warm, spicy kick. If you’re feeling adventurous, throw in some chopped nuts, cookie pieces, or even a swirl of caramel. Just remember to add these mix-ins after the ice cream has been churned but before you transfer it to the freezer for its final chill.
Storage Secrets: Keeping it Fresh (formated as H3 subheading)
Alright, so you’ve made your **chocolate custard ice cream recipe**, and it’s absolutely divine. But how do you keep it that way? The key is proper storage. Transfer the ice cream to an airtight container and press a piece of plastic wrap directly onto the surface to prevent ice crystals from forming. Store it in the coldest part of your freezer, and it should stay fresh for up to a week (if it lasts that long!).
Serving Suggestions for Chocolate Custard Ice Cream Recipe (formated as H2 subheading)
You’ve crafted the perfect **chocolate custard ice cream recipe**, now what? This isn’t just dessert; it’s an experience! Elevate that experience with some creative serving suggestions.
Classic Combos: A Timeless Treat (formated as H3 subheading)
Sometimes, the classics are classic for a reason. A simple scoop of **chocolate custard ice cream recipe** in a waffle cone is always a winner. Or, for a more sophisticated twist, try pairing it with a warm brownie or a slice of chocolate cake. The contrast of temperatures and textures is simply divine. And don’t forget the toppings! A sprinkle of chocolate shavings, a drizzle of chocolate sauce, or a dollop of whipped cream can take this classic combo to the next level.
Sundae Sensations: Unleash Your Inner Child (formated as H3 subheading)
Who doesn’t love a good sundae? And this **chocolate custard ice cream recipe** is the perfect base for creating your own sundae masterpiece. Start with a scoop or two of ice cream, then pile on the toppings! Think hot fudge sauce, caramel sauce, chopped nuts, sprinkles, maraschino cherries, and anything else your heart desires. Get creative and let your inner child run wild!
Affogato Bliss: Coffee and Ice Cream Unite (formated as H3 subheading)
For a more adult-friendly treat, try an affogato. Simply pour a shot of hot espresso over a scoop of **chocolate custard ice cream recipe**. The hot coffee melts the ice cream slightly, creating a delicious and decadent coffee-flavored treat. This is the perfect pick-me-up for an afternoon slump or a sophisticated dessert after a dinner party.
Ice Cream Sandwiches: A Handheld Delight (formated as H3 subheading)
Take your **chocolate custard ice cream recipe** on the go with an ice cream sandwich. Simply scoop a generous portion of ice cream between two cookies (chocolate chip, oatmeal raisin, or even graham crackers work well). Wrap the sandwich in plastic wrap and freeze for a few hours to allow it to firm up. This is the perfect treat for a summer picnic or a fun snack for the kids (and the adults!).
Milkshake Magic: A Creamy Concoction (formated as H3 subheading)
Transform your **chocolate custard ice cream recipe** into a creamy and delicious milkshake. Simply combine a few scoops of ice cream with some milk (or plant-based milk) in a blender and blend until smooth. For an extra decadent treat, add a drizzle of chocolate syrup or a handful of chocolate chips. This is the perfect way to cool down on a hot day or satisfy your sweet tooth any time of year.
Nutritional Information for Chocolate Custard Ice Cream Recipe (formated as H2 subheading)
Okay, let’s talk numbers. Now, I’m not one to obsess over calories, but it’s always good to have a general idea of what you’re putting into your body. Keep in mind that these are just estimates, and the actual values may vary depending on the specific ingredients you use and your portion sizes.
Calorie Count: A General Overview (formated as H3 subheading)
A single serving (about 1/2 cup) of this **chocolate custard ice cream recipe** typically contains around 250-300 calories. Again, this is just an estimate, so don’t freak out if your numbers are slightly different. The majority of the calories come from the fat and sugar in the heavy cream, egg yolks, and granulated sugar.
Macronutrient Breakdown: Fats, Carbs, and Proteins (formated as H3 subheading)
Here’s a rough breakdown of the macronutrients in a serving of this ice cream:
- Fat: 15-20 grams (primarily from the heavy cream and egg yolks)
- Carbohydrates: 25-30 grams (primarily from the granulated sugar and cocoa powder)
- Protein: 3-5 grams (primarily from the egg yolks and milk)
Sugar Content: A Sweet Treat (formated as H3 subheading)
Let’s be honest: this is ice cream, so it’s going to have some sugar. A serving of this **chocolate custard ice cream recipe** typically contains around 20-25 grams of sugar. If you’re concerned about the sugar content, you can try reducing the amount of granulated sugar in the recipe or using a sugar substitute. However, keep in mind that this may affect the texture and flavor of the ice cream.
Healthier Options: Making it a Little Lighter (formated as H3 subheading)
If you’re looking to make this **chocolate custard ice cream recipe** a little healthier, there are a few things you can do. You can substitute some of the heavy cream with milk (or plant-based milk) to reduce the fat content. You can also use a sugar substitute to reduce the sugar content. Additionally, you can add some fruit or vegetables to the ice cream to boost the nutrient content. For example, you could add some mashed bananas or pureed berries.
Important Note: Enjoy in Moderation (formated as H3 subheading)
Ultimately, this **chocolate custard ice cream recipe** is a treat to be enjoyed in moderation. Don’t feel guilty about indulging in a scoop or two every now and then. Just be mindful of your portion sizes and try to balance it out with a healthy diet and regular exercise. After all, life is too short to deprive yourself of delicious ice cream!
Perfecting the Cooking Process
To ensure the most delightful experience with this chocolate custard ice cream recipe, focus on precision. Gently heat the custard base, and then chill it completely before churning. This prevents a grainy texture, ensuring your ice cream is smooth and luxurious.
Add Your Touch
Unleash your creativity with this chocolate custard ice cream recipe! Consider incorporating dark chocolate shavings for a richer flavor. Or, swirl in homemade raspberry sauce for a fruity, tangy contrast. A dash of cinnamon can also add warmth and depth.
Storing & Reheating
Proper storage is key to enjoying your chocolate custard ice cream later. Store in an airtight container in the freezer for up to two weeks. There’s no need to reheat—just let it soften slightly at room temperature before serving for the perfect scoop.
Helpful Tips:
- To prevent ice crystals, press a piece of plastic wrap directly onto the surface of the custard before chilling.
- Churn the custard until it reaches a soft-serve consistency, which is when it is perfectly creamy and ready for freezing.
- If the ice cream becomes too hard in the freezer, let it sit at room temperature for a few minutes before scooping.
(Personal anecdote formated as paragraph subheading)
I remember the first time I made this ice cream for my family. Their eyes lit up with joy, and my little one declared it was “the best dessert ever!” That moment made all the effort worthwhile.
Alright, buckle up buttercups, because we’re diving headfirst into the decadent world of homemade ice cream. Not just any ice cream, mind you. We’re talking about a rich, creamy, oh-so-chocolatey, melt-in-your-mouth chocolate custard ice cream. And trust me, once you’ve tasted the real deal, you’ll never look at store-bought tubs the same way again. This chocolate custard ice cream recipe is your ticket to dessert nirvana!
The Allure of Homemade
: Why Bother?
Now, I know what you might be thinking: “Homemade ice cream? Sounds like a lot of work!” And yeah, I won’t lie, it requires a little more effort than grabbing a pint from the freezer aisle. But let me tell you, the payoff is HUGE. Forget those artificial flavors, stabilizers, and questionable ingredients. When you make your own chocolate custard ice cream, you control EVERYTHING. You get to use the freshest, highest-quality ingredients. Plus, there’s something incredibly satisfying about creating something truly delicious from scratch. It’s like being a culinary magician! And who doesn’t want to be a culinary magician?
Plus, imagine the bragging rights. Picture yourself serving up a bowl of this luscious chocolate custard ice cream to your friends and family. “Oh, this old thing? I just whipped it up this afternoon.” Watch their jaws drop as they savor every spoonful. Suddenly, you’re the dessert hero. You’re the champion of creamy goodness. You’re the reason everyone brings a spoon to the party.
Unlocking the Secrets to the Perfect Chocolate Custard Ice Cream
Alright, so you’re convinced, right? You’re ready to embark on this ice cream adventure with me? Fantastic! But before we get started, let’s talk about some essential tips and tricks to ensure your chocolate custard ice cream turns out perfectly every time. This isn’t just about throwing ingredients together; it’s about understanding the science (and the art!) behind creating the ultimate frozen treat.
Choosing Your Chocolate
: The Foundation of Flavor
First things first: the chocolate. This is where you can really make or break your ice cream. Don’t skimp on quality here! Opt for a good-quality dark chocolate with a cocoa percentage of at least 70%. The higher the cocoa percentage, the richer and more intense the chocolate flavor will be. For a milder flavor, you can use semi-sweet chocolate, but I personally prefer the depth and complexity that dark chocolate brings to the table. Think of it like choosing the right paint for a masterpiece – the better the paint, the better the picture, and, well, the better the chocolate, the better the chocolate custard ice cream!
And here’s a pro tip: use a combination of chocolate! I like to use both chopped chocolate and cocoa powder in my recipe. The chopped chocolate adds richness and texture, while the cocoa powder intensifies the chocolate flavor. It’s like a chocolatey double whammy!
Mastering the Custard
: The Key to Creaminess
Now, let’s talk about the custard. This is the heart and soul of our ice cream. A good custard base is what gives our ice cream that unbelievably smooth and creamy texture. The secret to a perfect custard is gentle heat and constant stirring. You want to cook the custard low and slow, stirring constantly to prevent it from curdling.
Think of it like this: you’re trying to coax the custard into existence, not bully it. Patience is key! Use a wooden spoon or a heat-resistant spatula to stir the custard, making sure to scrape the bottom and sides of the pot to prevent sticking. This ensures even cooking and prevents any dreaded lumps.
And here’s another important tip: don’t let the custard boil! Once the custard reaches a temperature of around 170-175°F (77-79°C), it’s done. It should be thick enough to coat the back of a spoon. If you let it boil, the eggs will scramble, and you’ll end up with a lumpy, grainy mess. Nobody wants that!
Chilling Out
: The Importance of Cooling
Once your custard is cooked, it’s crucial to chill it thoroughly before churning. This is where patience comes in again. The colder the custard, the smoother and creamier your ice cream will be. I recommend chilling the custard for at least 4 hours, or even better, overnight. This allows the flavors to meld together and the custard to fully thicken.
To prevent a skin from forming on the surface of the custard while it’s chilling, press a piece of plastic wrap directly onto the surface. This will keep it smooth and prevent any unwanted textures.
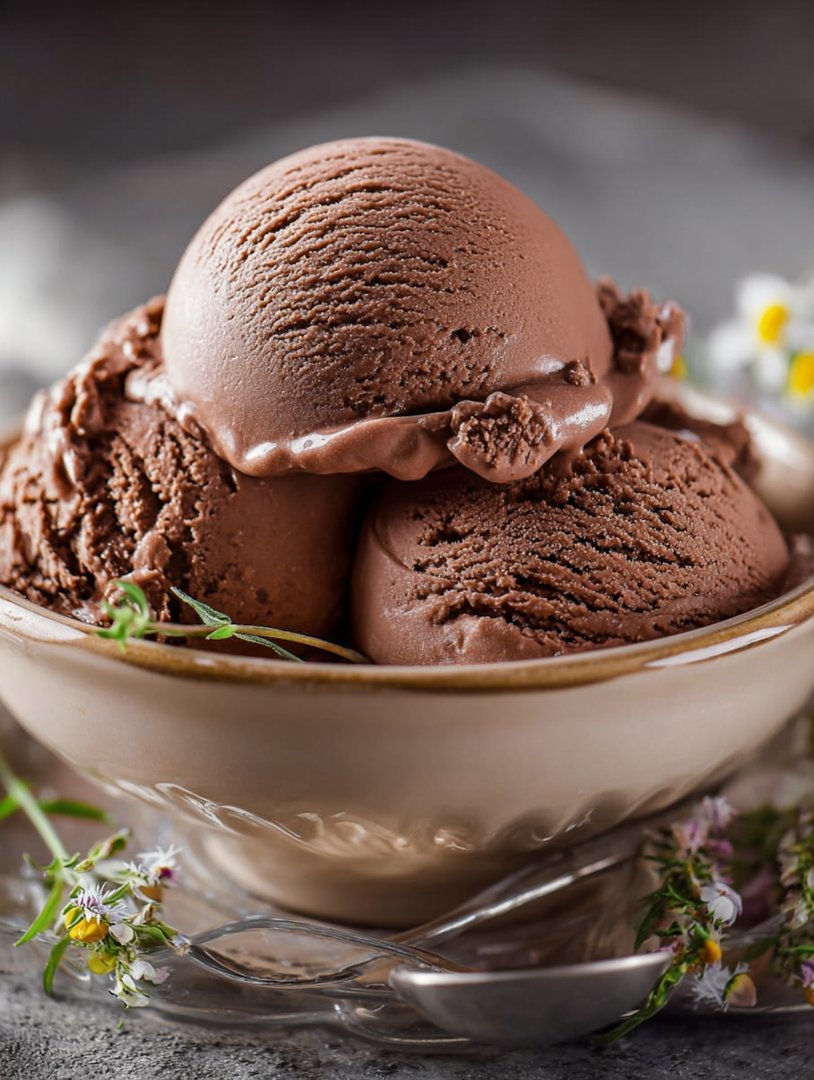
The Chocolate Custard Ice Cream Recipe
: Let’s Get Churning!
Okay, enough talk! Let’s get down to the nitty-gritty and whip up some amazing chocolate custard ice cream.
**Ingredients: **
- 2 cups heavy cream
- 1 cup whole milk
- 3/4 cup granulated sugar
- 1/2 cup unsweetened cocoa powder
- Pinch of salt
- 6 large egg yolks
- 6 ounces dark chocolate, finely chopped
- 1 teaspoon vanilla extract
**Instructions: **
1. In a medium saucepan, whisk together the heavy cream, milk, sugar, cocoa powder, and salt. Heat over medium heat, stirring constantly, until the mixture is smooth and the sugar is dissolved. Do not boil.
2. In a separate bowl, whisk together the egg yolks until light and frothy.
3. Slowly drizzle about 1/2 cup of the hot cream mixture into the egg yolks, whisking constantly to temper the eggs. This prevents them from scrambling when you add them to the pot.
4. Pour the tempered egg yolks into the saucepan with the remaining cream mixture. Cook over low heat, stirring constantly, until the custard thickens and coats the back of a spoon (about 5-7 minutes). Be careful not to let the custard boil.
5. Remove from heat and stir in the chopped dark chocolate and vanilla extract until the chocolate is melted and the mixture is smooth.
6. Pour the custard through a fine-mesh sieve into a clean bowl to remove any lumps.
7. Cover the bowl with plastic wrap, pressing the plastic wrap directly onto the surface of the custard to prevent a skin from forming.
8. Chill the custard in the refrigerator for at least 4 hours, or preferably overnight.
9. Once the custard is chilled, pour it into your ice cream maker and churn according to the manufacturer’s instructions.
10. Transfer the churned ice cream to an airtight container and freeze for at least 2 hours before serving. This will allow the ice cream to fully harden.
Beyond the Basics
: Elevating Your Ice Cream Game
Now that you’ve mastered the basic chocolate custard ice cream recipe, it’s time to get creative! The possibilities are endless when it comes to flavor combinations and add-ins. Here are a few ideas to get you started:
- **Peanut Butter Cup:** Swirl in peanut butter and chopped peanut butter cups.
- **Mint Chocolate Chip:** Add mint extract and chocolate chips.
- **Salted Caramel:** Swirl in homemade salted caramel sauce.
- **Coffee Chocolate:** Add strong brewed coffee or espresso powder to the custard base.
- **Spicy Chocolate:** Add a pinch of cayenne pepper to the custard base for a kick.
The key is to experiment and find what you like best. Don’t be afraid to get creative and try new things! After all, that’s what cooking is all about.
This chocolate custard ice cream recipe is more than just a dessert; it’s an experience. It’s the taste of pure indulgence, the feeling of creamy coolness on a hot summer day, and the satisfaction of creating something truly special from scratch. So go ahead, give it a try. I promise you won’t be disappointed. Your taste buds will thank you for it. Happy churning! And remember, life is too short to eat boring ice cream.
Conclusion for Chocolate Custard Ice Cream Recipe
In short, this chocolate custard ice cream recipe is a guaranteed crowd-pleaser. It combines the rich, comforting flavors of chocolate custard with the cool, refreshing texture of ice cream. The process is simple, even without fancy equipment, and the results are divine. Don’t be afraid to experiment with different chocolate types and exciting mix-ins to create a truly unique dessert. Go on, indulge in a scoop (or three) of this creamy, dreamy treat! After all, life is too short to skip dessert, especially when it involves chocolate.
Print
Chocolate Custard Ice Cream Recipe
Delicious chocolate custard ice cream recipe recipe with detailed instructions and nutritional information.
- Total Time: 35 minutes
- Yield: 4 servings
Ingredients
- Heavy cream: 2 cups
- Whole milk: 1 cup
- Granulated sugar: 3/4 cup
- Unsweetened cocoa powder: 1/2 cup
- Semi-sweet chocolate chips: 4 ounces, finely chopped
- Egg yolks: 6 large
- Vanilla extract: 1 teaspoon
- Pinch of salt
Instructions
- Step 1: In a medium saucepan, whisk together the heavy cream, whole milk, sugar, cocoa powder, and salt. Heat over medium heat, stirring constantly, until the mixture is steaming and the sugar is dissolved. Do not boil.
- Step 2: In a separate bowl, whisk together the egg yolks until lightly beaten. Gradually pour about 1 cup of the hot cream mixture into the egg yolks, whisking constantly to temper the eggs and prevent them from scrambling.
- Step 3: Pour the tempered egg yolk mixture back into the saucepan with the remaining cream mixture. Cook over low heat, stirring constantly with a spatula or wooden spoon, until the custard thickens enough to coat the back of a spoon. This should take about 5-7 minutes.
- Step 4: Remove the saucepan from the heat and stir in the chopped chocolate chips and vanilla extract until the chocolate is completely melted and the mixture is smooth.
- Step 5: Pour the custard through a fine-mesh sieve into a clean bowl to remove any lumps. Cover the bowl with plastic wrap, pressing it directly onto the surface of the custard to prevent a skin from forming. Refrigerate for at least 4 hours, or preferably overnight, to chill completely.
- Step 6: Pour the chilled custard into your ice cream maker and churn according to the manufacturer's instructions. Transfer the ice cream to an airtight container and freeze for at least 2 hours to harden before serving.
Notes
- Store leftover ice cream in a well-sealed container in the back of the freezer to prevent freezer burn.
- While not recommended, slightly softened ice cream can be gently stirred, but avoid melting it completely.
- Serve with a dusting of cocoa powder and fresh berries for an elegant presentation.
- For a richer chocolate flavor, use high-quality dark chocolate chips alongside the semi-sweet.
- Prep Time: 15 minutes
- Cook Time: 20 minutes
- Method: Stovetop
- Cuisine: American
FAQs
Can I use a different type of chocolate for this Chocolate Custard Ice Cream Recipe?
Absolutely! Feel free to experiment with different chocolates in this chocolate custard ice cream recipe. Dark chocolate will give you a richer, more intense flavor. Milk chocolate will create a sweeter, milder ice cream. White chocolate? Well, that’s just pure decadence! Just make sure you’re using high-quality chocolate for the best results. Trust me, your taste buds will thank you. Nobody wants gritty ice cream, unless you’re into that sort of thing, which, let’s be honest, is a bit weird.
How do I prevent ice crystals from forming in my homemade ice cream?
Ice crystals are the bane of any home ice cream maker! To avoid them in your delicious batch of chocolate custard ice cream, make sure your custard base is thoroughly chilled before churning. Churning it correctly helps incorporate air and keep those pesky crystals at bay. Also, adding a little bit of invert sugar or corn syrup can help prevent ice crystal formation. And whatever you do, don’t open the freezer every five minutes to check on it! Patience, young grasshopper, patience!
What if I don’t have an ice cream maker? Can I still make this dessert?
Don’t fret if you lack the fancy ice cream churning contraption! You can still make a simplified version of this chocolate custard ice cream. Pour the chilled custard base into a freezer-safe container and freeze for about 30-45 minutes. Take it out and stir vigorously to break up any ice crystals that have formed. Repeat this process every 30-45 minutes for about 2-3 hours. It won’t be quite as smooth as churned ice cream, but it’ll still be delicious! It’s a bit like manual labor, but the reward is worth the arm workout!
Can I add any mix-ins to this Chocolate Custard Ice Cream Recipe?
Oh, the possibilities! This chocolate custard ice cream is a blank canvas for all sorts of mix-ins. Chocolate chips (duh!), chopped nuts, brownie pieces, mini marshmallows, or even a swirl of peanut butter would all be fantastic. Just add your chosen mix-ins during the last few minutes of churning or fold them in after the ice cream is churned, before freezing completely. The only limit is your imagination (and maybe your freezer space)! Just make sure not to add too much, or you’ll end up with more “mix” than “cream.” Nobody wants that!


Leave a Comment