

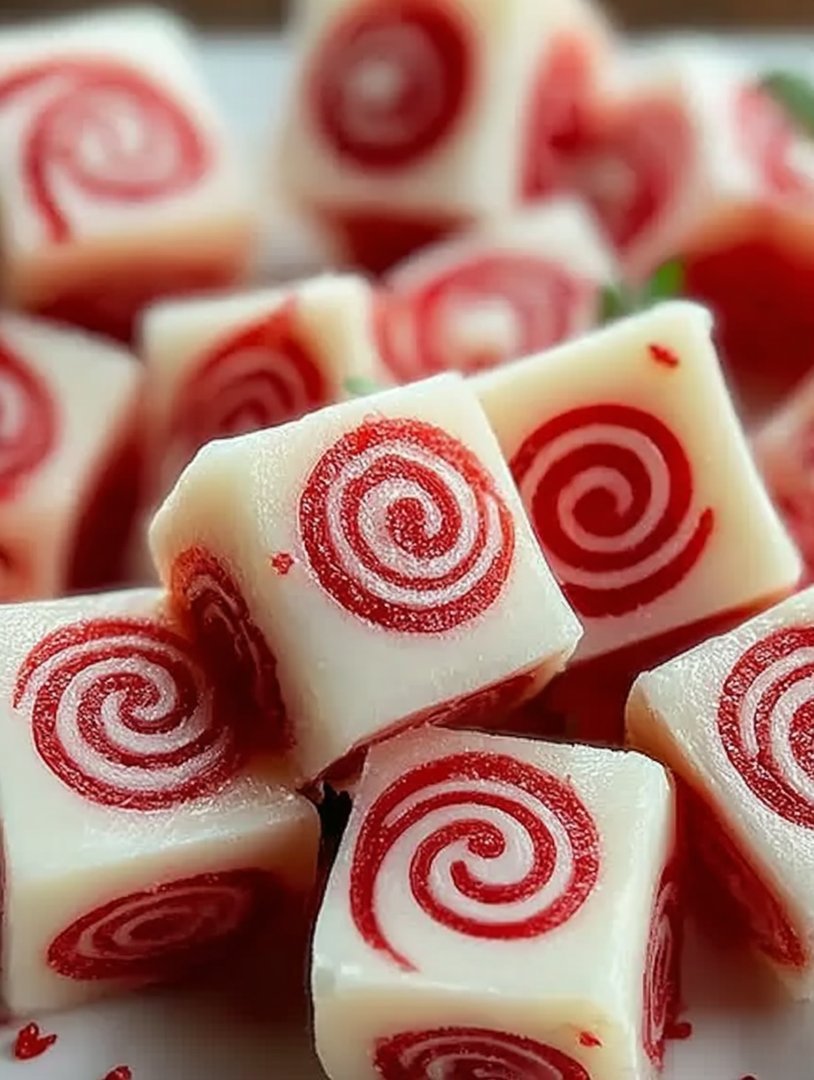
Oh, the joy of the holiday season! Nothing screams festive cheer quite like the sweet, cool burst of a peppermint melting on your tongue. Let’s embark on a culinary adventure to craft the most delightful **Soft Christmas Peppermints: The Incredible Ultimate Recipe for the Season**.
These little candy pillows of joy are the perfect way to spread holiday cheer. Their refreshing flavor and melt-in-your-mouth texture are simply irresistible. This recipe ensures you’ll have the perfect treat for gifting, decorating, or simply enjoying by the fire.
- Effortlessly create soft, melt-in-your-mouth peppermints with our straightforward, easy-to-follow instructions.
- Experience the perfectly balanced flavor profile that captures the essence of Christmas in every bite.
- Impress your friends and family with these beautifully festive candies that add a touch of elegance to any holiday spread.
- Customize your peppermint creations with various colors and designs, making each batch unique and special.
Ingredients for Soft Christmas Peppermints: The Incredible Ultimate Recipe for the Season
Here’s what you’ll need to make this delicious dish:
The full ingredients list, including measurements, is provided in the recipe card directly below.
How to Make Soft Christmas Peppermints: The Incredible Ultimate Recipe for the Season
Follow these simple steps to prepare this delicious dish:
Step 1: Prepare the Sugar Mixture
In a medium saucepan, combine the granulated sugar, light corn syrup, and water. Stir until the sugar is dissolved.
Step 2: Cook to Soft Ball Stage
Place the saucepan over medium heat. Use a candy thermometer and cook, without stirring, until the mixture reaches 235-240°F (113-116°C), which is the soft-ball stage. This may take a bit, so be patient. It’s like watching paint dry, but with the promise of peppermint at the end!
Step 3: Add Flavor and Color
Remove the saucepan from the heat and stir in the peppermint extract and red food coloring. Be careful, a little food coloring goes a long way. We’re aiming for festive, not radioactive! Stir until the color is evenly distributed.
Step 4: Cool and Cut
Pour the hot candy mixture onto a powdered sugar-dusted baking sheet or silicone mat. Let it cool slightly until it’s pliable enough to handle, about 5-10 minutes. Dust your hands with powdered sugar and gently shape the candy into a log or flatten it into a thick sheet.
Step 5: Shape and Cut
Using a pizza cutter or sharp knife dusted with powdered sugar, cut the candy into small squares or rectangles. Alternatively, you can use small cookie cutters for fun shapes. Remember, these are soft peppermints, so they won’t hold intricate shapes perfectly. Embrace the rustic charm!
Step 6: Cool Completely
Let the cut peppermints cool completely on the powdered sugar-dusted surface. This will help them set and prevent sticking. Once cooled, dust them with more powdered sugar, and they’re ready to enjoy!
Transfer to an airtight container and store in a cool, dry place. These Soft Christmas Peppermints: The Incredible Ultimate Recipe for the Season are best enjoyed fresh, but they can last for up to a week, if they even survive that long!
Perfecting the Cooking Process
To nail these soft Christmas peppermints, timing is everything. Start by precisely measuring your ingredients; accuracy is key. Cook the sugar mixture to the exact temperature for that perfect, melt-in-your-mouth texture. Work quickly when adding the peppermint extract and coloring, ensuring a uniform blend before the mixture cools too much.
Add Your Touch
Want to jazz up your peppermint dreams? Consider swapping the peppermint extract for other festive flavors like spearmint or wintergreen. For a visual twist, divide the batch and use different food colorings to create a vibrant, marbled effect. Adding a sprinkle of crushed candy canes on top before they set is always a good idea.
Storing & Reheating
These delightful soft Christmas peppermints are best stored in an airtight container at room temperature to maintain their soft, chewy texture. Avoid refrigerating them, as this can cause them to become sticky. If they harden slightly, a brief warming in the microwave can restore their softness, but watch them closely!
Helpful Tips for Minty Mastery:
- Use a candy thermometer to ensure the sugar mixture reaches the correct temperature; this is vital for achieving the perfect soft, chewy consistency.
- Work quickly when adding the peppermint extract and food coloring to prevent the mixture from cooling too fast and becoming difficult to manage.
- For easy shaping, lightly grease your hands or use powdered sugar to prevent the peppermint mixture from sticking to your fingers.
(Personal anecdote formated as paragraph subheading)
My first attempt resulted in peppermint rocks, but after my grandma’s tip about low and slow cooking, I finally nailed it. Now, everyone begs for my soft Christmas peppermints every year!
Conclusion for Soft Christmas Peppermints: The Incredible Ultimate Recipe for the Season
These delightful, melt-in-your-mouth Soft Christmas Peppermints are more than just a treat; they’re a holiday tradition waiting to happen. Ditch the store-bought candies this year and create something truly special. With a few simple ingredients and a touch of patience, you can whip up a batch of these incredible ultimate recipe for the season, perfect for gifting, sharing, or simply savoring by the fire. Embrace the festive spirit, get creative with colors, and spread the joy of homemade peppermint perfection!
Print
Soft Christmas Peppermints: The Incredible Ultimate Recipe for the Season
Delicious soft christmas peppermints: the incredible ultimate recipe for the season recipe with detailed instructions and nutritional information.
- Total Time: 35 minutes
- Yield: 4 servings
Ingredients
- Granulated sugar: 2 cups
- Light corn syrup: 1/2 cup
- Water: 1/2 cup
- Peppermint extract: 1 teaspoon
- Red food coloring: Few drops
- Powdered sugar: 1/4 cup (for dusting)
- Cream of tartar: 1/4 teaspoon
Instructions
- Step 1: In a medium saucepan, combine the granulated sugar, corn syrup, water, and cream of tartar. Cook over medium heat, stirring constantly until the sugar dissolves.
- Step 2: Once the sugar is dissolved, stop stirring and bring the mixture to a boil. Cook until the mixture reaches the hard-crack stage (300-310°F) on a candy thermometer.
- Step 3: Remove from heat and quickly stir in the peppermint extract and red food coloring. Be careful as the mixture is very hot.
- Step 4: Pour the hot mixture onto a lightly greased baking sheet or silicone mat. Allow it to cool slightly until you can handle it.
- Step 5: Once cool enough to handle, but still pliable, pull and stretch the candy until it becomes opaque and easier to work with.
- Step 6: Shape the candy into small rolls or cut into individual peppermint shapes. Dust with powdered sugar to prevent sticking. Allow to cool completely before storing in an airtight container.
Notes
- Store cooled peppermints in an airtight container with parchment paper between layers to prevent sticking.
- These peppermints are best enjoyed at room temperature; avoid reheating, as it can alter their texture.
- Serve these festive peppermints with a warm mug of hot chocolate for a classic holiday treat.
- For the best peppermint flavor, add the extract immediately after removing the candy from the heat to preserve its potency.
- Prep Time: 15 minutes
- Cook Time: 20 minutes
- Method: Stovetop
- Cuisine: American
FAQs
Can I use peppermint extract instead of peppermint oil for these Soft Christmas Peppermints?
Absolutely! While peppermint oil packs a more potent punch, peppermint extract is a perfectly acceptable substitute. Just remember that extract is generally less concentrated, so you might need to use a bit more to achieve the desired level of minty freshness in your soft peppermints. Start with the amount suggested in the recipe, then add more, a little drop at a time, until it tingles just right. Don’t go overboard, or you’ll end up with a peppermint explosion! Nobody wants that, unless you’re trying to clear your sinuses.
How do I prevent my Soft Christmas Peppermints from sticking together?
Ah, the dreaded peppermint pile-up! The key to preventing sticky situations is to ensure the peppermints are completely dry before storing them. After cutting them, let them air dry on parchment paper for a good long while, even overnight if you’re feeling patient. You can also dust them lightly with powdered sugar or cornstarch before packing them away. Store them in an airtight container, separated by layers of parchment or wax paper. This creates a barrier and keeps those little guys from clinging to each other for dear life.
What if my Soft Christmas Peppermints dough is too sticky?
Sticky dough can be a real pain, but don’t despair! A little extra powdered sugar is your best friend in this situation. Gradually add more powdered sugar, a tablespoon at a time, until the dough reaches a workable consistency. Remember that humidity can also affect the dough, so on particularly humid days, you might need a bit more sugar than usual. The goal is a dough that’s smooth, pliable, and doesn’t cling to your hands like a lovesick puppy. If all else fails, chill the dough for 30 minutes to firm it up before rolling.
Can I add food coloring to these Soft Christmas Peppermints?
Of course! Food coloring is a fantastic way to make your peppermints extra festive and eye-catching. Gel food coloring is generally preferred because it’s more concentrated and won’t add extra liquid to the dough. Add the coloring a drop at a time until you achieve the desired shade of vibrant peppermint goodness. You can create classic red and white stripes, or get creative with different colors and patterns. Just remember to divide the dough before adding the coloring, so you can create separate colors and swirl them together!


Leave a Comment