

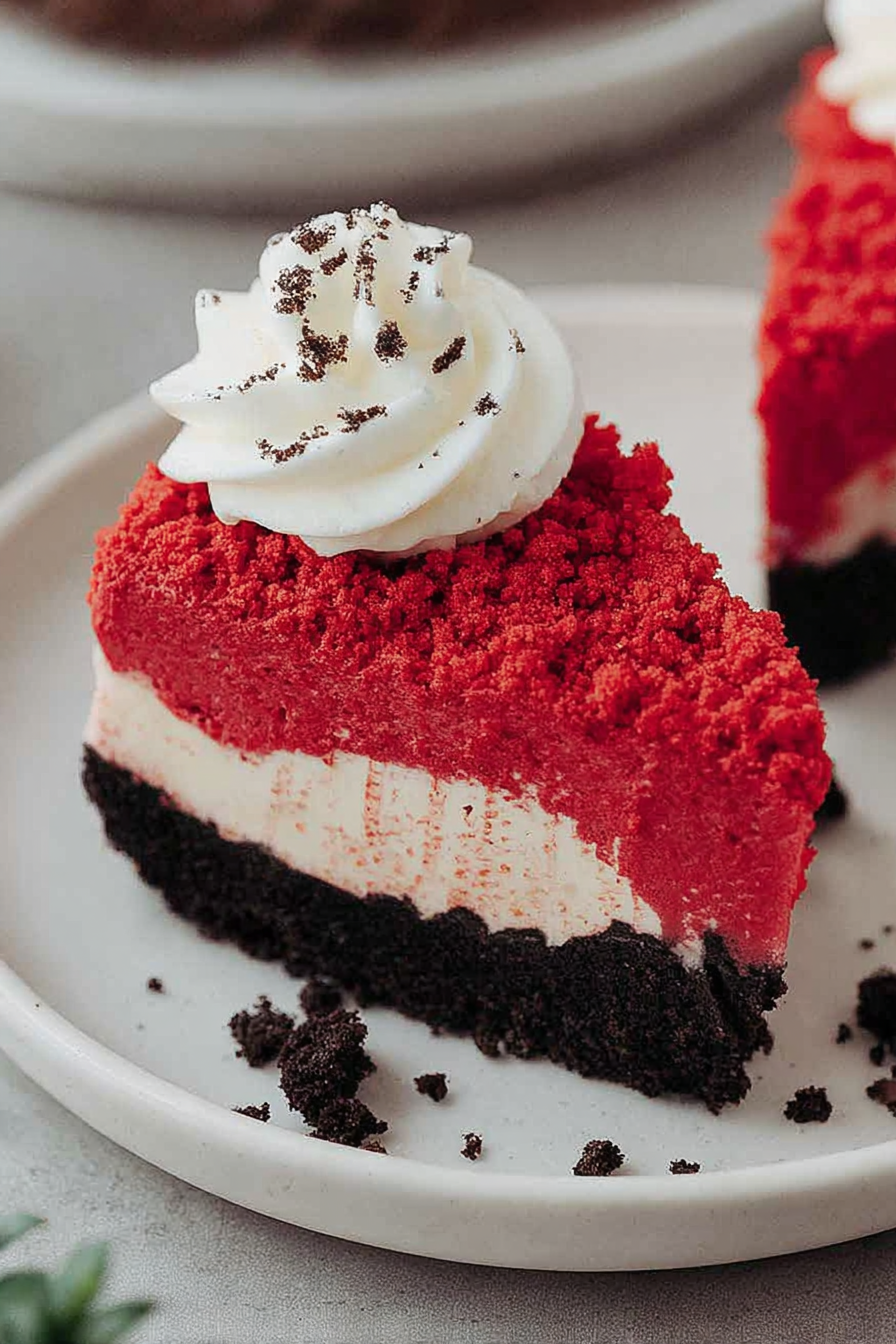
The very words “Red Velvet Cheesecake” whisper promises of decadent delight, a symphony of textures and tastes that dance upon the palate. Imagine sinking your fork into its creamy depths, the rich velvet melding seamlessly with the tangy cheesecake.
This isn’t just dessert; it’s a culinary hug, perfect for celebrating life’s sweet moments, big or small. Get ready to experience a flavor explosion that will have everyone begging for seconds!
Here’s why you’ll absolutely adore this recipe:
- It’s surprisingly straightforward to make, meaning you don’t need a culinary degree to impress your friends.
- The combination of red velvet and cheesecake creates an irresistible flavor marriage that’s both comforting and sophisticated.
- Its striking color and elegant presentation make it a show-stopping centerpiece for any gathering or celebration.
- This dessert is incredibly versatile; it can be adapted for different dietary needs and preferences without sacrificing flavor.
Ingredients for Red Velvet Cheesecake
Here’s what you’ll need to make this delicious dish:
The full ingredients list, including measurements, is provided in the recipe card directly below.
How to Make Red Velvet Cheesecake
Follow these simple steps to prepare this delicious dish:
Step 1: Prepare the Red Velvet Cake Layers
Preheat oven to 350°F (175°C). Grease and flour two 9-inch round cake pans. In a large bowl, whisk together flour, sugar, cocoa powder, baking soda, baking powder, and salt.
Step 2: Mix Wet Ingredients
In a separate bowl, combine eggs, oil, buttermilk, red food coloring, and Alcohol-free vanilla extract. Add the wet ingredients to the dry ingredients and mix until just combined. Do not overmix.
Step 3: Bake the Cake Layers
Divide the batter evenly between the prepared cake pans. Bake for 25-30 minutes, or until a toothpick inserted into the center comes out clean. Let the cakes cool in the pans for 10 minutes before inverting them onto a wire rack to cool completely.
Step 4: Make the Cheesecake Filling
In a large bowl, beat the cream cheese and sugar until smooth and creamy. Add the sour cream and heavy cream and beat until well combined. Sprinkle agar-agar powder and mix well. Ensure there are no lumps.
Step 5: Assemble the Cheesecake
Level the cake layers by trimming off any domed tops. Place one cake layer on a serving plate or cake stand. Spread the cheesecake filling evenly over the cake layer. Top with the second cake layer.
Step 6: Chill and Serve
Cover the cheesecake with plastic wrap and refrigerate for at least 4 hours, or preferably overnight, to allow the flavors to meld and the cheesecake to set. Slice and serve chilled. Garnish with fresh berries or a dusting of cocoa powder, if desired. Enjoy your homemade red velvet cheesecake.
Perfecting the Cooking Process
To ensure cheesecake nirvana, prep your ingredients first! Cream cheese needs to be soft, cocoa sifted, and Alcohol-free vanilla extract measured. Start with the crust, then tackle the red velvet swirl, finishing with the cheesecake layer. This efficient order minimizes stress and maximizes deliciousness.
Add Your Touch
Feel free to play around! Substitute beet juice for some of the red food coloring for an earthy twist. Add a hint of alcohol-free almond extract to the cheesecake filling for a nutty dimension. Instead of a traditional crust, try a chocolate cookie crumb base for extra decadence.
Storing & Reheating
Once cooled, wrap your magnificent Red Velvet Cheesecake tightly and refrigerate. It keeps well for 3-4 days. While technically you *could* reheat a slice, I highly recommend enjoying it chilled straight from the fridge for the best texture and flavor.
Here are a few tips to guarantee Red Velvet Cheesecake success:
- Ensure your cream cheese is truly room temperature. Trust me, lumpy cheesecake is nobody’s friend. Patience is key to a smooth, velvety texture.
- Don’t overbake! A slight jiggle in the center is perfect. It will firm up as it cools, preventing a dry, cracked top.
- Let it chill completely! This isn’t a suggestion; it’s a requirement. Overnight is ideal, allowing the flavors to meld and the texture to set.
(Personal anecdote formated as paragraph subheading)
My first attempt resulted in a slightly sunken center, but everyone devoured it anyway. Now, I always use a water bath and the results are consistently impressive.
Conclusion for Red Velvet Cheesecake :
This Red Velvet Cheesecake is a guaranteed crowd-pleaser, bringing together the best of both worlds: the tangy creaminess of cheesecake and the rich, chocolatey goodness of red velvet cake. Remember the key is not to overbake it, and a water bath is your best friend. From its vibrant color to its unforgettable flavor, this dessert is sure to become a favorite. Now go forth and bake!
Print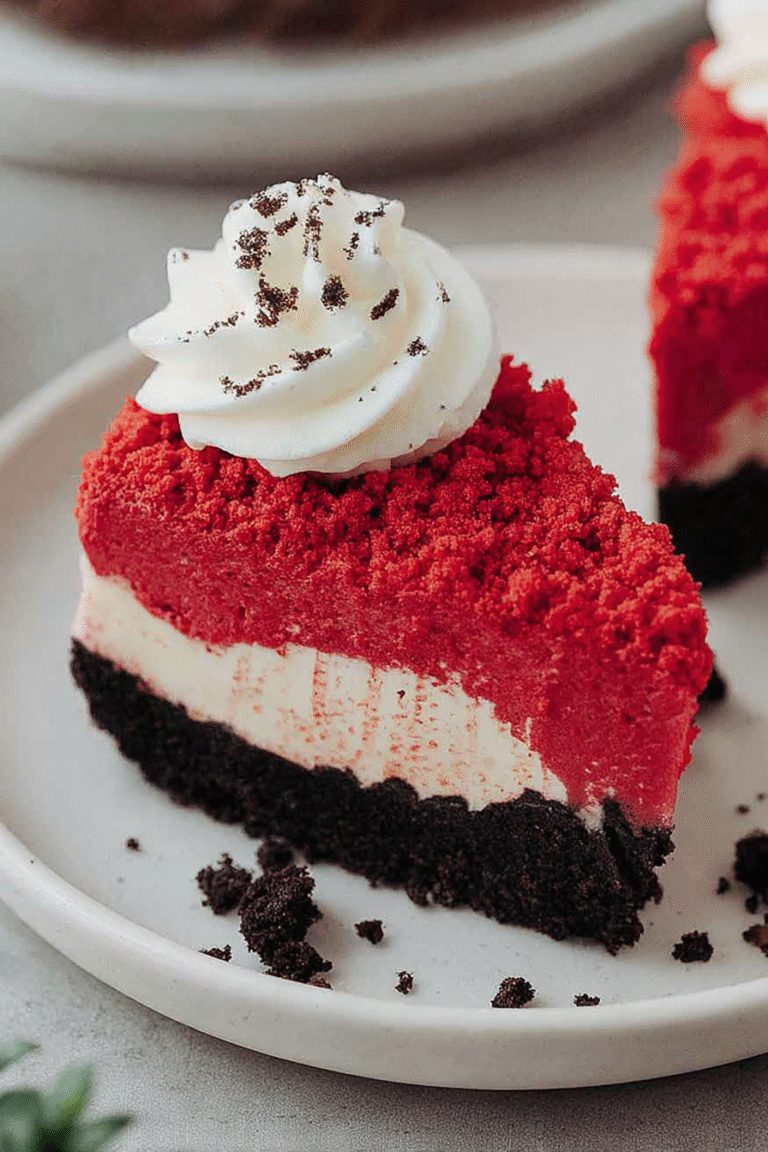
Red Velvet Cheesecake
Delicious red velvet cheesecake recipe with detailed instructions and nutritional information.
- Total Time: 35 minutes
- Yield: 4 servings
Ingredients
- All-purpose flour: 1 1/2 cups
- Granulated sugar: 1 cup
- Unsweetened cocoa powder: 2 tablespoons
- Baking soda: 1 teaspoon
- Buttermilk: 1 cup
- Red food coloring: 2 tablespoons
- Cream cheese (softened): 32 ounces
- Eggs: 4 large
Instructions
- Step 1: Preheat oven to 350°F (175°C). Grease and flour a 9-inch springform pan.
- Step 2: In a large bowl, whisk together flour, sugar, cocoa powder, and baking soda. In a separate bowl, combine buttermilk, red food coloring, oil, vinegar, and vanilla extract.
- Step 3: Gradually add the wet ingredients to the dry ingredients, mixing until just combined. Pour batter into the prepared pan.
- Step 4: In another large bowl, beat cream cheese until smooth. Gradually add sugar and beat until light and fluffy. Beat in eggs one at a time, then stir in sour cream.
- Step 5: Gently pour the cheesecake batter over the red velvet batter in the springform pan.
- Step 6: Bake for 55-65 minutes, or until the cheesecake is set around the edges but still slightly jiggly in the center. Let cool completely in the oven with the door ajar before refrigerating for at least 4 hours.
Notes
- To keep your Red Velvet Cheesecake incredibly moist, store it covered in the refrigerator for up to 5 days.
- If you want to gently warm a slice, try microwaving it for 10-15 seconds – just enough to take the chill off!
- Serve with a dollop of whipped cream and a dusting of cocoa powder for an elegant presentation.
- For the richest flavor and smoothest texture, make sure your cream cheese is fully softened before you begin mixing the cheesecake batter.
- Prep Time: 15 minutes
- Cook Time: 20 minutes
- Method: Stovetop
- Cuisine: American
FAQs :
What makes this Red Velvet Cheesecake so special?
Well, aside from the fact that it tastes like a fluffy cloud of deliciousness had a love affair with a vibrant red velvet cake, this recipe is incredibly approachable! No overly complicated steps or fancy techniques here. We are talking about a smooth, creamy cheesecake layer nestled on top of a moist, decadent red velvet base. Plus, we skip the animal-derived agar-agar, opting for a plant-based alternative, so everyone can indulge in a slice of pure happiness. It is the perfect balance of tangy and sweet, making it irresistible.
Can I make this Red Velvet Cheesecake ahead of time?
Absolutely! In fact, I highly encourage it. Cheesecake is like a fine grape juice with vinegar; it gets better with age (well, maybe not *that* old!). Making it a day or two in advance allows the flavors to meld together beautifully and the texture to become even smoother and creamier. Just be sure to store it properly in the refrigerator, wrapped tightly in plastic wrap or in an airtight container. This will prevent it from drying out or absorbing any unwanted odors from the fridge. So go ahead, get a head start and impress your guests!
What is the best way to prevent cracks in my cheesecake?
Ah, the dreaded cheesecake crack! Fear not, my friend, for I have a few tricks up my sleeve. Firstly, don’t overbake it! Overbaking causes the cheesecake to dry out and contract as it cools, leading to cracks. Secondly, use a water bath! The steam from the water bath creates a humid environment in the oven, which helps the cheesecake bake evenly and prevents it from cracking. And lastly, let the cheesecake cool gradually in the oven with the door slightly ajar. This allows it to cool down slowly and prevents sudden temperature changes that can cause cracking.
Can I freeze my Red Velvet inspired Cheesecake?
Yes, you can definitely freeze this delightful creation! To freeze it successfully, make sure the cheesecake is completely cooled. Then, wrap it tightly in several layers of plastic wrap, followed by a layer of aluminum foil. This will protect it from freezer burn and prevent it from absorbing any unwanted flavors from the freezer. When you are ready to enjoy it, thaw it in the refrigerator overnight. Be aware that the texture may change slightly after freezing, but it will still taste delicious!


Leave a Comment